
I get asked this question almost every week — usually by someone who just bought their first drone and heard “hyperlapse” in a YouTube tutorial, then saw “timelapse” on the same camera menu, and now isn’t sure which button does what. It’s a fair question, because the two terms get used interchangeably online even though they’re technically very different processes.
By the end of this guide, you’ll know exactly what separates a timelapse from a hyperlapse from regular sped-up video, which one fits your shot, and which settings to start with — whether you’re shooting a static sunset over the Swabian Alps or walking through a moving crowd in Ulm’s old town.
Quick Answer:
A timelapse is shot from a fixed, unmoving position — the camera captures individual frames over time and compresses hours into seconds. A hyperlapse is the same frame-by-frame concept, but the camera physically moves between frames (on foot, in a car, or on a drone), which means every shot has to be manually or algorithmically stabilized in post. Regular sped-up video is neither of these — it’s continuous 24/30/60fps footage played back faster, which looks noticeably choppier and less cinematic than either technique. If your subject is static (clouds, stars, construction), shoot a timelapse. If you want to cover distance or show movement through a space, shoot a hyperlapse.
Affiliate Disclosure
This guide contains affiliate links. Purchases made through these links support Aero Timelapse Studio at no additional cost to you. I only recommend products I personally use or carefully research. As an Amazon Associate I earn from qualifying purchases.
What Is a Timelapse?
A timelapse is a sequence of individual still photographs, captured at a fixed interval from a fixed position, then compressed into video at playback speed. The camera doesn’t move between frames — that’s the defining rule.
I shoot most of my timelapses this way: drone parked at a fixed GPS hover point, or camera on a tripod, firing a RAW frame every 3–15 seconds depending on how fast the subject is moving. A cloud timelapse over Hohenzollern Castle might use a 3-second interval; a construction progress shot spanning weeks might use one frame per hour.
💡 Pro Tip: The interval is the single most important variable in a timelapse, and it’s also the one beginners guess at instead of calculate. I built a Timelapse Interval Calculator specifically because “just use 5 seconds” is bad advice — the right interval depends on your subject’s speed and your desired playback length. If you want the full logic behind interval math, my Timelapse Interval Guide walks through it step by step.
Because the camera never moves, timelapse footage is inherently stable — you’re not fighting motion, you’re only fighting exposure drift (day-to-night ramping) and flicker between frames. If you’ve ever seen a timelapse with a distracting pulsing or strobing effect, that’s flicker, and it’s fixable — I cover the full cause-and-fix process in my Timelapse Flicker Fix guide.
💡 Pro Tip: Once you’ve got your frames, turning them into a finished clip means locking down frame rate, resolution, and codec — the Timelapse Video Settings Calculator works out the export math so your final video isn’t stuttery or oversized.
Timelapse is the right tool for subjects that change over a period longer than a human can comfortably watch: moving clouds, star trails, blooming flowers, sunsets, construction, tidal changes. If you want the technical settings for shooting the night sky specifically, I’ve written a dedicated Milky Way Timelapse guide covering exposure, gear, and dark-sky locations across Southern Germany and the Alps.
What Is a Hyperlapse?
A hyperlapse uses the exact same frame-by-frame capture method as a timelapse — but the camera physically moves between frames. You might walk 200 meters between shots, drive a route, or fly a drone along a flight path, capturing one frame at each position.
This is the part that trips people up: because the camera position changes every frame, every single frame has a different composition, and that has to be corrected in post-production so the final video doesn’t shake violently. This stabilization step is what separates a real hyperlapse from a mistake. Professional hyperlapses go through motion-smoothing software (Adobe After Effects, LRTimelapse, or dedicated stabilization tools) that tracks a fixed point across frames and locks the composition.
⚠️ Warning: Handheld hyperlapses without a stabilization plan almost always fail. I’ve reviewed dozens of first attempts where the shooter nailed the interval and the walking pace but skipped stabilization entirely — the result is unwatchable, not stylistically shaky. If you’re shooting your first hyperlapse on foot, my step-by-step hyperlapse-on-foot guide covers the exact walking cadence, frame interval, and stabilization workflow I use.
There are two sub-categories worth knowing:
Foot/Handheld Hyperlapse
Walking or driving between frames, typically used for urban exploration, travel content, or showing a journey through a space. Step distance and frame interval need to match — too many steps between frames and the motion looks jerky even after stabilization.
Drone Hyperlapse
The drone flies a path (often GPS waypoint-based for repeatability) and fires a frame at set intervals or distances along that route. This is where I spend most of my hyperlapse time professionally — flying a route over the Dolomites or along the Danube in Ulm produces a moving, cinematic reveal that a static timelapse simply can’t. Getting the flight speed, altitude, and interval to match takes calculation, not guesswork — my Drone Hyperlapse Calculator and Hyperlapse Step Calculator handle both scenarios.
What Is Regular Sped-Up Video?
This is the one people confuse most often with both of the above, and it’s actually the simplest: it’s just normal video, recorded continuously at 24, 30, or 60 frames per second, then played back faster in an editor.
There’s no frame-by-frame capture, no interval, and no separate stabilization workflow beyond standard video stabilization. You’re speeding up motion that was already continuous.
The visual giveaway is motion character. Regular sped-up video keeps the natural motion blur and smoothness of standard footage, just compressed in time — think of a sped-up traffic clip from a static security camera. Timelapse and hyperlapse footage, by contrast, has a distinct “staccato” or slightly stepped quality between frames, especially at longer intervals, because each frame is a genuinely separate exposure rather than a sampled frame from continuous video.
Regular sped-up video is faster to produce and requires zero specialized planning, but it can’t compress long durations the way a true timelapse can — sped-up video of an 8-hour sunset would still need to actually be recorded for 8 continuous hours, filling enormous amounts of storage, where a timelapse captures the same 8 hours in a few hundred frames. If you’re trying to plan card and drive space for a long shoot, the Drone & Timelapse Storage Calculator shows exactly how far apart these two approaches really are.
What Is Regular Sped-Up Video?
| Timelapse | Hyperlapse | Regular Sped-Up Video | |
|---|---|---|---|
| Camera movement | None (fixed position) | Yes (walking, driving, flying) | Continuous, as recorded |
| Capture method | Individual frames at intervals | Individual frames at intervals, position changes | Continuous video (24–60fps) |
| Post-production need | Deflicker, exposure ramp | Deflicker + frame stabilization | Speed ramp only |
| Best for | Clouds, stars, sunsets, construction, long static change | Walking tours, drone flyovers, showing a journey | Short, simple time compression |
| Difficulty | Moderate | High | Low |
| Storage efficiency | Very high (RAW stills) | Very high (RAW stills) | Low (full continuous footage) |
| Typical output length | Seconds from hours/days | Seconds from a walked or flown route | Seconds from minutes/hours of footage |
When to Use Each Technique
I make this decision on every single shoot, and the honest answer is that it comes down to one question: is my subject moving through space, or is it changing in place?
Choose Timelapse When:
- You’re shooting clouds, stars, sunrises, or sunsets from a fixed vantage point
- You’re documenting change over days or weeks (construction, seasons, growth)
- You want maximum stability with the least post-production complexity
- Your subject’s motion is the story — not your camera’s
Choose Hyperlapse When:
- You want to show a journey, route, or reveal (walking into a city square, a drone flight along a ridgeline)
- Your subject is largely static but you want dynamic camera movement
- You have time to invest in stabilization — this is not a “shoot and immediately post” technique
- You’re going for that signature “gliding through a city” travel-content look
Choose Regular Sped-Up Video When:
- The event is short (minutes, not hours)
- You need natural motion blur and smoothness (crowds, traffic, water)
- You don’t have time for interval planning or stabilization
- Storage isn’t a constraint
Common Mistakes That Ruin Each Technique
I’ve fixed all three of these mistakes in client footage, and they’re avoidable once you know what to look for.
- Wrong interval for timelapse. Too short and you shoot thousands of redundant frames; too long and fast-moving clouds turn into a stuttery mess. Calculate it before you start, don’t estimate on-site.
- No stabilization plan for hyperlapse. If you don’t know which software you’ll use to lock the frame before you start walking or flying, you’ll shoot something unusable. Decide your post-production tool first.
- Flicker left unfixed. Both timelapse and hyperlapse are vulnerable to exposure flicker between frames — usually from auto-exposure drift or aperture stepping. It’s correctable, but only if you shoot RAW and know the fix. Full breakdown in my flicker fix guide.
- Treating cloud motion as an afterthought. Fast-moving weather systems are one of the most dramatic subjects for timelapse, but they need a specifically shorter interval than a static sunset. My cloud timelapse guide covers the interval math for moving skies specifically.
- Ignoring weather conditions before flying a drone hyperlapse. Wind doesn’t just risk your aircraft — it introduces micro-jitter between frames that stabilization software can’t always fully absorb. I break down exactly how wind, humidity, and cloud cover affect a shoot in How Weather Affects Timelapse & Drone Shoots
Gear and Software That Actually Matters
You don’t need to buy anything to shoot your first timelapse or hyperlapse — most modern drones and even phones have built-in modes. But once you’re serious about eliminating flicker and getting smooth exposure ramps (day to night, or vice versa), the right software becomes the difference between amateur and professional-looking output.
LRTimelapse
For deflickering and building smooth exposure ramps in post-production, I recommend LRTimelapse — it’s the tool I actually use to remove frame-to-frame flicker and blend day-to-night transitions on both static timelapses and hyperlapses before final grading in Lightroom or Premiere. Best For: Timelapse Creators and Stock Sellers who need broadcast-clean, flicker-free footage. The Private License runs €141.61 incl. VAT (Germany).
A Drone With a Native Hyperlapse/Waypoint Mode
For hobbyists who don’t want to calculate flight speed and interval by hand, I recommend the DJI Mini 4 Pro — its built-in Waypoint flight mode handles the interval-and-movement math automatically, which is the single biggest barrier for a first drone hyperlapse.
Best For: Hobbyists who want a guided hyperlapse without manual flight planning.
I’m intentionally not forcing a tripod or ND filter recommendation into this article — neither is essential to understanding the difference between these three techniques, and the free ND Filter Calculator already covers exposure planning if you need it.
Read Next on Aero Timelapse
- How to Shoot a Hyperlapse on Foot — my full step-by-step walking hyperlapse workflow, from step distance to stabilization.
- Timelapse Flicker Fix — causes and the exact post-processing fix for flickering frames.
- Cloud Timelapse Photography — settings for dramatic moving-sky timelapses.
- Milky Way Timelapse: Settings, Gear & Locations — night sky timelapse specifics.
- The Ultimate Timelapse Photography Tutorial — the full pillar guide this article supports.
- Timelapse Interval Guide — the math behind choosing the right interval.
- How Weather Affects Timelapse & Drone Shoots — wind, humidity, and cloud cover’s real impact on a shoot.
- Drone Laws & Regulations — Complete Legal Guide for EU Pilots — relevant if your hyperlapse plan involves flying in a new EU location.
🔧 Free Tools:
FAQ: DJI Lito X1 Review
Is a hyperlapse just a faster timelapse?
No. Speed isn’t what separates them — camera movement is. A timelapse is shot from a completely fixed position; a hyperlapse involves the camera physically moving between each frame, which requires post-production stabilization that a timelapse doesn’t need.
Can I shoot a hyperlapse with regular video mode instead of individual frames?
Some phone apps simulate hyperlapse by recording continuous video and heavily compressing it, but this isn’t a true hyperlapse — it lacks the frame-by-frame control over interval and exposure that RAW stills give you, and results in visibly lower quality, especially in low light.
Why does my timelapse flicker but my regular video doesn't?
Flicker happens because each frame in a timelapse is a separate exposure, and small shifts in auto-exposure, aperture, or white balance between frames become visible as pulsing when played back quickly. Continuous video doesn’t have this problem because there’s no gap between frames for exposure to drift. My flicker fix guide covers the manual-exposure workflow that prevents it, and LRTimelapse fixes it after the fact if you’ve already got flicker in your footage.
What interval should I use for a drone hyperlapse?
It depends on your flight speed and desired final video length — flying faster or wanting a longer output both call for a shorter interval. Rather than guessing, run your flight plan through my Drone Hyperlapse Calculator, which calculates the correct interval from your speed, distance, and target duration.
Do I need special software to stabilize a hyperlapse?
Yes, effectively. Adobe After Effects (Warp Stabilizer) and LRTimelapse are the two most common professional options; some drones with waypoint-based hyperlapse modes handle basic stabilization automatically, but manual foot or handheld hyperlapses almost always need dedicated stabilization software to look professional.
Is timelapse or hyperlapse better for real estate or property videos?
For most property work, a hyperlapse (walking or drone-flown) tends to perform better because it shows scale and movement through a space, which is what buyers actually want to see. A static timelapse works well as a supporting shot — a moving-cloud sky over the property, for example — but rarely as the main deliverable.
How long should a timelapse or hyperlapse clip be in a final edit?
Most professional timelapse and hyperlapse clips run 5–15 seconds in a finished edit — long enough to register the movement or change, short enough to keep pacing tight. I rarely deliver a single clip longer than 20 seconds regardless of how much raw footage went into it.
Conclusion
The single distinction that matters: timelapse means the camera stays still, hyperlapse means it moves, and both are fundamentally different from just speeding up regular video. Get that right and every other decision — interval, stabilization, gear — follows naturally.
If you’re planning your first shoot, start with whichever matches your subject: static change gets a timelapse, movement through a space gets a hyperlapse. Run the numbers through the Timelapse Interval Calculator or Hyperlapse Step Calculator before you head out, and check the full timelapse photography tutorial for everything else you’ll need.
Dipon is a drone and timelapse cinematographer based in Ulm, Germany, with over 15 years of experience turning real spaces and projects into cinematic visuals. With a background in digital marketing, every shot is planned with a clear purpose — where it will appear, who will see it, and what it should help them decide.
You May Also Like
How to Shoot Milky Way Photos for Stacking
How to Shoot a Little Planet Photo With a Drone
Deflicker a Timelapse Without LRTimelapse: Free Tool for JPEG Sequences
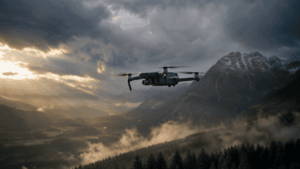
How Weather Affects Timelapse & Drone Shoots

Best Timelapse Cameras Under €1,000 in 2026

Best Time to Fly a Drone for Photography
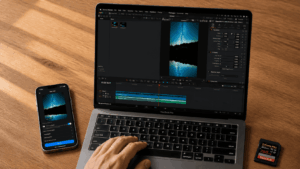
Timelapse for Social Media: Instagram, YouTube & TikTok Settings

Holy Grail Timelapse: Complete Day-to-Night Settings & Workflow
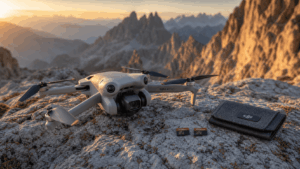
How to Plan Storage for Drone Footage — The Complete Pre-Flight Guide
How to Make a Star Trail Timelapse: From Camera Settings to Online Stacking
How to Shoot a Hyperlapse on Foot: Step-by-Step Guide
Timelapse Flicker Fix: Causes, Prevention & Post-Processing Solutions
Need help capturing professional timelapse for your next project but not ready to invest in the gear yet? Check out our Timelapse Video Production service to see how Aero Timelapse Studio can help elevate your production.