How to Shoot Milky Way Photos for Stacking (Step by Step)
Dipon | October 2026
Table of Contents
- What Is Milky Way Stacking and Why Shoot for It?
- How Do You Plan the Night?
- How to Shoot Milky Way Photos for Stacking: The Exact Settings
- What Gear Helps Most?
- How Do You Capture a Sharp Foreground?
- In What Order Should You Shoot the Night?
- When Should You Shoot Dark Frames?
- What Mistakes Ruin a Sequence?
- Read Next on Aero Timelapse
- FAQ
- Conclusion
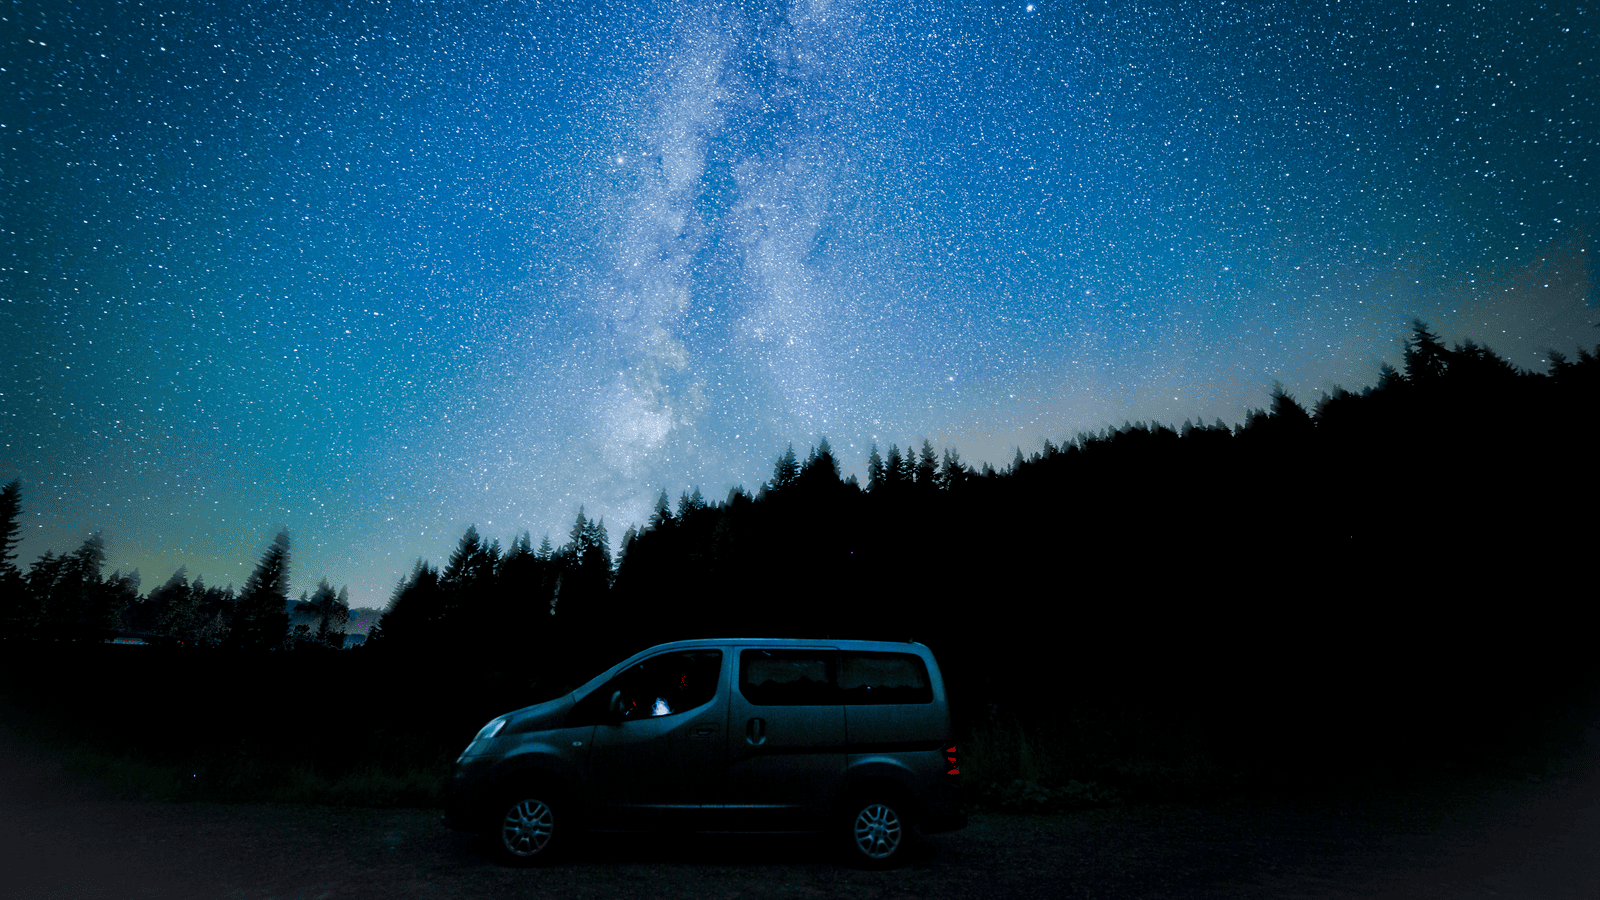
I parked my camper at the Riedbergpass in the Allgäu, where a small parking spot lets you stay the night. The plan was simple. Shoot a Milky Way timelapse, sleep in the camper and drive down in the morning.
Here is the catch with a night like that. One frame is noisy, and a long shutter smears the stars into dashes. Stacking solves that trade-off, but only if you shoot the right frames.
This guide shows you how to shoot Milky Way photos for stacking, the way I set it up on that pass: a Canon R6, a Samyang 14mm f/2.8 and a tripod. You will know the settings, how many frames to take, how to get a clean foreground and when to shoot dark frames. Processing afterwards takes minutes.
Key Takeaways
- Stacking means shooting 15 to 20 identical, short frames and averaging them to cut noise.
- Use our calculator for your shutter speed. For a Canon R6 with a 14mm f/2.8 lens, it gives about 21 s, so set 20 s.
- Shoot the foreground first, at blue hour, then refocus on a star and tape the focus ring.
- Keep every setting identical across the sky frames, and shoot RAW.
- Turn off long exposure noise reduction, or each frame takes twice as long.
- Shoot about 10 dark frames with the lens cap on, at the same settings.
- Process the finished sequence afterwards in a stacking tool.
Affiliate Disclosure
This guide contains affiliate links. Purchases made through these links support Aero Timelapse Studio at no additional cost to you. I only recommend products I personally use or carefully research. As an Amazon Associate I earn from qualifying purchases.
What Is Milky Way Stacking and Why Shoot for It?
Milky Way stacking is the technique of combining many short exposures of the same sky into one cleaner image. Sensor noise is random, so it changes from frame to frame. The stars and the Milky Way do not, so averaging keeps the real detail and cancels most of the noise.
A single long exposure runs into two limits. Past a certain shutter speed, stars stop being points and start to streak. Noise also builds up the longer the shutter stays open. Many short frames get around both.
Why Does the Way You Shoot Matter So Much?
Software can only work with what you give it. If your settings drift between frames, or the tripod shifts, no tool can fully repair the result. A careful capture saves more time than any processing trick, which is why this guide stays on the shooting side.
How Do You Plan the Night?
Plan around the moon, the place and the weather before you leave. A good plan decides whether the night is worth the drive. It also gives you more time to relax once you are there.
When Is the Right Night?
Pick a night within a few days of the new moon. Moonlight washes out the faint structure that makes the Milky Way worth shooting. Our Milky Way Exposure Calculator has a Moon & Timing tab. Enter your coordinates, the date and your UTC offset, and it shows moonrise, moonset and your window of full darkness. It also lists the next optimal dark nights.
The same tab has a season panel. For the northern hemisphere it shows the core above the horizon from March to October, with the peak from May to August.
How High Does the Core Climb?
At latitudes like southern Germany, the Milky Way core stays low. Around 47 to 48°N, it peaks only about 13 to 14° above the southern horizon. The calculator warns you about this for mid-northern latitudes.
That makes the horizon matter. Pick a spot with a clear, open view to the south, with no ridge or trees in the way.
Where Should You Shoot?
Look for a spot far from city glow. A light pollution map such as lightpollutionmap.info shows how dark a place is before you drive. As a rule of thumb, a Bortle 4 sky or darker gives a satisfying result. A mountain pass with an overnight parking spot is ideal, because you can stay until you are finished.
What Weather Do You Need?
You want clear skies and dry air. Humid air brings dew, and dew can ruin the last half of a sequence. Our guide on how weather affects timelapse and drone shoots explains what to check.
⚠️ Warning: Wild animals are active at night in mountain forests. Keep your distance, keep your light low and do not walk into the trees to get a better angle.
💡 Pro Tip: Arrive while it is still light. Compose the shot, level the tripod and weigh it down with your bag. At night, you only focus and shoot.
How to Shoot Milky Way Photos for Stacking: The Exact Settings
Use manual mode, your widest aperture and a shutter speed from the calculator, then keep everything identical across the sky frames. This example uses a Canon R6 and a Samyang 14mm f/2.8.
| Setting | Suggested starting value | Why |
|---|---|---|
| Mode | Manual | Nothing may change between frames |
| Aperture | f/2.8 | The widest the lens opens |
| Shutter | 20 s | The calculator gives about 21 s |
| ISO | 3200 for a dark sky | The calculator’s suggestion for Bortle 1 to 4 |
| White balance | A fixed Kelvin value | Same colour in every frame |
| File format | RAW | Keeps the most detail |
| Long exposure noise reduction | Disable | Stops each frame doubling in time |
| In-body stabilisation | Off | Avoids drift on a tripod |
| Drive | Built-in interval timer | No extra remote needed |
How Do You Work Out the Right Shutter Speed?
Open our Milky Way Exposure Calculator and use the Sharp Stars tab. Pick the Canon EOS R6 preset, or choose your own camera and type in the megapixels. Enter 14mm, f/2.8 and leave declination at 0°, then choose the Print / Pixel-peep profile.
It returns about 21 seconds for the R6 and the Samyang 14mm, and I set 20 s. The calculator uses the NPF rule, which takes your sensor’s pixel size into account. The formula is (35 × aperture + 30 × pixel pitch) ÷ focal length, with pixel pitch in micrometres.
The old 500 rule would give 500 ÷ 14, or about 36 seconds, which is roughly 40 percent too long for a modern sensor. The calculator shows both side by side.
What About Declination?
Declination is where in the sky you point. Leave it at 0° for the safest result. If you set it to −30°, which is the Milky Way core, the calculator allows about 24 s for this setup, because stars near that declination move a little slower.
I still round down to 20 s. Short exposures are fine for stacking, because the software recovers the lost light by combining more frames.
How Do You Choose the ISO?
The calculator also suggests an ISO based on how dark your sky is. For this setup it gives ISO 3200 for Bortle 1 to 4, and ISO 1600 for a Bortle 5 suburban sky. Start there, check the histogram and move one stop either way.
How Many Frames Should You Take?
Shoot 15 to 20 frames. The Nightstack tool needs at least 3, but most of the noise reduction shows up between 8 and 20 frames. More frames help, with diminishing returns.
The R6 has a built-in interval timer, so you don’t need an extra remote. Set the interval a second or two longer than your shutter speed. Twenty frames at 20 s takes about seven minutes, and keeping the sequence short means the sky doesn’t move much while you shoot.
Why Disable Long Exposure Noise Reduction?
On the R6, with long exposure noise reduction on Auto or Enable, processing can take as long as the exposure itself. That doubles the time per frame and leaves gaps in your sequence. You will shoot proper dark frames later, so you do not need it.
How Do You Capture a Sharp Foreground?
Shoot the foreground separately, first, while there is still some light in the sky. This is the most overlooked step in Milky Way photography. A dark-sky exposure gives you a noisy, muddy landscape.
Milky Way Foreground Exposure Technique: The Blue Hour Frame
Take one photo of the landscape at blue hour, with the sky still holding a little light. Use a low ISO (100 to 400) and a smaller aperture such as f/5.6 to f/8. The shutter can stay open for several seconds, so the ground comes out clean and detailed.
Focus on the foreground for this frame. Our Depth of Field Calculator helps you find the focus distance that keeps it sharp. The frame must match your sky frames exactly: same position, same composition, tripod untouched.
What About Light Painting?
If you miss blue hour, sweep a dim, warm torch over the foreground for one to three seconds during a single exposure. Keep the light soft and away from the sky. Check for other people first, because a sudden light ruins their night vision.
In What Order Should You Shoot the Night?
The order matters, because focus and framing cannot change once the sky sequence starts. On the pass, I worked in this sequence.
- Set up in daylight. Compose, level the tripod and weigh it down.
- Shoot the foreground at blue hour. Focus on the foreground and leave the tripod alone afterwards.
- Wait for full dark. The calculator’s Golden Window shows when your dark window starts and ends.
- Focus on a star. Switch to manual focus, zoom live view to 10× on a bright star and turn the ring until the star is as small as it gets.
- Tape the focus ring. A strip of tape stops it moving for the rest of the night.
- Take a test frame. Check the stars and the histogram, then adjust the ISO by a stop if needed.
- Run the sequence. Start the interval timer and keep your hands off the camera.
- Shoot dark frames. Do this at the end.
It was cold up there, and properly dark. Looking in the direction I was shooting, there was almost no light pollution at all. When I turned my headlamp towards the forest, I could see animals’ eyes reflecting back at me. I kept the camera pointed away and let the sequence run.
By morning, the whole sequence was on the card and I was driving down the pass. Doing the foreground first meant I never had to refocus mid-sequence.
When Should You Shoot Dark Frames?
Shoot about 10 dark frames at the end of the session. This takes only a couple of minutes. It removes the fixed noise pattern your sensor adds to every frame.
What Is a Dark Frame in Astrophotography?
A dark frame is an exposure taken with the lens cap on, using exactly the same ISO and shutter speed as your sky frames. It captures only the sensor’s own noise, which software then subtracts. Our Nightstack page explains that dark frames help with fixed sensor noise, especially on warm nights and with older cameras.
How Do You Shoot Dark Frames Correctly?
Put the cap on the lens and leave every setting unchanged. Shoot them in the same place, right after the sky frames, so conditions stay close. Dark frame astrophotography only works if the settings match, so do not touch the dial.
What Mistakes Ruin a Sequence?
Most bad stacks come from small inconsistencies. The table covers the ones to watch.
| Problem | Cause | Fix |
|---|---|---|
| Stars look like dashes | Shutter too long | Use the calculator’s NPF result for your sensor |
| Soft, fat stars | Missed focus | Refocus on a bright star and tape the ring |
| Brightness varies | Auto settings left on | Use full manual |
| Frames do not line up | Tripod bumped | Reshoot and keep your hands off |
| Hazy last frames | Dew | Use a lens warmer |
| Gaps in the sequence | Long exposure noise reduction on | Set it to Disable |
| Core hidden behind a ridge | Low southern horizon blocked | Scout an open southern view in daylight |
What Happens After the Shoot?
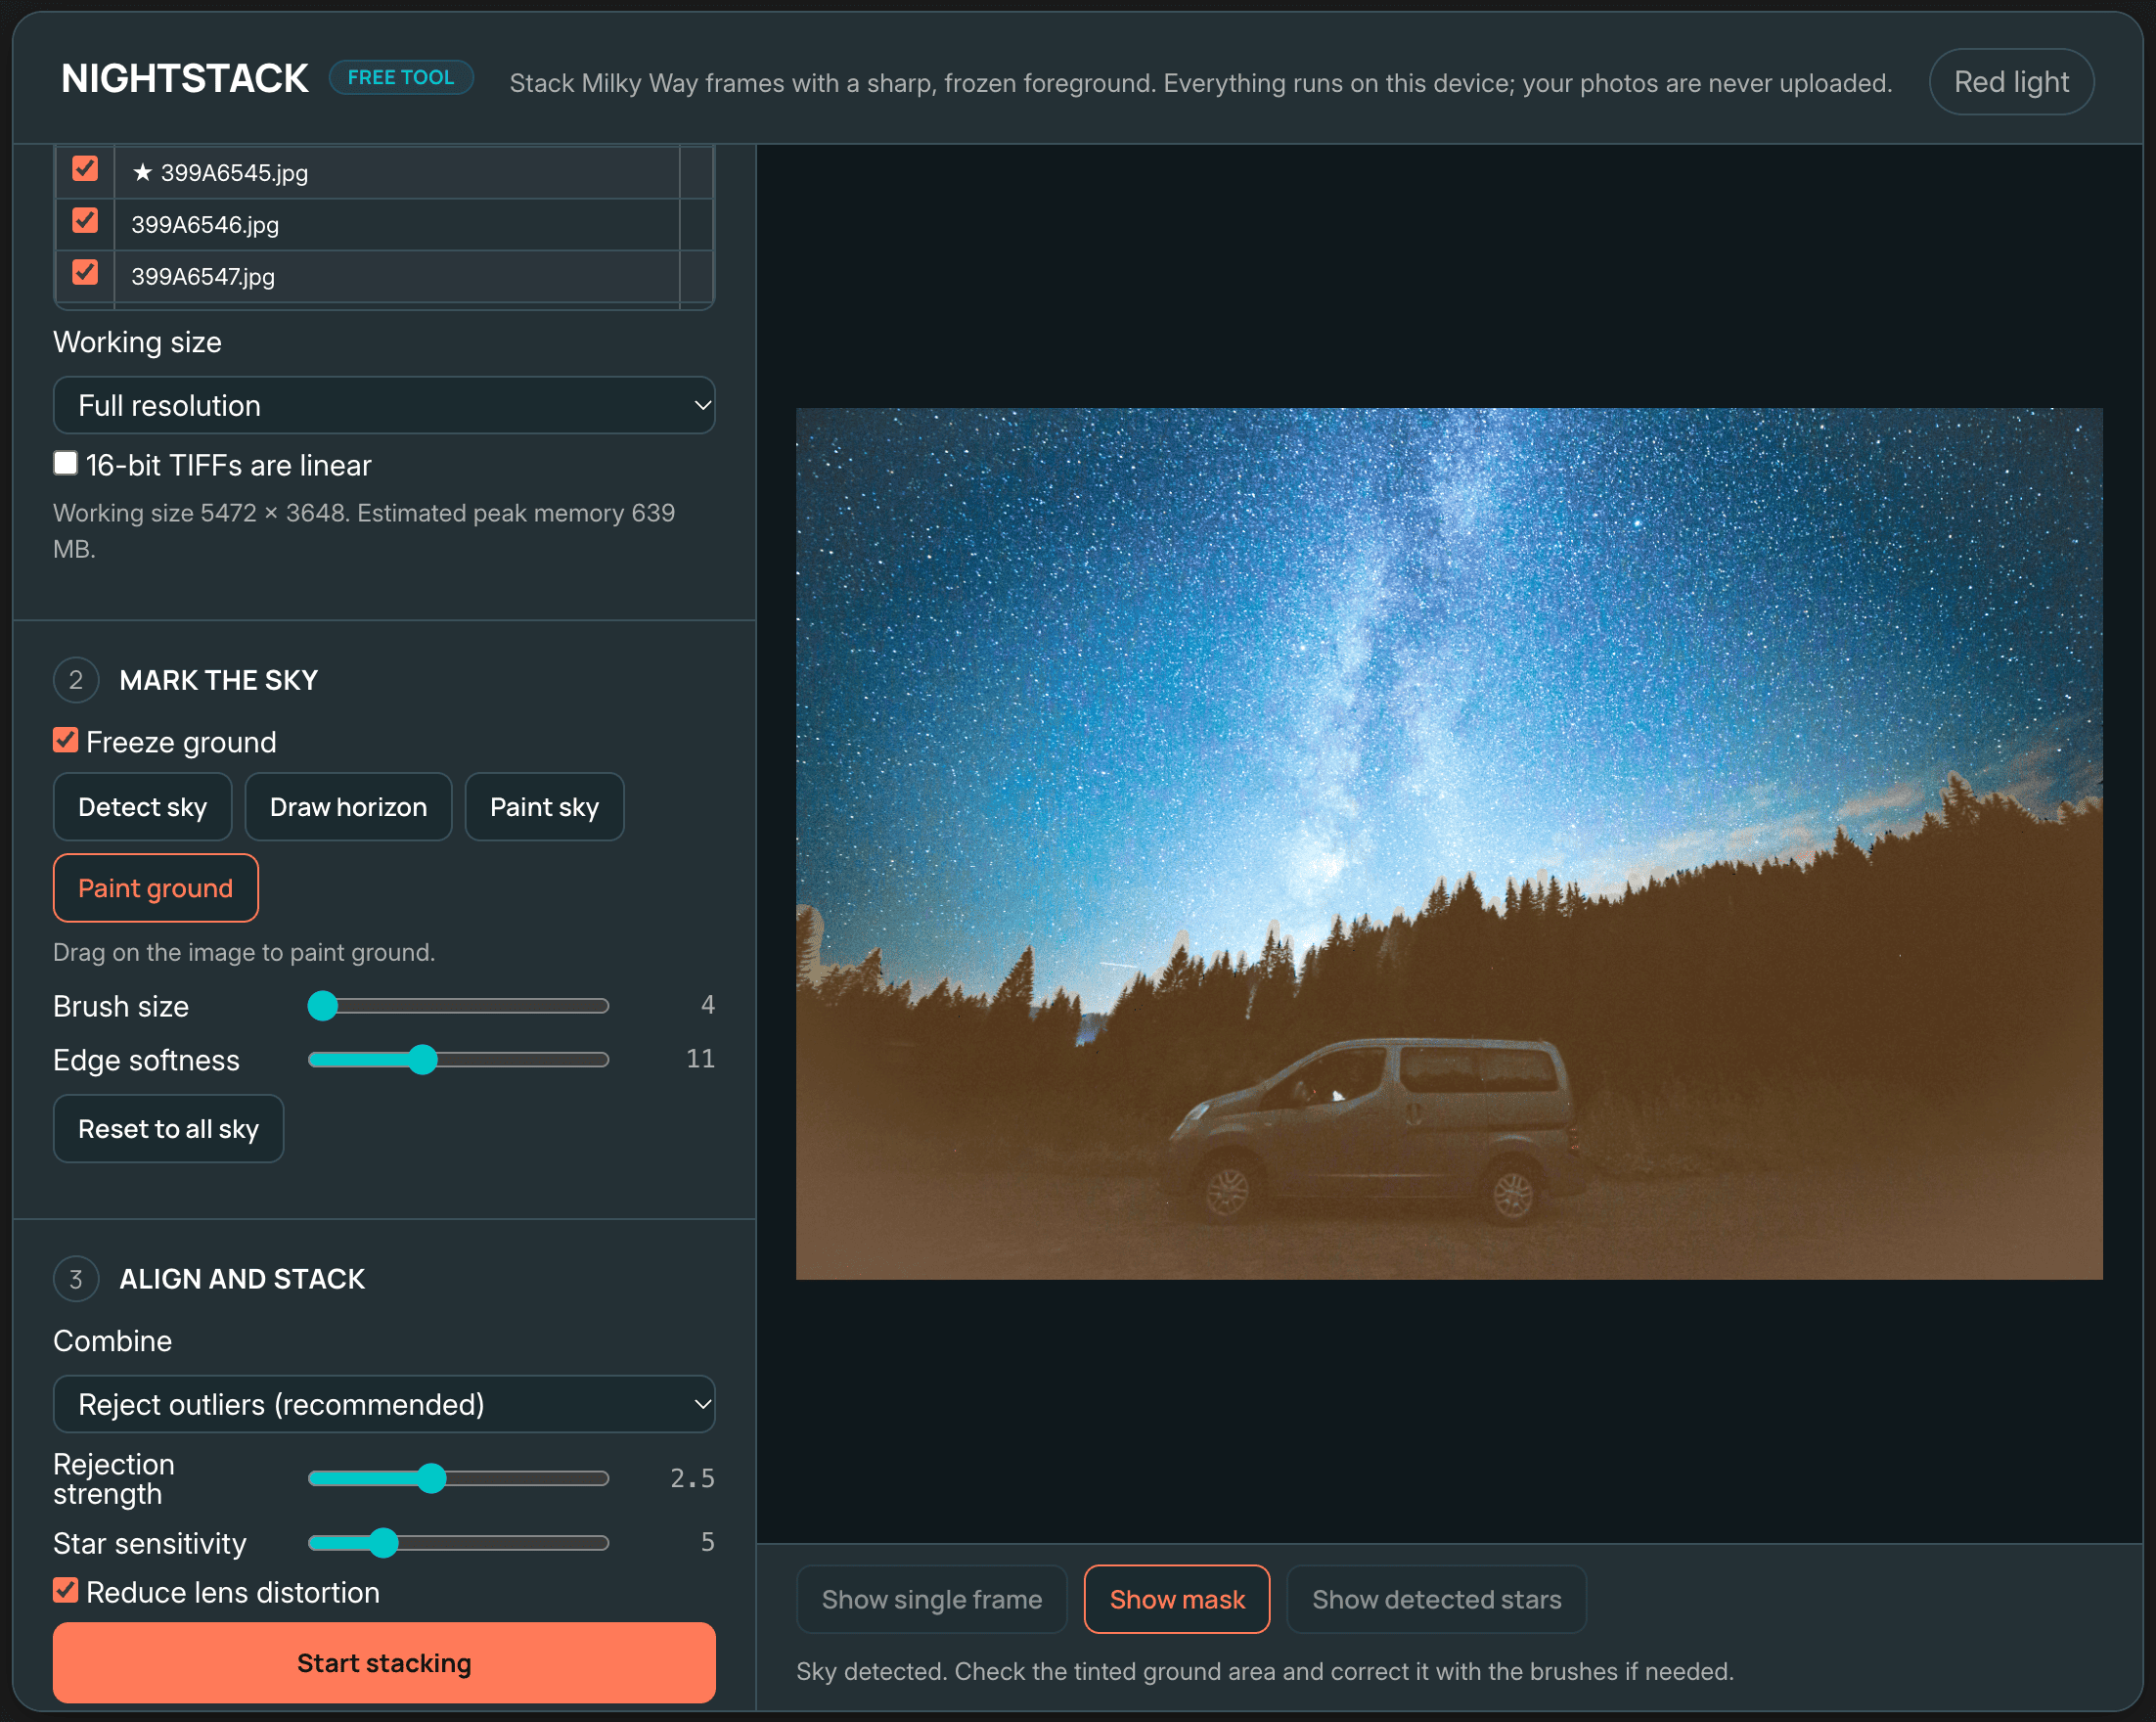
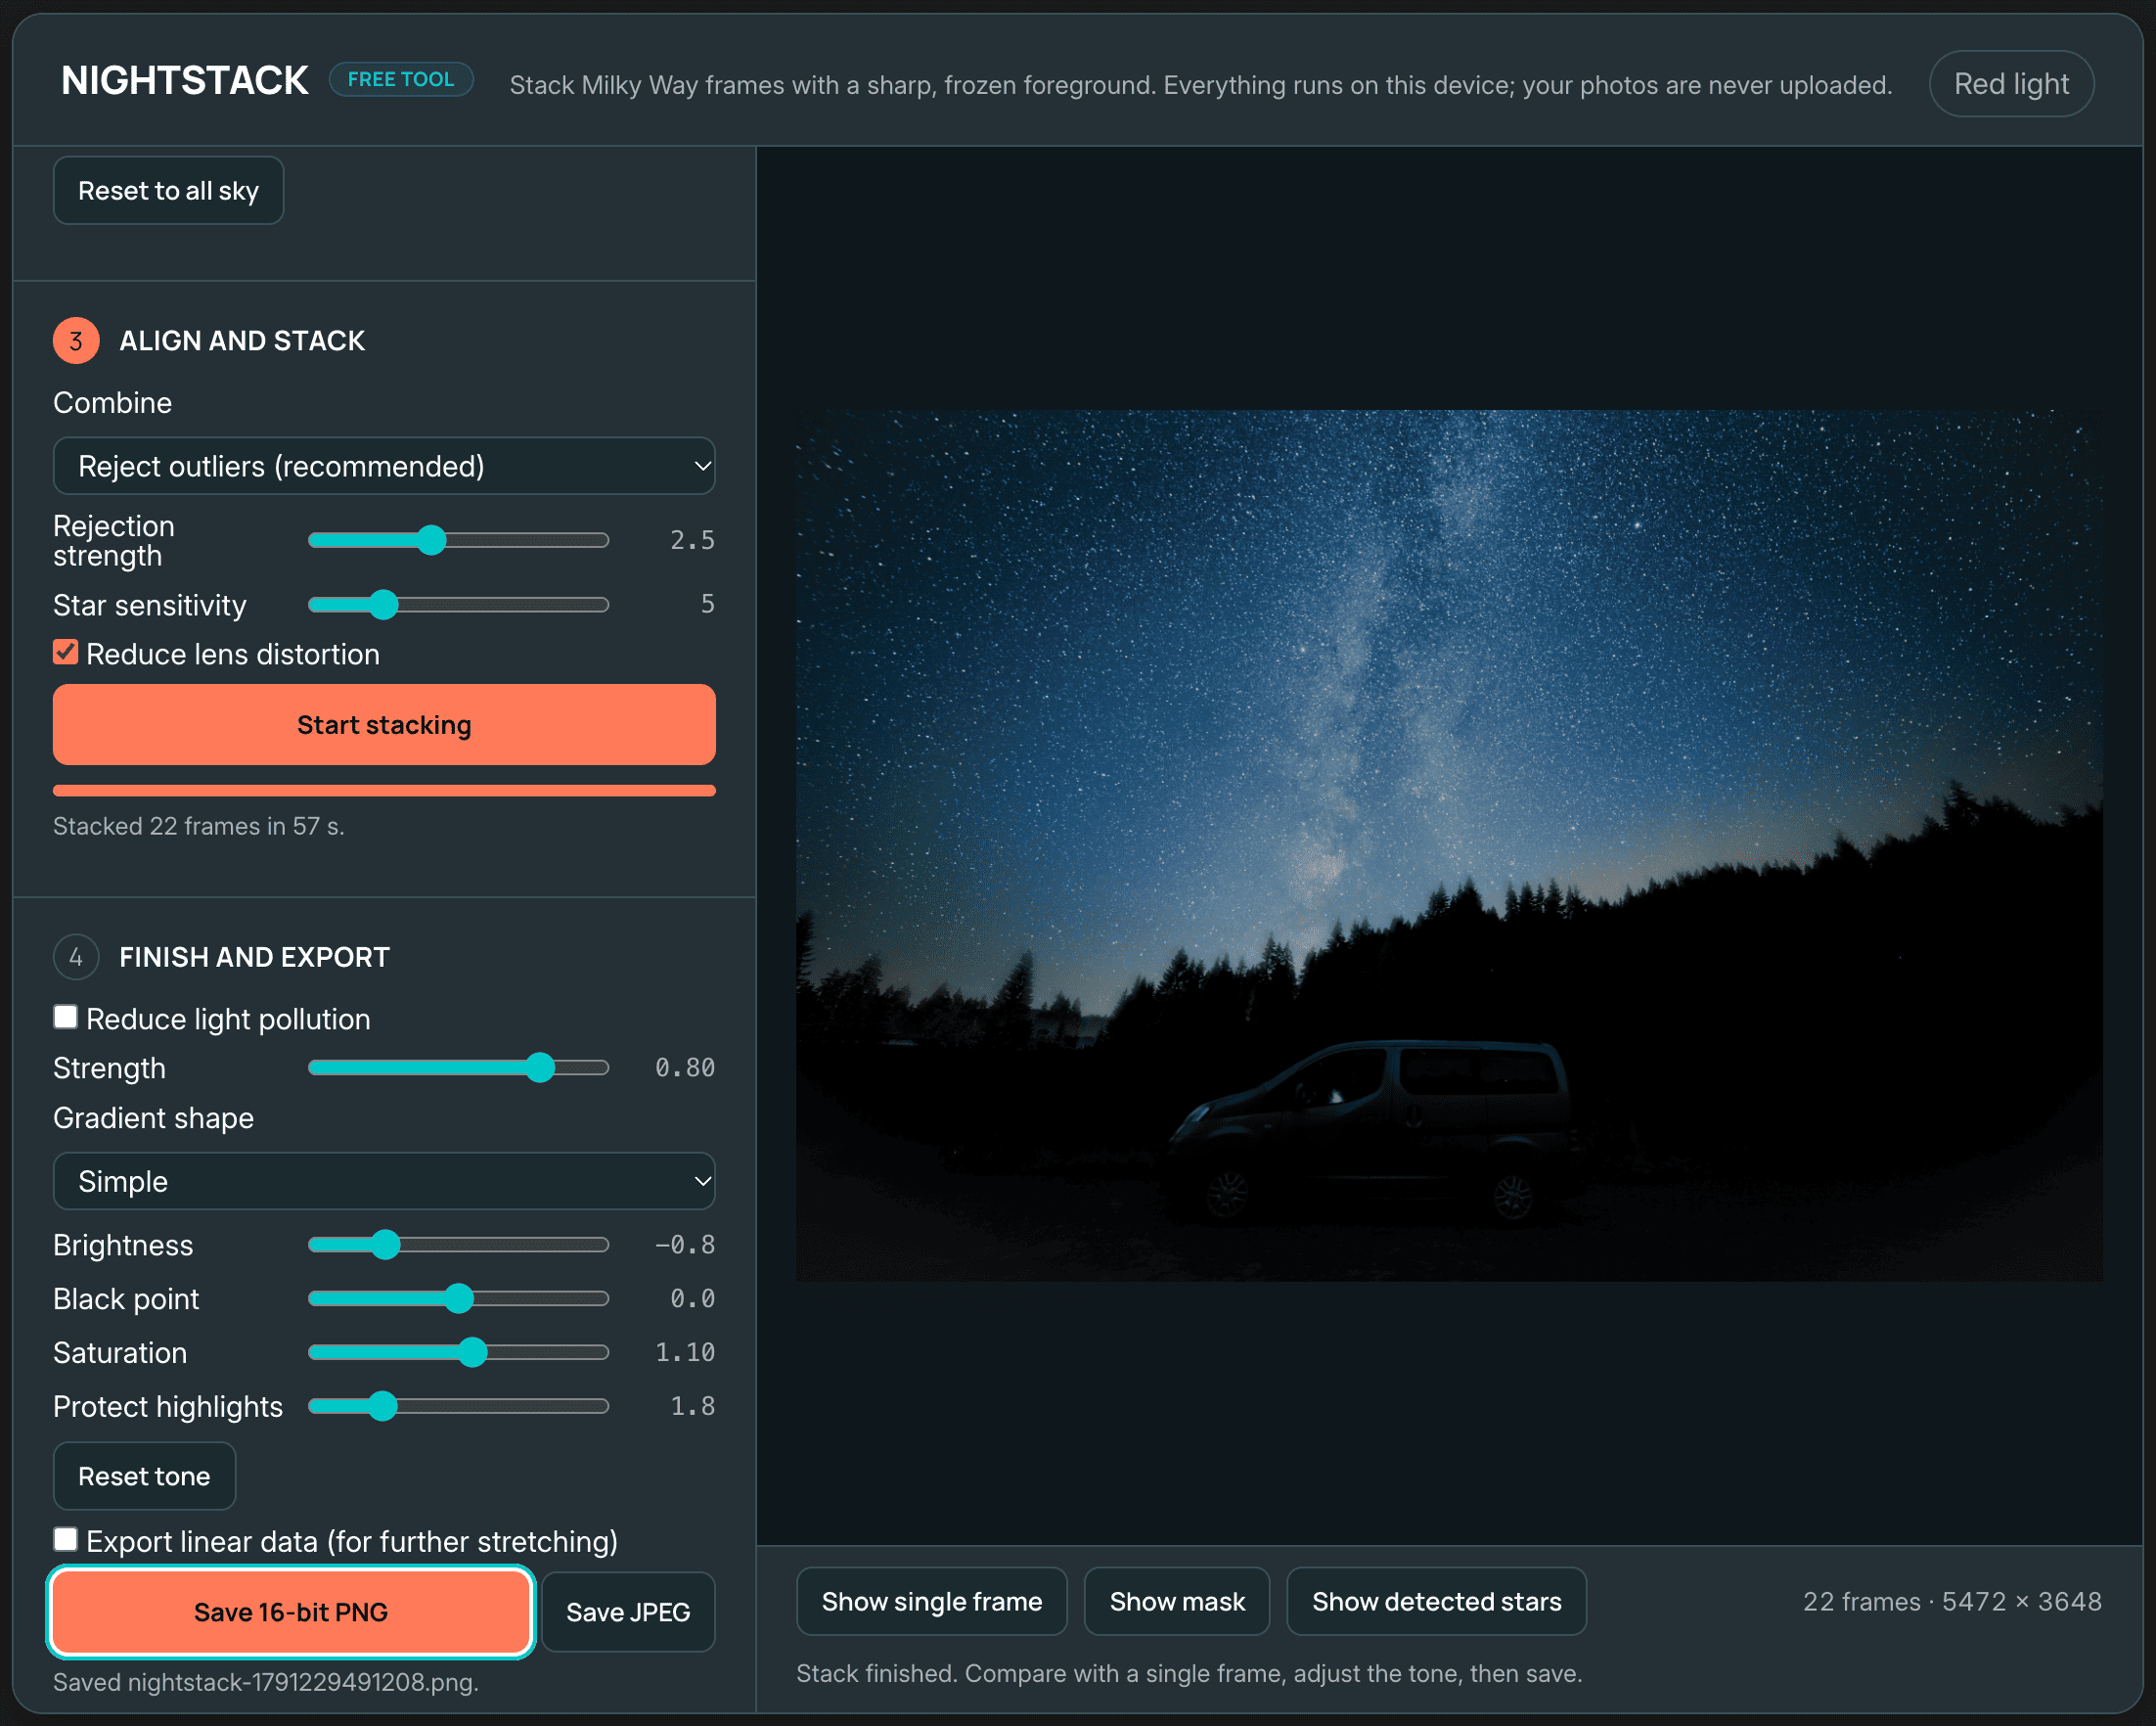
Convert your RAW files to 16-bit TIFF with the same settings for every frame, then load them into a stacking tool. Nightstack aligns the stars, keeps the ground still and exports a 16-bit PNG. The same sequence can also become star trails in the Browser Star Trail Stacker.
Need a Night Sky Shot for a Project?
If you need Milky Way or night sky footage for a hotel, a tourism board or a brand, I shoot it commercially across Southern Germany, the Alps and the Dolomites. Our Timelapse Production service covers planning, location scouting and finished footage. You get a delivery-ready result without waiting for the perfect clear night yourself. Request a quote and tell me about your project.
Read Next on Aero Timelapse
- Milky Way Timelapse: Settings, Gear & Locations: the full gear and locations guide.
- Nightstack: process your finished sequence in the browser.
- Milky Way Exposure Calculator: shutter speed, moon times and your dark window.
- Browser Star Trail Stacker: turn the same sequence into star trails.
- Depth of Field Calculator: focus your foreground.
- How Weather Affects Timelapse & Drone Shoots: dew, humidity and cloud.
FAQ - How to Shoot Milky Way Photos for Stacking
How many photos do you need for Milky Way stacking?
Shoot 15 to 20 identical frames. Three is the minimum, and most of the noise reduction appears between 8 and 20 frames. More frames help, but with diminishing returns.
What shutter speed should you use for Milky Way stacking?
Use the NPF rule: (35 × aperture + 30 × pixel pitch) ÷ focal length. For a Canon R6 with a 14mm f/2.8 lens it gives about 21 seconds, so I use 20 s. The old 500 rule would give about 36 s, which is too long for a modern sensor. Our Milky Way Exposure Calculator does the maths for your camera.
What ISO is best for Milky Way stacking?
Start at ISO 3200 under a dark sky (Bortle 1 to 4) and ISO 1600 under a suburban sky (Bortle 5), then adjust by a stop using the histogram. The ideal value depends on your camera and the sky.
Do you need dark frames for Milky Way stacking?
They are optional but helpful. Shoot about 10 frames with the lens cap on at the same ISO and shutter speed. They remove the sensor’s fixed noise pattern.
Can you stack Milky Way photos without a star tracker?
Yes. A fixed tripod works, because stacking software aligns the stars between short frames. Keep the exposures short enough to avoid trails.
What is the foreground exposure technique?
You shoot the landscape separately, at blue hour or with light painting, from the same framing as your sky frames. The software then combines the clean foreground with the stacked sky. This gives a sharper, cleaner ground than the dark sky frames can.
How high does the Milky Way get in Germany?
The core is low. At about 47 to 48°N it peaks only around 13 to 14° above the southern horizon, so you need an open view to the south.
Which lens is best for Milky Way photos?
A fast, wide lens such as the Samyang 14mm f/2.8. At f/2.8 and 14mm it gathers plenty of light and frames the core in one shot.
Conclusion
The core of how to shoot Milky Way photos for stacking is order and consistency. Shoot the foreground first, then refocus on a star and tape the ring. After that, take 15 to 20 identical frames at your NPF shutter speed and finish with dark frames.
Do one thing on your next clear, moonless night: shoot a foreground frame and a 20-frame sky sequence from the same spot. Then run it through Nightstack and compare the result with a single frame.
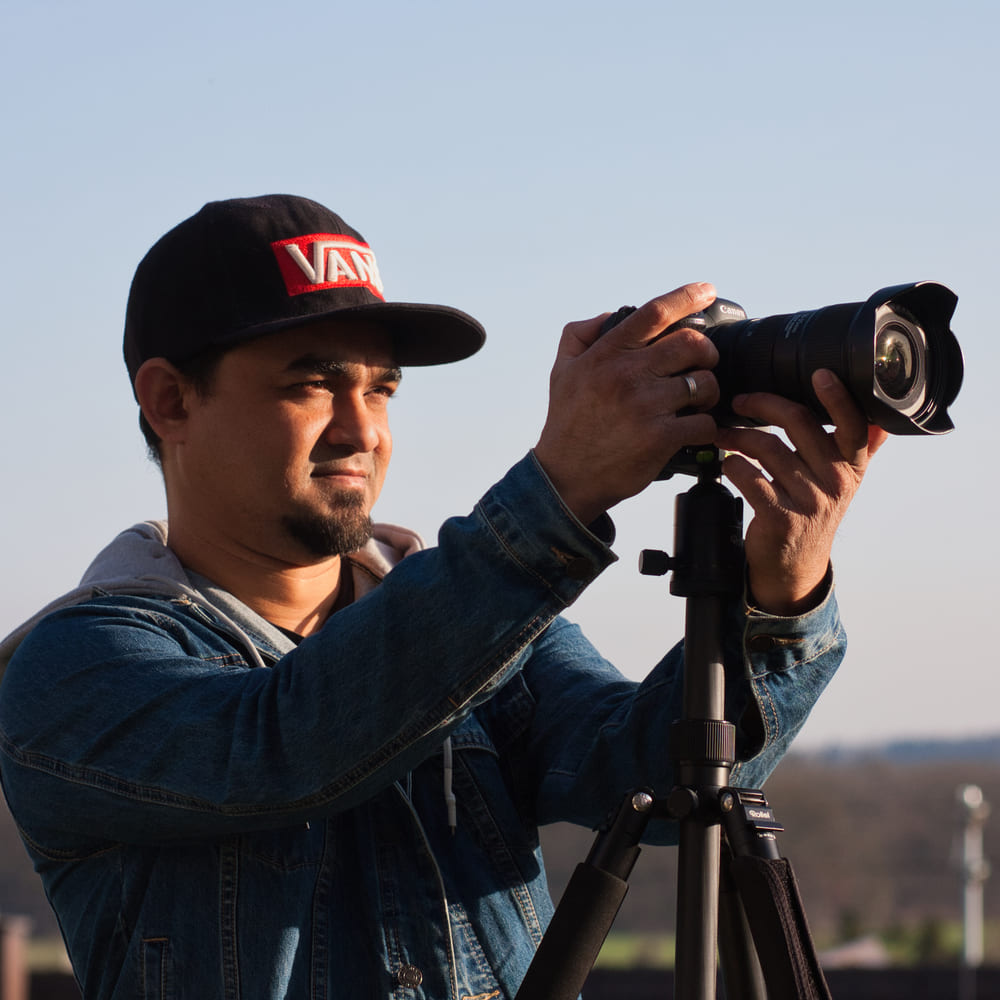
Dipon is a drone and timelapse cinematographer based in Ulm, Germany, with over 15 years of experience turning real spaces and projects into cinematic visuals. With a background in digital marketing, every shot is planned with a clear purpose — where it will appear, who will see it, and what it should help them decide.
You May Also Like
How to Shoot a Little Planet Photo With a Drone
Timelapse vs Hyperlapse : What’s the Difference?
Best Time to Fly a Drone for Photography
Timelapse for Social Media: Instagram, YouTube & TikTok Settings

Holy Grail Timelapse: Complete Day-to-Night Settings & Workflow
How to Plan Storage for Drone Footage — The Complete Pre-Flight Guide
How to Make a Star Trail Timelapse: From Camera Settings to Online Stacking
How to Shoot a Hyperlapse on Foot: Step-by-Step Guide
Timelapse Flicker Fix: Causes, Prevention & Post-Processing Solutions
Cloud Timelapse Photography: How to Capture Dramatic Moving Skies
Milky Way Timelapse: Settings, Gear & Locations