Table of Contents
- Quick answer
- What is a hyperlapse — and why it’s different from timelapse
- What you need to shoot a hyperlapse on foot
- Camera settings: lock everything before frame one
- How to shoot a hyperlapse step by step: the field process
- Editing your hyperlapse: deflicker, stabilise, deliver
- Frequently asked questions
- Do one thing right now
Affiliate Disclosure
This guide contains affiliate links. Purchases made through these links support Aero Timelapse Studio at no additional cost to you. I only recommend products I personally use or carefully research. As an Amazon Associate I earn from qualifying purchases.
You’ve watched the tutorials. You’ve scouted the location. You walked the route, shot 200 frames, got home — and the footage is a shaking, lurching mess that no stabiliser can fix. That’s not a gear problem. It’s a planning problem, and it happens to almost everyone on their first attempt. The step distance was wrong, the anchor point drifted, or one setting got left on auto and created a flicker that runs through every single frame. None of it is hard to fix — you just need to know what the problems are before you shoot, not after. I’ve shot foot hyperlapses on the cobblestones outside Ulm Münster, along the ridge trails above the Swabian Alps, and on the switchback approaches to the Dolomites. This guide gives you the exact process I use: settings, step calculation, anchor technique, ground marking, and the post workflow from raw frames to finished clip.
Quick Answer
To shoot a hyperlapse on foot, set your camera to full manual mode, lock white balance to a fixed Kelvin value, set focus manually to hyperfocal distance, and use a shutter speed equal to half your trigger interval — at a 2-second interval, use a 1-second shutter, with an ND filter in daylight to make that exposure work. Pick a distant anchor subject, take one frame per step, and move 10–50cm forward each time while recentring that anchor in the same spot in the frame before every trigger. The step distance formula is: Step Size = Total Route Distance ÷ (Clip Length in seconds × Frame Rate) — an 80-metre route for a 20-second clip at 24fps gives 16.7cm per step. Plan the geometry before you leave home with the free Hyperlapse Step Calculator, which solves both directions: enter a route length to get your step size, or enter a target step to find out how far you need to walk.
What Is a Hyperlapse (and Why It's Different from Timelapse)
A timelapse compresses time from a fixed position — the camera never moves, only the world does. A hyperlapse compresses both time and space simultaneously: the camera physically travels through the scene, one deliberate step at a time, creating the distinctive forward-rushing perspective that makes the technique so compelling. Every frame is shot from a slightly different position, which means positional drift and camera tilt accumulate across hundreds of frames — that’s the technical challenge, and it’s entirely manageable once you know what you’re controlling for.
Hyperlapse vs. Timelapse: Key Differences
| Feature | Timelapse | Hyperlapse |
|---|---|---|
| Camera position | Fixed | Moving (step by step) |
| Tripod required | Yes | No — handheld or monopod |
| Subject anchoring | Not required | Critical every single frame |
| Post-stabilisation | Rarely needed | Always needed |
| Typical frame count (10s clip) | 200–500 | 250–300 |
| Frame trigger | Fixed interval timer | One frame per step (manual) |
| Main failure mode | Exposure flicker | Wrong step size, drifting anchor |
The timelapse and hyperlapse workflows diverge most sharply at the planning stage — for timelapse you set an interval and let the camera run, for hyperlapse you calculate step distance before you leave home. Get step size wrong in the field and there is no post-production fix. Get it right and the stabilisation step in post is straightforward.
💡 Pro Tip: Foot hyperlapses through cities, alpine trails, and historic streets sell consistently on stock platforms. For how to build that into a passive income workflow, see Make Money Selling Timelapse Stock Footage.
What You Need to Shoot a Hyperlapse on Foot
The Essential Kit
Camera: Any interchangeable-lens camera with full manual exposure control. Mirrorless or DSLR, crop or full frame — the technique works on all of them. You need independent control over shutter speed, aperture, ISO, white balance, and focus, and you need to be able to shoot RAW.
Remote shutter release: Non-negotiable. Pressing the shutter button by hand introduces micro-vibration into every single frame. A cable release or wireless remote eliminates this entirely and lets you trigger with your eyes on the viewfinder, not the camera body. For this I recommend the Pixel TW-283 — it works across Canon, Nikon, Sony, and Fuji mounts, handles the 2-second intervals typical of foot hyperlapse without issue, and costs a fraction of what a bad sequence costs you in wasted time.
ND filter: Mandatory in any daylight condition. To hit the motion-blur shutter speeds required by the 180° rule — typically 1 to 2 seconds — you will be badly overexposed without filtration. A variable ND gives you flexibility as light changes across a shoot. For managing exposure across shifting conditions — golden hour fading into afternoon sun above the Swabian Alb — I use the PolarPro Vario VND 2–5 Stop 82mm. One filter covers most daylight scenarios without swapping, and the optical quality holds at the apertures I stop down to for hyperlapse.
Memory card: You are shooting RAW across 250–600 frames per clip. Write speed matters — a slow card causes buffer hesitation between steps and breaks your pacing rhythm. The SanDisk Extreme PRO SDXC UHS-II V60 256GB clears fast enough that it has never interrupted a sequence mid-walk.
Optional but Worth Having
Monopod: Adds a third contact point that reduces tilt variation between frames. Not essential once you’ve internalised the technique, but it measurably shortens the learning curve on your first few attempts.
Wide prime or zoom (16–24mm): Wider focal lengths are more forgiving of positional errors between frames. A 50mm or longer lens amplifies every small deviation; a 20mm absorbs it. Start wide and move longer once the technique is locked in.
Camera Settings for Hyperlapse: Lock Everything Before Frame One
Every automatic setting — exposure, white balance, focus — causes frame-to-frame variation that shows up as flicker or inconsistency that stabilisation software cannot correct. Lock the entire camera in manual before you take your first test frame, and do not change anything mid-sequence.
Hyperlapse Camera Settings Reference
| Setting | Value | Why |
|---|---|---|
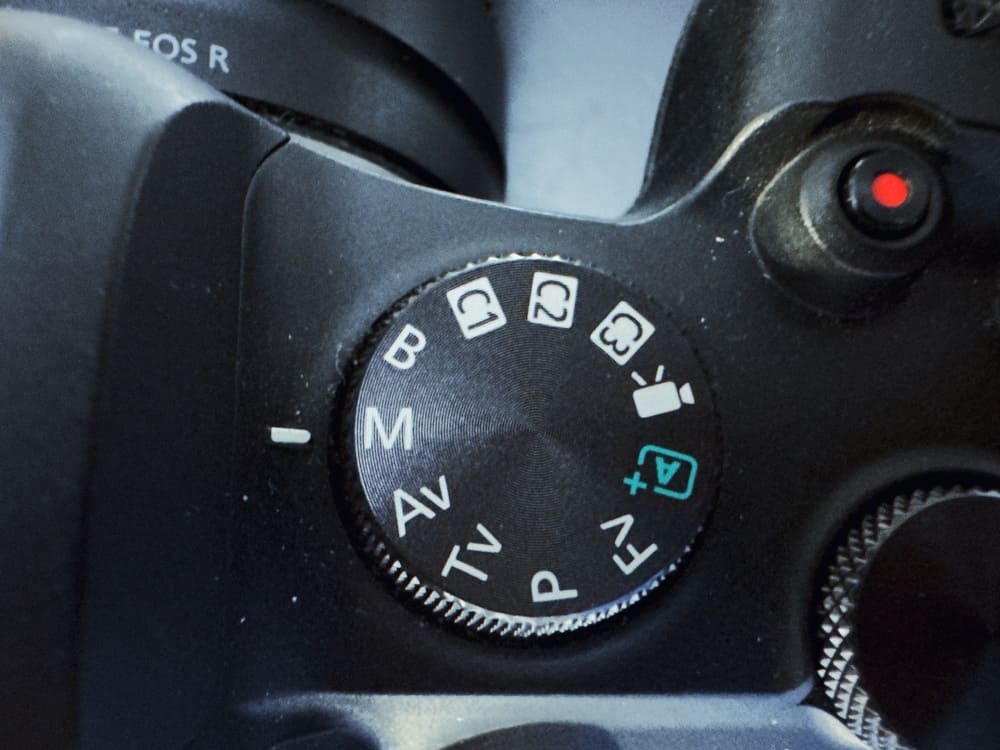
| Mode | M — full manual | Eliminates automatic exposure variation between frames |
| Shutter speed | Interval ÷ 2 (e.g. 1s at 2s interval) | 180° rule — applies motion blur to moving elements |
| Aperture | f/8–f/11 | Maximum depth of field; hyperfocal zone covers your full approach |
| ISO | 100–400 | Lowest clean ISO your sensor allows |
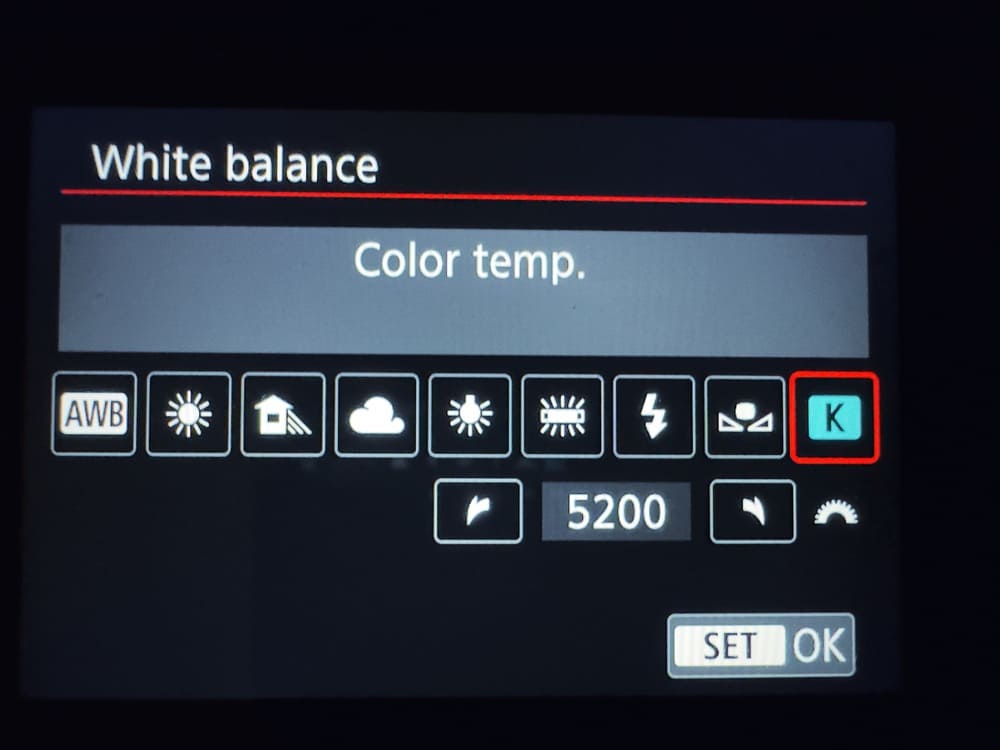
| White balance | Manual, fixed Kelvin | Auto WB shifts between frames and creates colour flicker |
| Focus | Manual, hyperfocal | AF hunting between frames destroys consistency |
| File format | RAW | Non-negotiable — deflicker and grade require the latitude |
| Image stabilisation | OFF (see note) | IBIS/OIS fights deliberate positional changes on most bodies |
⚠️ IBIS note: Turning image stabilisation off is correct for the majority of cameras. However, on certain Sony and OM System mirrorless bodies, specific IBIS modes can improve between-frame consistency on handheld shots. Check your body’s manual before assuming — on most systems off is right, but it is worth verifying for your specific camera.
⚠️ Warning: White balance on Auto is the single most common hyperlapse flicker cause. Even minimal cloud movement between frames shifts the WB reading and produces a colour pulse that runs through the entire sequence and is difficult to remove cleanly in post. Set a fixed Kelvin value before frame one: 5500K for midday sun, 6500–7000K for overcast, 3200K for artificial light.
The 180° Rule for Hyperlapse
Your shutter speed should equal half your trigger interval — this is the hyperlapse application of the 180° rule, and it governs the motion blur applied to any moving element (traffic, clouds, water) in each frame. At a 2-second interval: 1-second shutter. At a 3-second interval: 1.5-second shutter. In daylight, achieving those long exposures requires ND filtration. Use the free ND Filter Calculator to find the exact filter strength for your aperture, ISO, and ambient light — enter your base exposure and it outputs the precise stop value you need.
For a deeper look at ND filter selection across different timelapse and hyperlapse use cases, the Best ND Filters for Timelapse guide covers strength, quality, and format in full.
How to Shoot a Hyperlapse Step by Step: The Field Process
The field technique is a repeating rhythm: step, stop, anchor, trigger. Every element of it is learnable. The problems beginners run into — drifting subjects, inconsistent pacing, jitter in the final clip — each trace back to one specific mistake in this sequence that is easy to fix once you know where to look.
Step 1 — Calculate Your Step Distance Before You Leave Home
This is the most important thing in this article: step size is the only variable you cannot fix in post. Wrong exposure recovers from RAW. Wrong interval adjusts in the edit. Steps that are too large create spatial jumps between frames — the camera appears to teleport rather than glide — and no stabilisation tool treats this as anything other than an unfixable discontinuity. Calculate before you go.
The formula: Step Size = Total Route Distance ÷ (Clip Length in seconds × Frame Rate)
Worked examples:
- 80m route → 20s clip → 24fps: 80 ÷ (20 × 24) = 16.7cm per frame ✓
- 120m route → 15s clip → 25fps: 120 ÷ (15 × 25) = 32cm per frame ✓
- 40m route → 10s clip → 30fps: 40 ÷ (10 × 30) = 13.3cm per frame ✓
The free Hyperlapse Step Calculator runs this formula both ways. Step Size Mode takes a route length and returns how far to move per frame. Route Length Mode flips it: enter a comfortable step size and it tells you exactly how long a route to walk — useful when scouting an unfamiliar location at home before you drive there. Both modes output total shoot time so you can plan against a golden hour window or battery life, and after you calculate, a Before You Shoot checklist populates automatically with your specific values — your exact shutter speed, step distance, and interval setting — to work through before the first frame fires.
The step size sweet spot is 10–50cm per frame. Here’s the full range with field ratings:
| Step Size | Physical Movement | Field Rating |
|---|---|---|
| Under 5cm | Barely perceptible | Chalk or tape at every position — not reliable otherwise |
| 5–10cm | Small shuffle | Ground markers required at every position |
| 10–50cm | Shuffle to confident half-step | ✓ Ideal — aim here |
| 50–100cm | One full walking stride | Test pacing 5× before rolling |
| Over 100cm | Large stride | Avoid — spatial strobing, unfixable in post |
Step 2 — Choose Your Path and Anchor Subject
Walk the route before you shoot it — every time, without exception. You are looking for a distant anchor subject: a building spire, a mountain peak, a rocky summit, a lone tree on a ridgeline. The anchor is the fixed reference point you will re-centre in frame before every single trigger. The Ulm Münster tower works perfectly — so does the silhouette of Hohenzollern Castle against a grey sky, or a Dolomite peak above the treeline.
Distance matters. The anchor should be at least 50–100 metres away, ideally 200 metres or more. The further the anchor, the more forgiving small positional errors become — a 5cm misplacement when you’re 20 metres from the subject is visible; the same misplacement against a peak 300 metres away is invisible. Choose depth.
What if there’s no obvious distant anchor? On paths through dense forest or urban canyons where the sightlines are short, use a structural element at the vanishing point — a gap between buildings, the end of an avenue of trees, a bend in a road. The principle is the same: find the furthest stable point the lens can resolve and lock to it. If you genuinely cannot find an anchor, the location will not produce a clean hyperlapse — scout a different path.
What if you lose the anchor mid-sequence? Stop. Do not guess and keep walking. Walk back to your last confirmed frame position, re-establish the anchor at its correct position in the frame, and continue from there. Three recovery frames are better than 50 drifted ones.
Step 3 — Mark Your Ground Positions
For step sizes under 30cm, physical markers at every position are not optional — they are the difference between a clean sequence and one that jitters. Use chalk on pavement, small flat stones on trails, or strips of gaffer tape on hard surfaces. For step sizes between 30–70cm, experienced shooters can use muscle memory — but only after walking the distance five times before rolling to internalise the pace. For any step size, shoot a 15-frame test sequence first, play it back on the camera LCD at a quick scrub, and confirm smoothness before committing to the full route.
Step 4 — The Shooting Rhythm
This is the core loop, repeated for every single frame:
- Take one step forward — heel-to-toe, your calculated distance
- Plant both feet completely still
- Raise the camera and re-centre the anchor at its fixed position in the frame
- Trigger via remote release — never touch the camera body
- Confirm the frame fired, step forward again
The pause after stepping is where most beginners rush. Your body needs to stop moving entirely before you trigger — any residual sway shows up as tilt between frames that stabilisation software has to work harder to remove. One full breath between step and trigger is enough.
Step 5 — Frame Count
Frames needed = final clip length (seconds) × output frame rate. For a 10-second clip at 25fps: 250 frames. Always shoot at least 20% more than you calculate — stabilisation crops in, and you’ll want cutting room at both ends. For the full logic behind frame count and interval planning, the Timelapse Interval Guide covers it in depth.
Editing Your Hyperlapse: Deflicker, Stabilise, Deliver
Raw hyperlapse footage is always unstable and often flickering. This is not a failure — it is the expected starting point. Post-processing is where the sequence transforms from a bumpy image stack into the smooth cinematic move you planned in the field.
Step 1 — Grade and Deflicker in LRTimelapse
Import your RAW sequence into LRTimelapse. Apply your grade via the Lightroom round-trip — adjust exposure, white balance, contrast, and colour as you would any RAW file, but only on the keyframes LRTimelapse designates. The software interpolates all adjustments across the sequence.
Then run the deflicker function. What you’re looking for in the luminance curve is a line that should be smooth but instead shows small, rapid spikes — each spike is a frame where the aperture blades settled at a microscopically different position, or ambient light shifted by a fraction. LRTimelapse analyses the actual luminance of each frame and builds a correction curve that smooths those spikes before export. If you shot with auto white balance despite the advice in this article, the Holy Grail wizard handles colour drift the same way — but it is a recovery tool, not a substitute for shooting correctly.
Export as a JPEG or 16-bit TIFF sequence. Use TIFF if you want further grading headroom in your NLE. Best For: all serious hyperlapse and timelapse post-production — no other software matches LRTimelapse for deflicker quality and RAW workflow integration.
For a complete breakdown of all the ways flicker manifests and the full prevention-and-fix workflow, the Timelapse Flicker Fix guide covers both capture-stage prevention and post-processing solutions in detail.
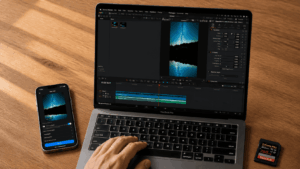
Step 2 — Stabilise in Premiere Pro or DaVinci Resolve
Import your exported image sequence into your NLE at the correct frame rate. In Premiere Pro, apply Warp Stabilizer with these starting settings:
- Stabilisation: Smooth Motion
- Smoothness: 50–70%
- Method: Subspace Warp for wide-angle footage (it warps the frame independently across zones, handling the perspective shifts in a walking hyperlapse far better than Perspective mode, which tries to apply a single transform to the whole frame and often fails at the edges)
- Framing: Stabilise, Crop, Auto-scale
In DaVinci Resolve, the Inspector stabiliser works well with Smooth Camera mode at similar smoothness values. Give the analyser time to complete a full pass before judging the result.
💡 Pro Tip: Shoot wider than your intended output. Warp Stabilizer crops in by roughly 10–15% as it works. If you shoot at 20mm and want a 24mm-equivalent output, you’ll land around 23mm — acceptable. If you shoot at 35mm intending a 35mm output, the crop will be visible and the field of view will be wrong.
Step 3 — Speed Check and Export
At 250 frames rendered at 25fps, you have exactly 10 seconds at natural playback. The speed-up effect in a foot hyperlapse is baked in by the step interval at capture — you are not speed-ramping the NLE timeline. Export at 4K UHD (3840×2160) for stock, 1080p for social. If you’re selling the clip, the free Stock Footage Metadata Generator handles keyword generation, title formatting, and description fields for Pond5, Adobe Stock, and Shutterstock in one pass.
Read Next on Aero Timelapse
- The Ultimate Timelapse Photography & Videography Guide — the complete guide to shooting amazing Timelapses
- 7 Timelapse Mistakes Beginners Make — most apply directly to hyperlapse; worth reading before your first shoot
- Cloud Timelapse Photography: How to Capture Dramatic Moving Skies — combine moving cloud with a walking foreground for maximum cinematic effect
- Best ND Filters for Timelapse — full strength and quality guide if you’re unsure which filter to buy
- Free Hyperlapse Step Calculator — calculate step distance and route length before every shoot
How to Shoot a Hyperlapse - Frequently Asked Questions
What is the best camera setting for a hyperlapse?
Set your camera to full manual mode — shutter speed, aperture, ISO, white balance, and focus all locked manually. Use a shutter speed equal to half your trigger interval (the 180° rule): at a 2-second interval, use a 1-second shutter. Set aperture at f/8–f/11 for maximum depth of field, ISO at 100–400, white balance to a fixed Kelvin value (5500K for midday sun, 6500K for overcast), and focus to the hyperfocal distance for your lens. Shoot RAW — it is not optional if you want to deflicker and grade the sequence properly in post.
How do I calculate hyperlapse step size for my route?
The formula is: Step Size = Total Route Distance ÷ (Clip Length in seconds × Frame Rate). For a 60-metre route shooting a 15-second clip at 30fps: 60 ÷ (15 × 30) = 13.3cm per frame. To solve in reverse — you know the step you want, need the route length — use Route Length Mode in the free Hyperlapse Step Calculator: a 25cm step for a 15-second clip at 24fps requires a 90-metre route. The calculator also outputs total shoot time and generates a Before You Shoot checklist populated with your specific values.
What is the ideal step size for a walking hyperlapse?
The ideal range is 10–50cm per frame. Steps in this range are physically reproducible without ground markers, produce smooth motion that stabilisation software handles cleanly, and work across a range of focal lengths. Steps over 1 metre create visible spatial jumps between frames — the camera appears to teleport — that cannot be corrected in post. Steps under 5cm are too small to reproduce accurately without chalk or tape markers at every single position.
Do I need an ND filter for hyperlapse?
In any reasonable daylight condition, yes. To achieve a 1–2 second shutter speed at f/8–f/11 in bright sun, you typically need 6–10 stops of ND filtration. A variable ND is the most practical choice since the required strength shifts as light changes across the shoot. For the exact filter stop for your specific scene, aperture, and ISO, use the free ND Filter Calculator. I use the PolarPro Vario VND 2–5 Stop 82mm for most daylight hyperlapse work — it covers the majority of conditions without swapping filters mid-sequence.
How do I stabilise a handheld hyperlapse in post?
Grade and deflicker first in LRTimelapse, then export as a still image sequence. Import into Premiere Pro and apply Warp Stabilizer set to Smooth Motion, 50–70% smoothness, Subspace Warp method. In DaVinci Resolve, use the Inspector stabiliser with Smooth Camera mode at similar settings. Both tools need 10–30 seconds to analyse the full sequence. Allow 10–15% for the automatic crop that comes with stabilisation — shoot wider than your intended output frame to compensate.
How long does it take to shoot a foot hyperlapse?
For 250 frames at a 60cm step, you cover roughly 150 metres. With setup, test frames, and a deliberate shooting pace, budget 45–75 minutes for the shoot. Post-processing — RAW grading, deflicker in LRTimelapse, stabilisation in Premiere or Resolve — adds 30–60 minutes depending on sequence complexity. Total realistic time commitment for a polished 10-second clip: 2–3 hours start to finish on your first attempt, 90 minutes once the workflow is familiar.
Can I sell foot hyperlapse footage as stock?
Yes — walking hyperlapses through cities, historic sites, alpine trails, and coastal paths sell consistently across Pond5, Adobe Stock, and Shutterstock. Buyers use them for travel campaigns, destination tourism, and documentary inserts. Shoot at 4K UHD minimum, deliver as a ProRes or H.264 clip with clean metadata. The free Stock Footage Metadata Generator handles keyword generation and description fields for all three platforms. For the full stock footage strategy and platform breakdown, see Make Money Selling Timelapse Stock Footage.
Do One Thing Right Now
Before you go out and shoot: open the Hyperlapse Step Calculator, enter your route length and target clip specs, and confirm your step distance is in the 10–50cm range. That calculation — sixty seconds at a desk — is the single highest-leverage action you can take before a foot hyperlapse shoot. Every other mistake in this process is fixable. The wrong step size is not. Get that right, lock every camera setting to manual, mark your ground positions, and the rest of the technique follows naturally. The gap between a first attempt and something genuinely publishable is usually two or three sessions — not talent, just repetition.

Dipon is a drone and timelapse cinematographer based in Ulm, Germany, with over 15 years of experience turning real spaces and projects into cinematic visuals. With a background in digital marketing, every shot is planned with a clear purpose — where it will appear, who will see it, and what it should help them decide.
You May Also Like

Best Time to Fly a Drone for Photography
Timelapse for Social Media: Instagram, YouTube & TikTok Settings
Holy Grail Timelapse: Complete Day-to-Night Settings & Workflow
How to Plan Storage for Drone Footage — The Complete Pre-Flight Guide
How to Make a Star Trail Timelapse: From Camera Settings to Online Stacking
Timelapse Flicker Fix: Causes, Prevention & Post-Processing Solutions

Cloud Timelapse Photography: How to Capture Dramatic Moving Skies

Milky Way Timelapse: Settings, Gear & Locations
The Complete Drone Videography Guide (2026)
Best ND Filters for Timelapse: Strength Guide & Picks

Stock Footage Metadata for Timelapse Contributors: How to Title, Tag & Describe Your Clips
Manual Drone Camera Settings: ISO, Shutter, Aperture Explained
Need help capturing professional timelapse for your next project but not ready to invest in the gear yet? Check out our Timelapse Video Production service to see how Aero Timelapse Studio can help elevate your production.