Timelapse for Social Media: Instagram, YouTube & TikTok Settings
Dipon | May 2026
You posted it. You waited. Three people liked it, one of them was your mum, and the clouds that looked absolutely incredible on your camera screen look like a blurry, washed-out mess on your phone. You’re already wondering if you need a better camera. You don’t. The footage is fine — the problem is that you handed a perfect clip to a platform that re-compressed it into oblivion, in the wrong aspect ratio, at the wrong frame rate, with no colour grade to survive the process. That is not a shooting failure. It is a settings and workflow failure, and it is completely fixable.
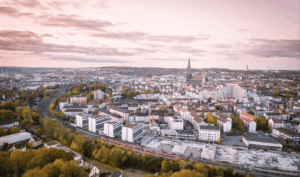
I’ve shot timelapse across the Swabian Alps, Hohenzollern, and through a full Ulm construction project from groundwork to facade — and the difference between a clip that performs and one that disappears is almost never the location. It is always the last 20 minutes before upload. In this guide you’ll get the exact resolution, aspect ratio, frame rate, export codec, and colour grade workflow for Instagram Reels, TikTok, and YouTube — for your timelapse for social media to land the way it looked in the field.
Quick Answer
The Short Version: For Instagram Reels, TikTok, and YouTube Shorts, shoot 4K in a 9:16 crop or reframe in post, export H.264 or H.265 at 1080×1920, 30 fps, 15–30 seconds. For standard YouTube, export H.264 1920×1080 at 24 or 30 fps. Always use a 2–8 s interval for moving clouds or city scenes, and apply a gentle S-curve plus colour grade before export — platforms re-compress your video, so upload the cleanest, highest-bitrate file you can. If your clip looks dull after upload, the fix is almost always colour grade and export codec, not a reshoot.
Affiliate Disclosure
This guide contains affiliate links. Purchases made through these links support Aero Timelapse Studio at no additional cost to you. I only recommend products I personally use or carefully research. As an Amazon Associate I earn from qualifying purchases.
Why Timelapse Looks Bad on Social Media
Platform Re-Compression Is the Real Enemy
Every platform — Instagram, TikTok, YouTube — re-encodes your video the moment you upload it. Instagram can reduce a 50 Mbps clip to under 5 Mbps. TikTok is similarly aggressive. The result: soft edges, crushed shadows, colour shifts, and banding in skies. The fix is not to upload lower-quality video — it is the opposite. Upload the cleanest, highest-bitrate H.264 or H.265 file you can produce, so the platform has more data to work with when it compresses.
The Aspect Ratio Trap
A standard timelapse shot in 16:9 (landscape) will be letterboxed with black bars on Instagram Reels and TikTok, which are 9:16 portrait formats. It will look like a tiny stamp in a black frame — immediately less engaging. Shoot 4K so you have enough resolution to reframe to 9:16 in post without losing sharpness. A 4K sensor (3840×2160) gives you more than enough pixels to crop to 1080×1920 and still deliver a sharp result.
Frame Rate Matters More Than You Think
Most social platforms display video at 30 fps. If you export a 24 fps timelapse, some platforms will subtly convert it and introduce judder. For Reels and TikTok, export at 30 fps. For YouTube, 24 fps is accepted and looks cinematic for landscape-oriented timelapses. For hyperlapse or anything with fast motion, 30 fps keeps movement smooth.
💡 Pro Tip: Check your timelapse on a mobile screen before you post — not on a desktop monitor. Social media content is consumed 90% on phones. What looks sharp on a 27-inch monitor can look compressed and blurry on a 6-inch screen.
Platform-by-Platform Timelapse Settings
Instagram Timelapse Settings
Instagram Reels & Stories
Instagram Reels is currently the highest-reach format on the platform and the right home for most timelapse clips.
| Setting | Recommended Value |
|---|---|
| Resolution | 1080 × 1920 (9:16) |
| Frame Rate | 30 fps |
| Max Duration | 90 seconds (15–30 s optimal for reach) |
| Codec | H.264, High Profile |
| Bitrate | 8–15 Mbps (upload highest you have) |
| Audio | AAC, 128 kbps minimum |
| Colour Space | sRGB (Rec.709) |
Upload as an .mp4 file. Instagram will re-compress regardless, but starting with a high-bitrate source preserves far more detail in the final output. Keep your timelapse between 15 and 30 seconds — the algorithm rewards completion rate, and shorter clips are watched to the end more often.
Instagram Feed (Square & Portrait)
For feed posts, 4:5 portrait (1080×1350) gives you the largest possible screen real estate in the feed. Square (1:1, 1080×1080) still works but takes up less space. Landscape (1.91:1) is the weakest option for mobile engagement. Use 4:5 wherever possible.
TikTok Timelapse Settings
TikTok re-compresses more aggressively than Instagram, so source quality matters even more.
| Setting | Recommended Value |
|---|---|
| Resolution | 1080 × 1920 (9:16) |
| Frame Rate | 30 fps |
| Max Duration | Up to 10 minutes (15–60 s performs best for timelapse) |
| Codec | H.264 or H.265 |
| Bitrate | 10–20 Mbps (upload highest available) |
| Colour Space | Rec.709 / sRGB |
⚠️ Warning: TikTok will strip colour grading from heavily-processed LOG footage if it detects it as out-of-gamut. Always convert from LOG to Rec.709 before export. Never upload a flat or LOG-encoded clip directly.
YouTube Timelapse Settings
YouTube handles quality better than Instagram or TikTok, but it still re-encodes everything. The key distinction is between YouTube Shorts (9:16, up to 60 seconds) and standard YouTube uploads (16:9 or 4:5).
| Setting | Shorts | Standard Upload |
|---|---|---|
| Resolution | 1080 × 1920 | 3840 × 2160 (4K) or 1920 × 1080 |
| Frame Rate | 30 fps | 24 or 30 fps |
| Codec | H.264 | H.264 or H.265 |
| Bitrate | 10–20 Mbps | 35–68 Mbps (4K) / 8–12 Mbps (1080) |
| Max Duration | 60 seconds | No limit |
| Colour Space | Rec.709 | Rec.709 (or HDR with HLG/PQ for HDR‑enabled channels) |
For standard YouTube, uploading in 4K is worth it even if your timelapse was shot in 4K and edited at 1080p — YouTube assigns a higher bitrate to 4K uploads, which means your 1080p video will actually look sharper when embedded in a 4K container. This is a legitimate trick used by professional creators.
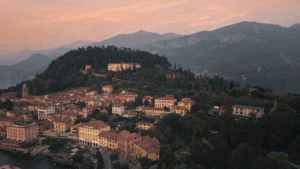
💡 Pro Tip: For a standard YouTube timelapse video (not Shorts), 24 fps gives a more cinematic, filmic feel — especially for landscape and nature timelapses shot in places like the Dolomites or around Lake Como. Use 30 fps for city and construction timelapses where sharp motion is the point.
Shooting Settings for Social-Ready Timelapse
The right platform settings mean nothing if the footage itself is wrong. These are the in-camera and intervalometer settings that produce social-ready timelapse clips.
Interval Settings by Subject
The interval is how often your camera fires a shot. The shorter the interval, the faster the motion in the final clip. Here’s what works for the most common social media subjects:
| Subject | Recommended Interval | Notes |
|---|---|---|
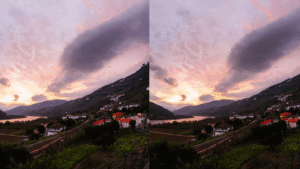
| Fast‑moving clouds | 2–4 s | Ideal for dramatic sky clips |
| Standard clouds / fog | 5–8 s | Swabian Alps fog, morning mist |
| Golden hour / sunset | 8–15 s | Slow colour change |
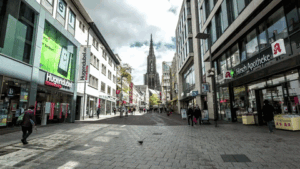
| City traffic | 3–5 s | Keeps cars visible as light trails |
| Construction / progress | 30–60 s | Weekly or daily sessions |
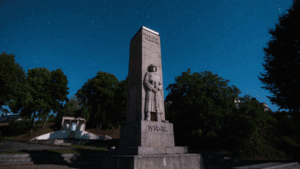
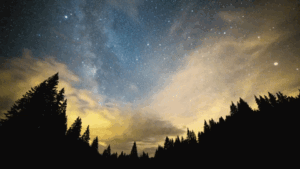
| Star trails | 20–30 s | Needs dark sky, fast lens |
For a 30-second social clip at 30 fps, you need 900 frames. At a 5-second interval, that means 75 minutes of shooting. Use the Timelapse Interval Calculator to plan your session precisely before you go out — especially important for golden hour when light windows are short.
Exposure Settings
For most social media timelapse, you want the 180-degree shutter rule: shutter speed = 2× your frame rate target. If you’re exporting at 30 fps, use 1/60s. This creates natural motion blur between frames and prevents the strobing, jittery look common in beginner timelapses.
- Clouds and landscapes in daylight: 1/60s, f/8–f/11, ISO 100–200 — use ND filters to achieve this in bright conditions
- Golden hour / blue hour: 1/60s, f/4–f/5.6, ISO 400–1600
- Night and star timelapse: 15–25s exposures, f/2.8 or wider, ISO 1600–6400
For ND filter selection at your specific shooting conditions, use the ND Filter Calculator — it takes the guesswork out of filter stacking entirely.
Resolution and Format
Always shoot the highest resolution your camera supports — ideally 4K (3840×2160) or higher. This gives you the freedom to reframe for any aspect ratio in post. Shooting in a locked 16:9 HD frame means you cannot reframe for Reels or TikTok without visible quality loss.
If your camera supports RAW timelapse (like many Sony, Canon R-series, and Nikon Z-series bodies), use it — RAW gives you vastly more latitude in post for colour grading before export to the compressed delivery formats each platform requires.
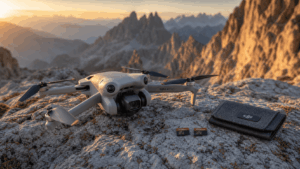
Gear You Need for Social-Ready Timelapse
Stability: The Non-Negotiable
A single frame of camera shake ruins an entire timelapse sequence. For any locked-off social timelapse — city skylines, cloud movement, construction — you need a tripod with zero flex and a lever-lock centre column.
Manfrotto MT055XPRO3 Aluminium Tripod
For locked-off timelapse shoots, I recommend the Manfrotto MT055XPRO3 — the 90° centre column is a game-changer for low-angle cloud timelapses, and the lever-lock legs set up and break down fast in changing light. Best For: Landscape & cloud timelapse hobbyists who need rock-solid stability on uneven terrain.
Motion: Adding Interest to Social Clips
Static timelapses perform well on social media, but clips with a slow, smooth camera movement — a gentle pan or a linear slide — stop the scroll more reliably than anything static. A motorised slider adds this without complex rig setups.
GVM Automated Motorised Slider 120 cm
For adding horizontal motion to your timelapse, the GVM Automated Motorised Slider 120 cm gives you a full metre of travel with programmable speed — perfect for slow pans across city panoramas or mountain ridgelines. Pair it with the interval calculator to sync slider speed with your shooting interval. Best For: Timelapse creators who want cinematic movement without a full motion control system.
Storage: Don't Lose a Three-Hour Session
A 4K RAW timelapse session over 90 minutes can generate 40–80 GB of data. Slow or unreliable cards cause write errors mid-sequence — you lose everything.
SanDisk Extreme PRO SDXC UHS-II V60 256 GB
For 4K timelapse work, I use the SanDisk Extreme PRO SDXC UHS-II V60 256 GB — the V60 rating guarantees minimum 60 MB/s write speed, which handles RAW bursts without dropped frames. 256 GB comfortably covers even long-session construction or star timelapse work. Best For: Hobbyists and creators shooting 4K RAW timelapse.
Post-Processing Software
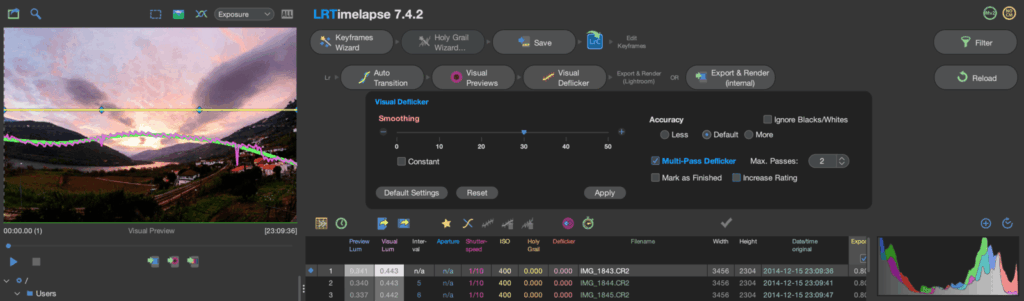
LRTimelapse
For processing RAW timelapse sequences, deflickering, and colour grading before export to social platforms, LRTimelapse is the industry standard. It handles Holy Grail day-to-night transitions, automatic deflickering, and integrates directly with Lightroom or Adobe Camera Raw. Nothing else comes close for professional-quality social output. Best For: Anyone shooting RAW timelapse who needs professional deflickering and grading before platform export.
For more on flicker — one of the most common problems that destroys social timelapse clips — read: Timelapse Flicker Fix: Causes, Prevention & Post-Processing.
Editing & Export Workflow for Social Media
Most timelapse clips fail on social at this exact stage — not in the field. The shoot was fine. The export killed it. Here is the workflow I use, step by step, from a folder of RAW frames to a clip that survives platform re-compression without losing its soul.
Step 1: Deflicker First — Everything Else Waits
Before you even think about music, open your sequence in LRTimelapse and run the deflicker pass. When I exported a 90-minute golden-hour sequence over Ulm without deflickering first, the sky pulsed visibly on every third frame — Instagram’s re-compression turned a subtle flicker into something that looked like a broken light fitting. Fix the flicker, then grade. Never the other way around.
Step 2: Grade for the Platform, Not for Your Monitor
This is where most beginners go wrong twice. First: they grade on a calibrated desktop monitor, and the result looks flat on a phone. Second: they apply a heavy cinematic LUT that looks stunning at full quality and turns into colour mud after re-compression. The right approach — lift your shadows by roughly +15 to +20 (platforms crush blacks on re-encode), boost saturation slightly rather than using a heavy grade, and add a gentle S-curve for contrast. Your goal is a clip that looks a little punchy on your desktop, because re-compression will knock it back.
Step 3: Reframe and Add Motion
Import your deflickered, graded sequence into Premiere, DaVinci Resolve, or CapCut at 30 fps. If you shot 16:9 and are targeting Reels or TikTok, create a 1080×1920 sequence and position your 4K frame to show the best part of the shot. Here’s the move most people miss: add a slow position keyframe drift across the clip — say, 40 pixels of horizontal movement over 20 seconds. It looks like a slow pan, it adds life to what would otherwise be a static frame, and it costs you nothing in post. On Reels, clips with any camera movement consistently outperform locked-off shots.
Step 4: Export Settings (Don't Guess Here)
These are the exact values. Do not approximate.
- Format: H.264 (H.265 if file size is a concern — both upload fine)
- Bitrate: VBR 2-pass, target 15 Mbps, maximum 20 Mbps
- Resolution: 1080×1920 for Reels/TikTok/Shorts — 1920×1080 for standard YouTube
- Frame rate: 30 fps for all short-form; 24 fps is fine for standard YouTube
- Colour space: Rec.709 — never upload LOG or a flat profile directly
- Audio: Include a silent AAC 128 kbps audio track even with no sound — platforms handle audio-less files inconsistently and will sometimes flag them during processing
Step 5: Upload at the Right Moment
The algorithm treats the first hour of a post as a sampling window — it decides how widely to push your clip based on early engagement. For European-based creators, Tuesday through Thursday between 18:00 and 21:00 CET consistently outperforms weekend posting for timelapse content. Post when your audience is actively scrolling, not when you happen to finish the export.
⚠️ Warning: Never bake unlicensed music into your export file. Instagram, TikTok, and YouTube all run Content ID on upload and will mute or block clips containing unlicensed audio — sometimes retroactively, weeks after posting. Use Epidemic Sound or Artlist for pre-cleared tracks, or add music using the platform’s native music tool after upload. On YouTube, this also protects your monetisation rights.
For the complete foundational shooting workflow — intervals, exposure maths, ND filter selection — the Ultimate Timelapse Photography Tutorial covers everything from first frame to final clip.
Read Next on Aero Timelapse
- The Ultimate Timelapse Photography & Videography Guide — the complete resource covering every aspect of timelapse from beginner to professional
- 7 Timelapse Mistakes Beginners Make — avoid the most common errors before they ruin your next session
- Cloud Timelapse Photography: How to Capture Dramatic Moving Skies — clouds are the most popular timelapse subject on social media; here’s how to shoot them well
- Holy Grail Timelapse: Complete Day-to-Night Settings & Workflow — the most dramatic timelapse type, and one of the best-performing on YouTube
- How to Shoot a Hyperlapse on Foot (discovered on-site) — hyperlapse is one of the most viral formats on Instagram Reels and TikTok
- 🔧 Timelapse Interval Calculator — plan exactly how long to shoot before you leave the house
FAQ - Timelapse for Social Media
What is the best timelapse length for Instagram Reels?
15 to 30 seconds is the optimal length for Instagram Reels. Completion rate is one of the key signals the Reels algorithm uses to decide how widely to distribute a clip — shorter videos are watched to the end more often, which increases reach. A 30-second Reels timelapse with strong visual movement and a colour grade consistently outperforms longer clips.
Should I shoot timelapse in 4K for social media if I'm only uploading 1080p?
Yes — always shoot in the highest resolution your camera supports, even for 1080p delivery. Shooting 4K gives you the flexibility to reframe from 16:9 landscape to 9:16 portrait (for Reels/TikTok) without quality loss, and to add virtual pan or zoom motion in post. Downsampling from 4K to 1080p also produces a sharper final image than shooting native 1080p.
Why does my timelapse look soft or blurry after uploading to TikTok?
TikTok applies aggressive re-compression on upload. The fix is to upload a high-bitrate source file — target 10–20 Mbps H.264 — so the platform has more data to work with during its re-encode. Also check that you exported in Rec.709 colour space and at exactly 1080×1920 resolution; any non-native resolution forces an additional resize step that costs sharpness.
What frame rate should I use for timelapse on social media?
Export at 30 fps for Instagram Reels, TikTok, and YouTube Shorts. This matches the native display rate of most platforms and prevents judder from frame-rate conversion. For standard YouTube landscape videos, 24 fps is accepted and gives a more cinematic feel — particularly suited to nature and landscape timelapses. Avoid 25 fps for social platforms (it’s a PAL broadcast standard, not a social media standard).
Do I need special software to edit timelapse for social media?
For basic editing, free tools like DaVinci Resolve or CapCut handle sequence assembly and export correctly. For professional results — especially if you shoot RAW and need deflickering — LRTimelapse combined with Lightroom is the industry-standard workflow. It handles Holy Grail transitions and automatic flicker removal that simpler tools cannot, producing significantly cleaner output after platform re-compression.
What interval should I use for a timelapse on Instagram Reels?
It depends entirely on your subject. For dramatic cloud movement — the most popular timelapse subject on Reels — use a 3–5 second interval. For slower fog rolling over valleys (like the Aach fog timelapse common in the Swabian Alps), use 6–10 seconds. For city traffic at night, 3–4 seconds keeps car light trails distinct and fluid. Use the Timelapse Interval Calculator to calculate exactly how long to shoot for any target clip length and interval combination.
Can I post the same timelapse on Instagram, TikTok, and YouTube?
Yes — but export a separate file for each platform rather than re-uploading the same file everywhere. The platform specs are slightly different (bitrate targets, optimal length), and uploading a platform-optimised file always produces better results than one generic export. The actual video content can be identical; only the export container and length may differ. If you’re also selling your footage, see Make Money Selling Timelapse Stock Footage for how to separate the social and licensing workflows.
Conclusion
You don’t need new gear, a new location, or a complete workflow rebuild. Right now, pick your best existing timelapse clip and run it through this process: reframe to 9:16 if needed, apply a colour grade, export H.264 at 1080×1920, 30 fps, 10–15 Mbps, and upload. That single change will make more difference to how your timelapse for social media performs than anything else you could do today. For the full technical foundation — intervals, exposures, gear — start with The Ultimate Timelapse Photography & Videography Guide. If you’d rather hand it to a professional, we’re here.

Dipon is a drone and timelapse cinematographer based in Ulm, Germany, with over 15 years of experience turning real spaces and projects into cinematic visuals. With a background in digital marketing, every shot is planned with a clear purpose — where it will appear, who will see it, and what it should help them decide.
You May Also Like

Best Timelapse Cameras Under €1,000 in 2026
Best Time to Fly a Drone for Photography

Holy Grail Timelapse: Complete Day-to-Night Settings & Workflow
How to Plan Storage for Drone Footage — The Complete Pre-Flight Guide
How to Make a Star Trail Timelapse: From Camera Settings to Online Stacking
How to Shoot a Hyperlapse on Foot: Step-by-Step Guide
Timelapse Flicker Fix: Causes, Prevention & Post-Processing Solutions

Cloud Timelapse Photography: How to Capture Dramatic Moving Skies
Milky Way Timelapse: Settings, Gear & Locations
The Complete Drone Videography Guide (2026)
Best ND Filters for Timelapse: Strength Guide & Picks

Stock Footage Metadata for Timelapse Contributors: How to Title, Tag & Describe Your Clips
Need help capturing professional timelapse for your next project but not ready to invest in the gear yet? Check out our Timelapse Video Production service to see how Aero Timelapse Studio can help elevate your production.