Table of Contents
Affiliate Disclosure
This guide contains affiliate links. Purchases made through these links support Aero Timelapse Studio at no additional cost to you. I only recommend products I personally use or carefully research. As an Amazon Associate I earn from qualifying purchases.
You set up your camera, shot 800 frames, came home excited — and the footage looked like a screensaver. Flat sky. Barely any movement. Nothing like those cinematic rolling-cloud videos you see everywhere.
Cloud timelapse photography has more variables than almost any other timelapse subject. The interval, shutter speed, filter choice, and time of day all compound on each other. One setting off, and the whole shoot collapses.
By the end of this guide, you’ll know exactly which interval to use for different cloud speeds, how to expose for silky or sharp motion, which three pieces of gear actually matter, and how to process a cloud sequence that looks polished and professional. I’ve shot cloud timelapses from Hohenzollern Castle to the Dolomites and across Europe and Asia — this is the framework I use every time.
Quick Answer
Cloud timelapse photography means shooting a sequence of still images at timed intervals that, when played back as video, compress hours of cloud movement into seconds of dramatic motion. For standard cumulus conditions, use a 3–5 second interval, a shutter speed of 1–2 seconds, and an ND filter to hold that exposure in daylight. Shoot in RAW, lock ISO at 100, and keep everything — exposure, white balance, focus — fully manual from first frame to last. In post, run your sequence through LR Timelapse to remove flicker, then export at 4K for a clean final clip.
Why Your Cloud Timelapse Looks Flat (And How to Fix It)
The #1 reason beginners get boring cloud footage is wrong interval timing. Not bad gear. Not bad locations. Just intervals that don’t match the speed of the sky.
Fast-moving storm clouds shot at a 30-second interval look almost stationary on playback. Slow drifting cumulus at a 2-second interval look choppy and jittery. The interval is everything.
The Two Mistakes That Kill Cloud Footage
Mistake 1 — Wrong interval: The interval must match the speed of your specific clouds on that specific day. There’s no single universal setting.
Mistake 2 — Auto exposure: As clouds pass the sun, the camera compensates — and your footage flickers badly in post. Manual mode only, locked from the first frame to the last.
Fix those two things and 80% of your cloud timelapse problems disappear immediately.
💡 Pro Tip: Before committing to a full shoot, fire 60–100 test frames and play them back in-camera as a slideshow. Smooth and continuous? Your interval is right. Choppy or barely moving? Adjust now, not after two hours of wasted shooting.
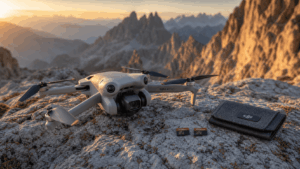
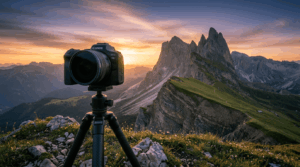
Gear That Makes the Difference
You don’t need €5,000 of equipment to shoot great cloud timelapse. You need three things done right: a stable tripod, an ND filter for daylight, and a reliable interval timer.
Tripod: Stability Is Non-Negotiable
Wind and interesting cloud formations almost always arrive together. A lightweight travel tripod flexes in wind gusts — and every flex shows up as a jarring frame shift in your sequence.
For outdoor timelapse in variable conditions, I recommend the Manfrotto MT055XPRO3 Aluminium Tripod. It’s what I use for all ground-level timelapse work across Southern Germany and the Alps. The centre column locks solid and the wide leg spread handles uneven terrain without compromise.
Best For: Hobbyists and timelapse creators shooting outdoor cloud and landscape timelapses in exposed or windy locations
Price range: ~€160–€190
⚠️ Warning: If your tripod weighs under 1.5 kg, hang your camera bag from the centre column hook to add ballast on windy ridgelines. It makes a real difference.
ND Filters: Essential for Daylight Cloud Work
Without an ND filter in daylight, you’re forced into fast shutter speeds (1/500s or faster). Those short exposures produce sharp, choppy cloud frames — not the smooth, cinematic motion you’re after.
For variable daylight, a 6–10 stop ND filter lets you use 1–4 second exposures even at midday. The PolarPro Vario VND 6–9 Stop Mist Edition II handles the full midday range without the colour cast or vignetting you get from cheaper variable filters.
Best For: Timelapse creators shooting cloud motion in bright daylight who want silky, smooth playback
Price range: ~€180–€230
⚠️ Warning: Cheap variable ND filters shift colour cast and vignetting as you rotate them — creating flicker that’s even harder to fix than exposure flicker. Buy quality once.
Interval Timer: Don't Let Your Camera Decide When to Shoot
An intervalometer is what actually fires the shutter on a timed schedule — it’s the engine of every timelapse sequence. Without one, there is no timelapse.
Most modern mirrorless and DSLR cameras have a built-in intervalometer in the menu. If yours does, use it — it works perfectly and costs nothing extra. But if your camera doesn’t have one (older DSLRs often don’t), or if you want a dedicated physical control with a clear display and the ability to set long exposures beyond 30 seconds (Bulb mode), a wired remote intervalometer is the tool you need.
For that use case, I recommend the Pixel TW-283 — it supports Bulb mode for exposures longer than 30 seconds, has a large backlit display for night and dawn shoots, and covers the widest range of Canon, Nikon, Sony, and Fuji bodies of any remote in this price range.
Best For: Shooters whose camera lacks a built-in intervalometer, or anyone shooting long exposures beyond 30 seconds (fog, low-light cloud sequences)
Price: ~€20–€40
Motion Slider: The Upgrade That Makes Cloud Footage Cinematic
A static cloud timelapse works. A cloud timelapse with a slow lateral camera move becomes something you can’t look away from. The added motion turns a weather clip into a proper cinematic shot — and it’s one of the clearest differences between footage that sells once and footage that sells repeatedly on stock platforms.
An automated motorised slider handles this by moving the camera a few centimetres per minute across a track while your intervalometer fires the shutter. The movement is almost imperceptible to the eye in real time — but compressed into 10 seconds of timelapse, it becomes a deliberate, fluid pan that gives your footage a production quality most hobbyists never achieve.
For this, I recommend the GVM 120cm Automated Slider. The 120cm rail gives enough travel for a meaningful move across a full cloud sequence, the speed control is smooth enough for timelapse intervals as short as 2 seconds, and it handles payloads up to 8kg — so it works with a full mirrorless kit and a heavy ND filter without drift issues.
Best For: Timelapse creators and stock sellers who want to add professional motion to cloud and landscape sequences without a full motion-control rig
Price: ~€280–€350
Cloud Timelapse Settings: The Numbers That Work
These aren’t generic starting points. They’re the specific numbers that consistently produce commercial-quality cloud footage at Aero Timelapse Studio.
Interval by Cloud Type
| Cloud Type | Interval | Shutter Speed | Notes |
|---|---|---|---|
| Fast storm / cumulonimbus | 1–2 sec | 1/500s–1/1000s | Sharp, intense; shoot before rain |
| Standard cumulus (typical day) | 3–5 sec | 1–2 sec | Most common daytime condition |
| Slow stratus / overcast | 8–15 sec | 2–4 sec | Needs 30–60 min of patience |
| Fog rolling through valleys | 5–10 sec | 1–3 sec | Aach fog, Alpine valleys |
| Sunrise / sunset clouds | 3–5 sec | 1–2 sec | Monitor exposure as light shifts |
Use the free Timelapse Interval Calculator to calculate exact intervals based on cloud speed and your desired final video length. It removes the guesswork completely.
Shutter Speed — Sharp vs. Silky
This is a creative choice, not a rule — but know what you’re choosing before you shoot.
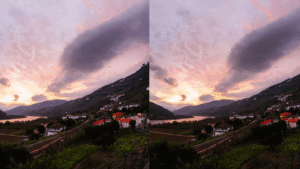
Sharp clouds (1/500s–1/1000s): Individual cloud formations stay crisp in each frame. Playback feels fast, intense, dramatic. This works well for approaching storm cells and dark Foehn events — the kind of shot I captured over the Swabian Alps before a Foehn front came in.
Silky motion blur (1–4 seconds): Cloud edges blend softly between frames. Playback feels smooth, flowing, cinematic. This is what most high-end commercial timelapse uses — and what stock buyers license most often. You need ND filtration to achieve this in daylight.
ISO, Aperture, and White Balance
ISO: 100. Always. No exceptions in daylight timelapse.
Aperture: f/8 for maximum sharpness across the whole sky. Drop to f/5.6 at golden hour if you need more light.
White balance: Manual. Lock it before the first frame. Auto white balance shifts subtly between shots and creates flicker.
Focus: Manual. Lock at infinity using live view — zoom in on a distant tree or structure and nail it before starting.
Set everything manually, check your histogram (no blown highlights, no crushed blacks), shoot RAW, and don’t touch a setting until the sequence is complete.
How to Shoot Cloud Timelapse Step by Step
Follow these steps and you’ll come home with usable footage nearly every time.
Check Windy.com for cloud prediction and movement direction. Identify where formations are moving from and frame your composition into that direction.
2. Arrive 20–30 minutes early.
Levelling and composing in a rush leads to crooked horizons. Fix them in the field, not in post.
ISO 100, f/8, white balance fixed, focus locked at infinity.
4. Dial in exposure with your ND filter.
Target a 1–2 second shutter for the silky look. Use the free ND Filter Calculator to find the right filter density for your current light.
Use the table above. Default starting point for standard cumulus: 4 seconds.
Review playback. Is motion smooth? Is exposure correct? Any flicker? Fix it now.
A 10-second clip at 25fps needs 250 frames. At a 4-second interval, that's ~17 minutes of shooting.
If a passer-by bumps your tripod, note the frame number so you can trim it in post.
💡 Pro Tip: Always shoot longer than you think you need. A 30-minute session gives you options. Cloud conditions are unpredictable — you want the best 10 seconds from 450 frames, not the only 250 frames you have.
Before your next shoot, read 7 Timelapse Mistakes Beginners Make — it covers several field errors that cost beginners entire sessions.
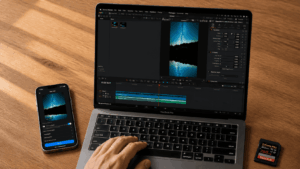
Post-Processing: From Raw Sequence to Final Video
Great cloud footage is made twice — once in the field, once at the desk. Even a perfectly exposed sequence needs careful processing to become a finished clip worth publishing or submitting to stock.
Step 1 — Import and Cull
Import your RAW files into Lightroom as a sequence, not as individual images. Sort by capture time and immediately scrub for problem frames — a bird crossing the frame, a truck driving through your foreground, or a single overexposed frame caused by a cloud suddenly clearing. Remove them now. One bad frame in 300 disrupts the entire playback rhythm.
Step 2 — Grade One Frame, Sync to All
Pick a representative middle frame — not the brightest, not the darkest — and apply your full grade to it. Adjust exposure, whites, shadows, clarity, and colour temperature until it looks exactly how you want the final video to feel. Then sync those settings to every frame in the sequence in one action. Do not grade frame by frame.
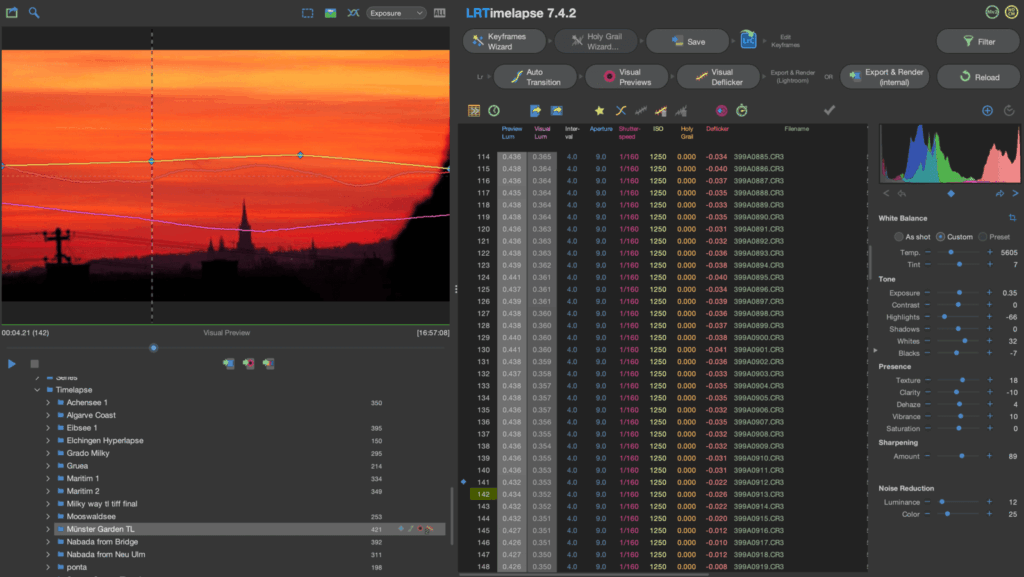
Step 3 — Fix Flicker
This is where most sequences fail in post. Even shooting fully manual, slight aperture blade variations between shots cause frame-to-frame exposure differences — visible as an unpleasant pulsing in playback. The fix is a deflicker pass before rendering.
Lightroom alone can’t do this properly. A dedicated tool like LR Timelapse analyses the luminance curve across your entire sequence and smooths the variation frame by frame — non-destructively, before the final export. For cloud sequences with dynamic conditions (sun appearing and disappearing mid-shoot), this step is what separates amateur-looking footage from broadcast-quality output.
Step 4 — Export and Render
Export your deflickered sequence back into Lightroom, then render to video. Use these settings:
| Setting | Value | Reason |
|---|---|---|
| Resolution | 4K (3840×2160) | Minimum for premium stock licensing |
| Frame rate | 24fps or 25fps | 24fps for global stock/cinema; 25fps for European broadcast delivery |
| Codec | ProRes 422 or H.264 high bitrate | Preserves quality for re-editing and platform submission |
| Colour space | Rec. 709 | Standard for web and broadcast delivery |
Choose 24fps if your primary goal is stock licensing to a global buyer base — it’s the cinematic standard and the most universally accepted format. Choose 25fps if you’re delivering to a European broadcaster or a client who has specifically requested PAL-standard output. Avoid 30fps unless you’re targeting North American broadcast clients.
💡 Pro Tip: Always keep your original RAW sequence archived. Cloud footage from a specific weather event — a Foehn front, a fog inversion, a storm cell — cannot be reshot. The RAW files are your master negative.
Selling Cloud Timelapse on Stock Platforms
Cloud timelapse is one of the consistently best-selling categories on stock platforms. It’s evergreen, works across advertising, broadcast, and corporate video, and requires no model or property release for wide-sky compositions.
Formats that sell best:
4K, 23.98/24fps or 25fps, 10–30 seconds — use 24fps for global stock licensing, 25fps if delivering to European broadcasters specifically
Clean horizon with a strong foreground element — ridge line, castle, city skyline
Both “dramatic storm approach” and “golden hour drift” styles license well year-round
Seamless loops command a price premium — worth the extra edit time
The pricing reality: Individual cloud timelapse clips on Pond5 are priced by contributors in the €15–€79 range for 4K royalty-free — with the highest-earning clips being those with a unique foreground subject, rare weather event (Foehn, fog inversion), or aerial perspective that generic library content can’t replicate. Pond5 pays contributors 50% commission per sale. A single 4K clip selling once per month at €39 covers your ND filter investment within a year. Scale to 30–50 clips in a focused niche like cloud and sky, and the passive income becomes meaningful.
Submit to Shutterstock for volume licensing and Pond5 for higher per-clip revenue — both platforms have deep buyer demand for sky and atmospheric footage.
Use the free Stock Footage Metadata Generator to write your titles, descriptions, and keywords efficiently. Metadata quality directly impacts how often your clips appear in buyer searches.
For a full income strategy, read: Make Money Selling Timelapse Stock Footage.
Frequently Asked Questions
What is the best interval for cloud timelapse photography?
For standard cumulus clouds moving at moderate speed, a 3–5 second interval produces smooth, cinematic motion at 24 or 25fps. Fast-moving storm cells work better at 1–2 seconds. Slow stratus or overcast conditions need 8–15 seconds to show visible movement. Use 4 seconds as your default starting point and adjust based on a 60-frame test playback before committing to the full sequence.
What camera settings do I need for cloud timelapse?
Shoot in full manual mode — ISO 100, aperture f/8, manual white balance set to Daylight or Cloudy, focus locked at infinity. Shutter speed depends on the look you want: 1/500s–1/1000s for sharp dramatic clouds, 1–4 seconds (with an ND filter) for silky smooth motion. Shoot RAW for maximum flexibility in post-processing.
Do I need an ND filter for cloud timelapse photography?
Yes, if you want smooth cinematic cloud motion. Without an ND filter in daylight you’re limited to fast shutters that produce choppy, sharp frames. A 6–10 stop ND filter lets you use 1–4 second exposures in full sunlight. The PolarPro Vario VND 6–9 Stop Mist Edition II covers the full midday brightness range without the colour cast issues you get from cheap variable filters.
How long does a cloud timelapse shoot take?
A 10-second final clip at 25fps requires 250 frames. At a 4-second interval, that’s approximately 17 minutes of actual shooting. In practice, plan 30–60 minutes per session to give yourself editing options and time for clouds to develop. Always shoot more than you think you need — you want the best 10 seconds from 450 frames, not the only 250 frames available.
Why does my cloud timelapse footage flicker?
Flicker is caused by frame-to-frame exposure variations — most commonly from aperture breathing (tiny f/stop variations between shots) or auto exposure compensating for changing cloud light. The fix is two-part: shoot fully manual so the camera never adjusts, and process your sequence through LR Timelapse which uses visual deflicker specifically designed for this problem. Never use any auto setting during a timelapse shoot.
What resolution and frame rate should I use for cloud timelapse stock footage?
Export at 4K (3840×2160) and 24fps or 25fps (the European broadcast standard). Use ProRes 422 or high-bitrate H.264/H.265. Keep clips between 10 and 30 seconds, ensure the horizon is level, and confirm consistent exposure across the entire sequence before submitting.
Can I shoot cloud timelapse with a drone?
Yes — and aerial cloud timelapse sells extremely well on stock platforms because the elevated angle adds depth that ground-level shots can’t match. In the EU, all drone timelapse operations fall under EASA and LBA regulations: fly within visual line of sight, respect the 120m AGL altitude limit, and check airspace before every flight using DJI Fly or Drone Assist. For drone cloud timelapse, use a 2–5 second interval with GPS Hold mode active to counteract wind drift between frames.
Next Steps
Pick one cloud type from the settings table, set your interval accordingly, and go shoot 300 frames this week. That single session — even if the result isn’t perfect — will teach you more than any guide can.
The skies above Southern Germany are spectacular, and demand for cinematic cloud footage has never been higher. You have everything you need to start today.
Ready to go deeper? The Ultimate Timelapse Photography & Videography Guide covers every subject type, setting, and workflow in full detail — it’s the logical next read.
Read Next on Aero Timelapse
The Ultimate Timelapse Photography & Videography Guide — the full parent resource: every subject, setting, and workflow in one place
Timelapse Interval Guide — choose the right interval for every subject, not just clouds
Best Timelapse Subjects for Stock Footage — which subjects earn most on stock platforms
Best Stock Platforms for Timelapse — Shutterstock vs. Pond5 vs. Adobe Stock compared
Timelapse Interval Calculator — free tool: plug in your conditions, get exact numbers instantly
ND Filter Calculator — free tool: find the right filter density in seconds

Dipon is a drone and timelapse cinematographer based in Ulm, Germany, with over 15 years of experience turning real spaces and projects into cinematic visuals. With a background in digital marketing, every shot is planned with a clear purpose — where it will appear, who will see it, and what it should help them decide.
You May Also Like

Best Timelapse Cameras Under €1,000 in 2026
Best Time to Fly a Drone for Photography
Timelapse for Social Media: Instagram, YouTube & TikTok Settings
Holy Grail Timelapse: Complete Day-to-Night Settings & Workflow
How to Plan Storage for Drone Footage — The Complete Pre-Flight Guide
How to Make a Star Trail Timelapse: From Camera Settings to Online Stacking
How to Shoot a Hyperlapse on Foot: Step-by-Step Guide
Timelapse Flicker Fix: Causes, Prevention & Post-Processing Solutions
Milky Way Timelapse: Settings, Gear & Locations
The Complete Drone Videography Guide (2026)
Best ND Filters for Timelapse: Strength Guide & Picks

Stock Footage Metadata for Timelapse Contributors: How to Title, Tag & Describe Your Clips
Need help capturing professional timelapse for your next project but not ready to invest in the gear yet? Check out our Timelapse Video Production service to see how Aero Timelapse Studio can help elevate your production.