The Ultimate Timelapse Photography Guide (2026)
Dipon | January 2026 | Revised March 2026
Table of Contents
- Intro
- Key Takeaways
- What is Timelapse Photography?
- The Math Behind the Magic: Timelapse Calculations
- Camera Settings for Flawless Timelapse
- ND Filters: Motion Blur & Exposure Control
- The Holy Grail Timelapse: Day-to-Night Sequences
- What to Shoot: Timelapse Subjects & Types
- Essential Gear for Timelapse Photography
- Pro-Level Upgrades
- Drone Timelapse: Aerial Time Compression
- Step-by-Step Timelapse shooting Workflow
- Post-Production: Editing Your Timelapse
- Common Timelapse Photography Problems & Solutions
- How to Make Money from Timelapse Footage
- Related deep-dives
- FAQ
You’ve seen them. A storm front rolling across an alpine ridge in ten seconds. A city waking up from black to gold in a single breath. A skyscraper rising from bare earth to skyline in thirty seconds flat. That’s timelapse — and it is one of the most powerful storytelling tools a photographer or videographer can master.
The challenge is that timelapse isn’t just point-and-shoot. Get the interval wrong and your footage is too fast or too slow. Leave the camera in auto mode and you get flicker. Forget the ND filter on a bright day and the motion looks mechanical and stuttered. These mistakes cost you hours of shooting and the footage is unusable.
I’ve made every one of those mistakes. On real shoots. For paying clients. And then I fixed them — through dozens of projects across the Dolomites, Lake Como, construction sites in Ulm, and mountain passes in the Alps. This guide contains everything I know, in the order you need to learn it.
Whether you’re shooting your first sunset timelapse on a tripod, adding timelapse sequences to drone projects, or building a stock footage library that earns while you sleep – this is your complete reference. Bookmark it. Come back to each section when you need it.
Key Takeways from this Timelapse Photography Tutorial
- Timelapse calculation formula: Event duration (in seconds) ÷ Desired final video frames = Shooting interval
- For 30 fps playback: A 10-second final video needs 300 frames; a 2-hour event becomes 24-second intervals
- Manual mode is non-negotiable: Shooting in M mode prevents the exposure flicker that ruins timelapse sequences
- ND filters are essential for motion blur: Especially in daylight, they allow slow shutter speeds that compress motion smoothly
- Shoot RAW – the editing flexibility is essential, especially for holy grail (day-to-night) sequences
- Invest in an intervalometer: Whether built-in or external, this is the backbone of consistent timelapse capture
- Lock everything – aperture, shutter, ISO, white balance, focus – before the first frame fires
- The most common beginner mistake isn’t a wrong setting — it’s covered in detail in 7 Timelapse Mistakes Beginners Make
Affiliate Disclosure
This guide contains affiliate links. Purchases made through these links support Aero Timelapse Studio at no additional cost to you. I only recommend products I personally use or carefully research. As an Amazon Associate I earn from qualifying purchases.
What is Timelapse Photography?
Timelapse photography condenses extended time into seconds by capturing individual frames at set intervals, then assembling them into video at standard frame rates (typically 24 or 30 fps). The result? Motion that’s invisible to human eyes becomes spectacular and revealing.
Think of it this way: a sunset that unfolds over 90 minutes becomes a 10-second video when played back at 24 frames per second. A construction project that spans months compresses into a 30-second clip. A blooming flower appears to unfurl before your eyes in 15 seconds.
The principle sounds simple. The execution requires precision.
Why timelapse matters for content creators: If you’re producing b-roll for real estate, drone videography, or documentary work, timelapse adds production value instantly. Studies show that listings with professional drone photography sell 68% faster than those without. That cinematic timelapse of storm clouds rolling across a landscape? That’s the footage that tells stories, and keeps viewers watching. This tutorial will help you understand a solid, repeatable way to approach shots like that. source: photoup
Timelapse vs. Hyperlapse vs. Motion Timelapse
These terms get thrown around interchangeably, but they’re distinct:
Timelapse: Camera stays stationary; time is compressed. Your anchor tripod locked in position for 2 hours capturing a sunset.
Hyperlapse: Camera moves between shots in calculated increments, adding spatial movement to time compression. A slider moving 5cm every 3 seconds while simultaneously capturing timelapse creates dreamy parallax movement.
Motion timelapse: Combines both your motorized slider moves while your intervalometer captures frames, creating the cinematic push-in effect where your perspective shifts as time accelerates.
For most photographers starting with timelapse, stationary timelapse is the foundation. Once the interval maths, camera settings, and ND filter workflow are second nature, hyperlapse and motion timelapse become natural progressions.
Timelapse
The standard stationary approach. Ideal for landscapes and cityscapes where the camera remains on a fixed tripod.
Difficulty: Beginner
Gear: Tripod
Motion: Static Frame
Hyperlapse
Timelapse where the camera position changes between each shot. Creates cinematic movement over distance.
Difficulty: Advanced
Gear: Handheld/Tripod
Motion: Forward/Tracking
Motion Timelapse
Timelapse shot while the camera glides along a motorized slider or pan-tilt rig, creating smooth cinematic movement through the scene.
Difficulty: Intermediate
Gear: Motion Slider
Motion: Pan/Tilt/Slide
The Math Behind the Magic: Timelapse Calculations
This is where timelapse photography stops being art and becomes engineering. Nail this section, and every shoot succeeds. Ignore it, and you’ll spend hours capturing the wrong interval.
The Core Formula
Shooting Interval (seconds) = Event Duration (seconds) ÷ Total Frames Needed
Lets break this into the actual workflow:
Step 1: Decide your final video length
How long should your finished timelapse be? 10 seconds? 20 seconds? 30 seconds? Start here because everything else flows from this number.
Step 2: Choose your frame rate
Standard video plays at either 24 fps (cinema standard) or 30 fps (broadcast standard). Most timelapse works beautifully at 24 fps.
Step 3: Calculate total frames needed
Total Frames = Video Length (seconds) × Frame Rate (fps).
For a 10-second video at 24 fps: 10 × 24 = 240 frames neededStep 4: Determine real-world event duration
How long will your actual subject take?.
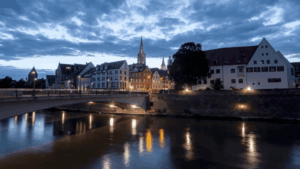
For Example: A sunset = 90 minutes = 5,400 seconds.Step 5: Calculate your interval
Interval (seconds) = Event Duration (seconds) ÷ Total Frames Needed.
Example: Your sunset lasts 90 minutes (5,400 seconds) and you want a 10-second final video at 24 fps (240 frames)..
5,400 ÷ 240 = 22.5-second intervals.
You'll set your camera to capture one frame every 22-23 seconds.
If you want a quick solution for calculating interval for your timelapse, use Aero Timelapse Interval Calculator
Real-World Examples of the Calculation
Sunrise timelapse
- Event duration: 45 minutes (2,700 seconds)
- Desired final video: 15 seconds
- Frame rate: 24 fps
- Frames needed: 15 × 24 = 360 frames
Interval: 2,700 ÷ 360 = 7.5 seconds
Golden hour Clouds
- Event duration: 120 minutes = 7,200 seconds
- Desired final video: 20 seconds
- Frame rate: 24 fps
- Frames needed: 20 × 24 = 480 frames
Interval: 7,200 ÷ 480 = 15 seconds
Milkyway timelapse
- Event duration: 4 hours (14,400 seconds)
- Desired final video: 15 seconds
- Frame rate: 24 fps
- Frames needed: 15 × 24 = 360 frames
Interval: 14,400 ÷ 360 = 40 seconds
Camera Settings for Flawless Timelapse
This is where the difference between amateur and professional timelapse is made – and lost. A single wrong setting ruins everything, often invisibly, until you play the sequence back and see the flicker.
Why Manual Mode is Non-Negotiable
Your camera is smart, sometimes too smart for timelapse. When you shoot in any automatic or semi-automatic mode like Program, Aperture Priority, Shutter Priority, or Auto ISO, the camera keeps adjusting exposure from frame to frame. Small changes such as passing clouds, moving shadows, or slight shifts in light cause the meter to react. One frame becomes a little brighter, the next a little darker, and the result is flicker, strobing, and footage that is hard to watch.
If you do not want to rely on post-processing or tools like LRTimelapse to fix exposure changes later, the most reliable solution is full Manual mode. Set your aperture, shutter speed, ISO, white balance, and focus before the first frame, then leave everything untouched for the entire sequence. This consistency is what gives timelapse its smooth, professional look and keeps motion clean and flicker-free.
source: learntimelapse
You must shoot in full Manual mode (M). This locks exposure across every single frame. There is an exception to this when you shoot day to night timelapse where we shoot in Aperture Priority (Av/A) and use tools like LR timelapse in post processing to get rid of the flicker. We will talk about that later.
The Six Settings to Lock
Aperture
Choose your aperture based on the depth of field your scene requires, then keep it locked for the entire timelapse sequence. For landscape and architectural timelapse, apertures between f/8 and f/11 typically provide the best balance of sharpness and depth.
Avoid changing the aperture mid-sequence, as even small adjustments can introduce exposure flicker and inconsistencies between frames. Smaller apertures such as f/16 should only be used when maximum depth of field is essential, as diffraction may reduce overall image sharpness.
source: boostyourphotography
Shutter Speed
Shutter speed plays a key role in how smooth and cinematic your timelapse looks. Unlike normal video, timelapse motion blur is not based on frame rate, but on the relationship between shutter speed and shooting interval.
For natural, fluid motion, a proven rule of thumb is to set your shutter speed to approximately 20–50% of your interval time. For example, if you shoot one frame every 5 seconds, a shutter speed between 1 and 2.5 seconds will produce pleasing motion blur.
To achieve these longer exposures, especially in daylight, ND filters are essential. They allow shutter speeds ranging from around 1/6 second to several seconds, creating smooth cloud movement, flowing traffic, and a cinematic sense of motion compression that defines professional timelapse imagery.
Shorter shutter speeds can result in a sharper, more staccato look, while longer exposures produce a softer, more fluid visual style. Choosing the right balance depends on the subject, interval, and creative intent.
source:bhphotovideo
ISO
Set ISO as low as possible to maintain clean image quality and minimize noise. In most daylight timelapse situations, ISO 100–200 is ideal. Keep ISO fixed throughout the entire sequence, as automatic ISO adjustments can introduce flicker and exposure shifts between frames.
With modern cameras, higher ISO values still deliver very usable image quality. Depending on the sensor, ISO 800–1600 is commonly clean, and even ISO 3200 can be acceptable when required. If lighting conditions demand a higher ISO to maintain the desired shutter speed and interval, feel free to increase it consistent exposure and smooth motion are often more important than absolute noise levels.
White Balance
Set your white balance manually and keep it fixed for the entire timelapse sequence. Automatic white balance can shift between frames, causing visible color flicker and inconsistent tones in the final video.
For daylight timelapse, a fixed setting such as Daylight or a manual Kelvin value around 5200–5600K works well. For golden hour, blue hour, or night scenes, choose a Kelvin value that matches the dominant light source and maintain it throughout the sequence. Locking white balance ensures stable, natural colors and simplifies color grading in post-production.
Focus Mode
Set your lens to manual focus and lock it before starting the timelapse. Continuous or single autofocus can refocus between frames, leading to focus jumps and ruined sequences.
Carefully focus on your subject before recording using live view magnification or focus peaking if available. Avoid touching the focus ring during the shoot. For landscapes, focusing slightly before true infinity often delivers sharper results than relying on the infinity mark alone. Locking focus ensures consistent sharpness and eliminates focus-related flicker throughout the entire timelapse.
Image format
Shoot in RAW format whenever possible to retain maximum image detail and dynamic range. RAW files provide far greater flexibility for adjusting exposure, white balance, and color in post-production, especially important for challenging lighting conditions and high-contrast scenes.
While JPEG can be useful for quick previews or long sequences where storage is limited, it offers less room for correction and can introduce compression artifacts. For professional timelapse work, RAW is strongly recommended, as it ensures the highest image quality and the most control during editing and color grading.
Aperture
Choose based on depth of field (f/8–f/11 typical) and lock it for the entire sequence to avoid flicker.
Shutter Speed
Set your shutter to 20–50% of your interval to create smooth motion blur. ND filters help achieve longer exposures in bright conditions.
ISO
Keep ISO low for clean images (ISO 100–200). Modern cameras handle higher ISO (up to 1600–3200) if needed for exposure.
White Balance
Set manually and keep fixed. Avoid Auto WB to prevent color flicker; choose a Kelvin value that matches the scene.
Focus Mode
Use manual focus and lock it before shooting. For landscapes, slightly before infinity gives sharper results.
Image format
Shoot in RAW for maximum flexibility in post-processing. JPEG is only for previews or limited storage situations.
Settings Summary
| Setting | Value | Why |
|---|---|---|
| Mode | Manual (M) | Prevents exposure flicker |
| Aperture | f/8–f/11 (locked) | Sharpness + depth of field |
| Shutter Speed | 20–50% of interval | Natural cinematic motion blur |
| ISO | As low as possible (locked) | Clean image, no noise flicker |
| White Balance | Fixed Kelvin value | Consistent colour across sequence |
| Focus | Manual, locked | Eliminates focus-jump flicker |
| Format | RAW | Maximum editing flexibility |
⚠️ Warning: The single most common mistake beginners make isn’t the interval calculation — it’s leaving one setting on auto. One auto setting poisons the whole sequence. Before you start shooting, run through every setting on the camera’s info screen and confirm every single one is locked.
ND Filters: Motion Blur & Exposure Control
An ND (Neutral Density) filter is one of the most powerful tools in a timelapse photographer’s kit. It works exactly as the name suggests: it reduces the amount of light entering the lens uniformly across all wavelengths, without affecting colour. Think of it as sunglasses for your camera sensor.
In daylight, without an ND filter, achieving a 1–2 second shutter speed is physically impossible – the exposure would be completely white. ND filters cut the light entering the lens, measured in stops, allowing you to use long shutter speeds even in bright conditions. That long shutter = motion blur = the smooth, fluid movement that defines cinematic timelapse.
Without ND filters, clouds look like they’re jumping between frames. Traffic becomes individual car shapes instead of light trails. Water looks frozen. The scene feels mechanical rather than alive.
ND Filter Strength Guide
| ND Filter | Light Reduction | Best For | Typical Shutter Speed Range |
|---|---|---|---|
| ND 4 | 2 stops | Overcast days, early morning | 1/125 – 1/500 s |
| ND 8 | 3 stops | Bright morning, sun breaks | 1/60 – 1/250 s |
| ND 16 | 4 stops | Sunny mornings, partly cloudy | 1/30 – 1/125 s |
| ND 32 | 5 stops | Strong midday sun | 1/15 – 1/60 s |
| ND 64 | 6 stops | Intense sun, dramatic motion blur | 1/8 – 1/30 s |
| ND 400+ | 8+ stops | Extreme long-exposure effects | 1 – 4 s |
For most timelapse situations, ND 8 to ND 32 covers 90% of shooting conditions. An ND 16 is the single most versatile filter in the kit – it handles more situations than any other individual filter. For drone timelapse specifically, ND 8 to ND 32 is the practical range; extreme ND filters are impractical on drones due to wind-induced movement during long exposures.
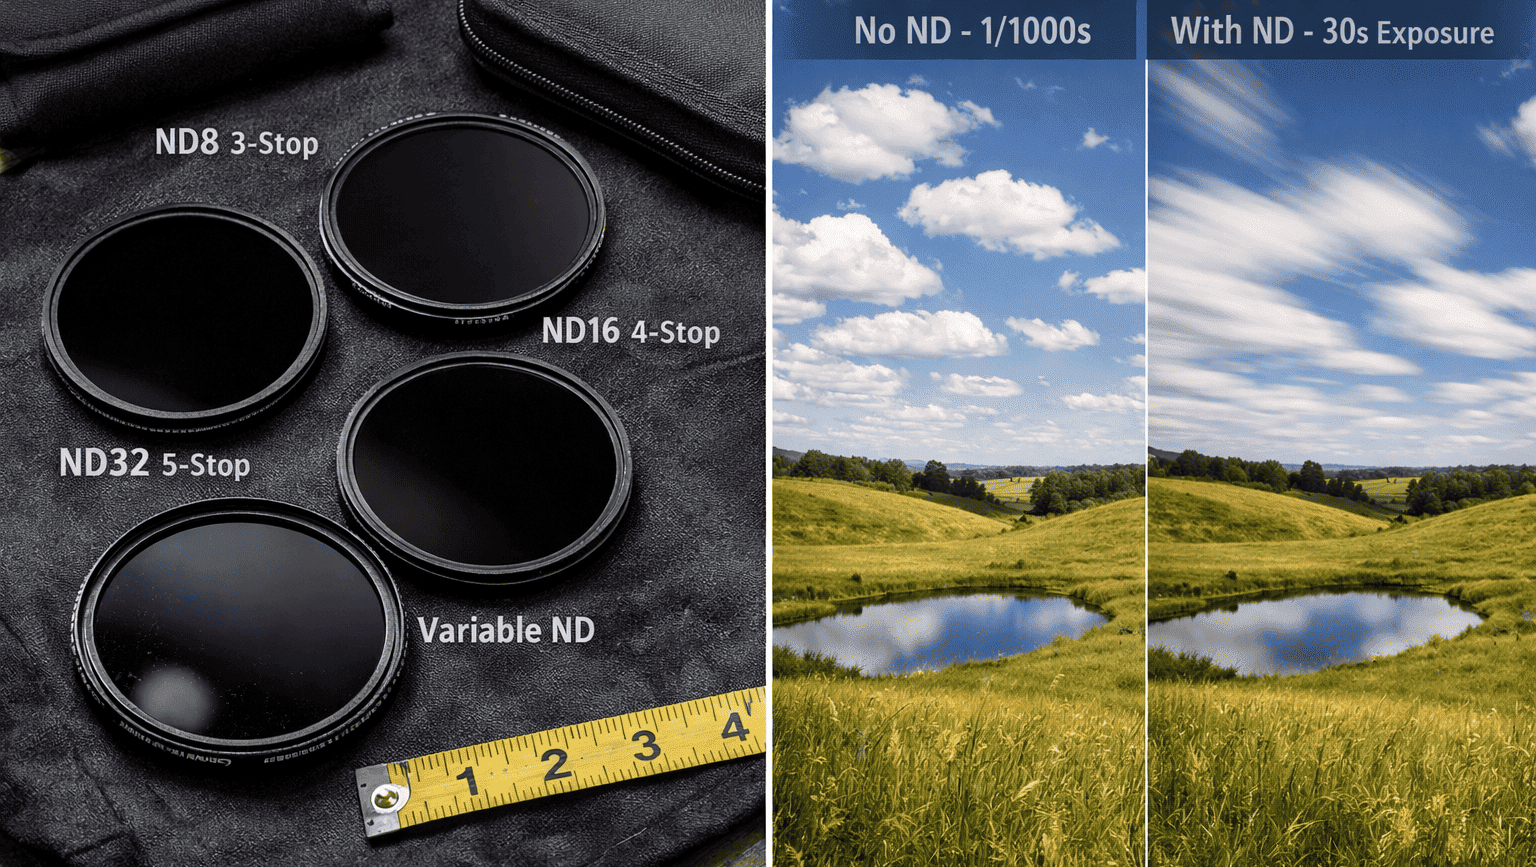
Pro Tip: Variable ND filters such as the PolarPro Vario ND 2–5 Stop give you a full range in a single rotating filter. For timelapse, where you rarely change filters mid-sequence, a variable ND is an elegant solution that covers most shooting conditions without carrying multiple individual filters.
Not sure which ND filter strength to use for your specific scene? Use the free ND Filter Calculator — enter your shutter speed, aperture, and ISO and it calculates which filter strength you need.
The Holy Grail Timelapse: Day-to-Night Sequences
The holy grail timelapse is the most technically demanding sequence in timelapse photography. It captures the full transition from daylight through golden hour and into night – in one continuous, uninterrupted sequence. The lighting changes by 8–10 stops across the span of the shoot. No single manual exposure setting can handle that range.
During a 90-minute sunset-to-night holy grail sequence, a typical lighting journey looks like this:
Bright daylight: You may need a strong ND filter (ND 32 or similar) and a fast shutter to prevent overexposure.
Golden hour: ND 16 or ND 8, shutter extending to 1–2 seconds
Twilight / golden hour: Light drops quickly, requiring adjustments to shutter, ISO, or filter strength.
Night: You may end with long exposures (10–30 seconds or more) with no filter and a higher ISO to capture stars or low-light scenes.
The challenge is that your camera in full Manual mode cannot adapt to this range without you touching the settings – and touching settings mid-sequence introduces visible jumps in exposure. The solution is to shoot in Aperture Priority (Av/A mode) and accept that the camera will introduce some exposure variation across the sequence, then remove that variation systematically in post-processing using LRTimelapse.
Practical Tips for Holy Grail Timelapse:
- Shoot in Aperture Priority — Lock your aperture (f/8 typically), set Auto ISO with a reasonable ceiling (ISO 6400 maximum), and let the camera handle exposure changes automatically. This means flicker, but manageable flicker.
- Shoot RAW — Essential. Every frame needs post-processing correction.
- Use ND filters strategically — Start with stronger ND filters in daylight. Remove or reduce them as light diminishes. Have your ND 32, ND 16, ND 8, and no-filter options ready.
- Import into LRTimelapse — The Holy Grail Wizard analyses your sequence, identifies the exposure changes, and lets you set keyframes at the moments where light shifts are most dramatic.
- Deflicker and grade — LRTimelapse smooths the exposure curve between keyframes, removes micro-flicker from the aperture blinking, and produces a seamless, smooth transition from day to night.
The first holy grail sequence I got right took four attempts over three separate evenings. LRTimelapse’s Holy Grail Wizard is genuinely what made the difference — not better technique, just the right tool applied correctly.
What to Shoot: Timelapse Subjects & Types
Timelapse is only as strong as its subject. The technique is the tool – the subject is the story. These are the most powerful timelapse subjects, what makes each one work, and the specific settings considerations for each.
Clouds & Weather
Moving clouds are the most universally watchable timelapse subject. Fast-moving cumulus clouds, fog burning off a valley, storm fronts approaching a mountain ridge – all of these compress time in a way that feels almost otherworldly.
Interval: 2–5 seconds for fast-moving clouds. 8–15 seconds for slow cumulus on still days.
Key technique: ND filter is critical – you want the motion blur that makes cloud movement look fluid, not staccato. The Dolomites at sunrise, with fog filling the valleys below sharp peaks, is one of the most visually dramatic timelapse setups I’ve encountered.
Construction & Architecture
Long-term construction timelapse is the most commercially valuable timelapse type. A camera installed on a building or crane, firing one frame every 10–30 minutes for 6–18 months, compresses an entire construction project into 60–90 seconds of footage that becomes a permanent asset for the client – used in presentations, social media, handover ceremonies, and investor reports.
Interval: 10–30 minutes for full construction days. 1–5 minutes for specific activity periods.
Key consideration: Power supply and weatherproofing are the primary technical challenges for long-term installs. This is where professional-grade equipment and a reliable setup process are non-negotiable.
Night Sky & Milky Way
Star timelapse reveals the rotation of the Earth in a way that’s genuinely awe-inspiring. The Milky Way arcing across a clear mountain sky, individual stars trailing as Earth turns underneath them – this is some of the most visually impactful footage a timelapse shooter can produce.
Interval: 20–40 seconds for star movement. 25–40 seconds for Milky Way arc.
Key settings: Wide aperture (f/1.8–f/2.8), ISO 1600–6400, no ND filter. Focus on a bright star using live view magnification.
Location matters enormously: Find dark sky areas away from light pollution. The Schwäbische Alb in Baden-Württemberg offers surprisingly dark skies within an hour of Ulm.
Sunrise & Sunset
The classic. A well-executed golden hour timelapse never gets old – the colour, the movement, the compression of the most dramatic light of the day into 10–20 seconds of footage.
Interval: 5–15 seconds. Use the shorter end when light is changing quickly (the 20 minutes around actual sunrise/sunset), longer when the change is slower.
ND filter: Essential. ND 16 to ND 32 in the bright period. Transition to lighter or no filter as light falls.
City Traffic & Urban Life
Long focal lengths compressing city traffic into light trails. Pedestrians moving through a square in smooth, flowing streams. A market setting up in the early morning. Urban timelapse at its best reveals the invisible rhythms of city life.
Interval: 1–3 seconds for fast traffic. 5–10 seconds for pedestrian movement. Longer for market/street activity.
Shooting position: Height helps enormously elevated shooting angles reveal the patterns and flow of traffic in a way that street level cannot.
What Timelapse Footage Actually Sells
If building a stock footage income stream alongside your shooting practice is part of your plan, the subjects above are ranked roughly in order of commercial demand. Clouds, construction, and urban traffic consistently generate the highest sales volumes on stock platforms.
→ See the full breakdown: What Timelapse Sells: Best Subjects for Stock Videos
Essential Gear for Timelapse Photography
When you’re starting with timelapse photography, you don’t need a studio-level kit and this tutorial will help you focus on what actually matters. What you do need is a reliable core setup that won’t fail mid-sequence, plus a set of pro-level upgrades that elevate your footage into something cinematic, consistent, and commercially usable as b-roll.
Timelapse is unforgiving, which is why this timelapse photography tutorial prioritizes the essentials. A loose tripod, a dying battery, or a missed focus can ruin hours of shooting. The goal is simple: stability, consistency, and control.
1. Camera Body (Reliability Over Specs)
Any modern interchangeable-lens camera can shoot timelapse, but reliability matters more than megapixels.
What to look for:
Manual exposure control
Interval shooting (built-in or via remote)
Good dynamic range
Clean ISO performance at night
Mirrorless cameras excel due to silent shutters and reduced mechanical wear, but DSLRs are still perfectly capable. What matters most is that the camera can shoot hundreds or thousands of frames without interruption.
2. Tripod (Non-Negotiable)
A stable tripod is the single most important piece of timelapse gear.
Key requirements:
Solid construction (carbon or aluminum)
Strong locking mechanisms
No flex in wind
Cheap tripods cause micro-movement between frames, which becomes painfully obvious when played back at speed. If your shot moves when it shouldn’t, it’s not cinematic, it’s unusable. A €30 tripod that wobbles in wind will ruin footage you spent three hours shooting. It is the worst trade-off in the kit.
The tripod I use and trust for long outdoor sequences is the Rollei C5i compact lightweight Tripod – solid in wind, fast to set up, and genuinely worth the investment.
3. Lenses (Sharp, Consistent, Manual-Friendly)
Your lens defines the look of your timelapse more than the camera body.
Recommended characteristics:
Sharp at f/8–f/11
Minimal focus breathing
Smooth manual focus ring
Wide-angle lenses are ideal for landscapes, skies, and cityscapes, while standard focal lengths work well for architectural or compressed scenes. Avoid variable aperture zooms for critical sequences, as aperture shifts can introduce flicker.
4. ND Filters (Motion Blur Control)
ND filters allow you to control shutter speed in bright conditions, which is essential for smooth, cinematic motion.
Why they matter:
Enable longer shutter speeds in daylight
Create natural motion blur
Prevent stiff, stuttering movement
For most timelapse work, ND 8 to ND 32 covers the majority of lighting conditions. An ND 16 lives permanently in my kit bag – it handles more situations than any other single filter. PolarPro Vario VND 2–5 Stop Peter McKinnon Edition II is a reliable starting point that covers ND4–ND32 in one ring — ideal if you don’t want to buy a separate stack right away.
Stronger ND filters are useful for extreme long-exposure effects when dramatic motion blur is desired in stable, ground-based scenes.
5. Intervalometer (Timing & Redundancy)
Many modern cameras have built-in interval timers, but an external intervalometer adds reliability and flexibility.
Benefits:
Precise interval control
Backup if internal software fails
Essential for long or critical sequences
For professional work, redundancy is safety. I’ve had a built-in intervalometer freeze mid-sequence on a critical shoot. An external one saved the job. It does not cost a fortune and earns its place every time. I personally still use a Yongnuo MC-C3 Timer Remote Controller I bought over 10 years ago — it just refuses to die. It’s no longer easy to find on Amazon, but if you’re looking for a solid equivalent today, I can recommend the Pixel TW-283 Intervalometer. It is even has wireless timer but same reliability and broad camera compatibility.
6. Memory Cards
Memory cards must be large enough to store thousands of images without interruption.
Why they matter:
Prevent mid-sequence stoppages
Handle large RAW file volumes
Ensure reliable data storage
Timelapse sequences can easily generate several thousand images in a single shoot. Use high-capacity, reliable cards to avoid running out of space mid-sequence.
Recommendation: At minimum 128 GB, with 256 GB or more preferred when shooting RAW or long sessions. I use SanDisk cards myself – they’ve never let me down across thousands of shoots. The SanDisk Extreme Pro 128GB is what I’d recommend: fast write speeds, solid reliability, and priced fairly for the performance.
Pro-Level Upgrades
Once your core timelapse setup is reliable, pro-level upgrades are what transform a good sequence into a cinematic, commercially valuable shot. These tools don’t replace fundamentals like stability and exposure control, they enhance them by adding motion, precision, and consistency that stand out in professional work.
1. Motorized Slider or Pan-Tilt Head
Motorized motion adds depth and parallax to timelapse shots, instantly increasing production value. Subtle movements, slow slides, pans, or tilts—create a dynamic feel that static shots can’t match. Even minimal motion, when executed smoothly, makes a timelapse feel intentional and cinematic rather than observational.
Why it matters:
Introduces parallax
Adds visual interest
Elevates production value
Even subtle motion can transform a static timelapse into a cinematic sequence. I use the GVM Motorized Camera Slider myself — smooth movement, easy to program, and it holds up well in the field. Solid choice for anyone stepping into motion timelapse without spending a fortune.
2. LRTimelapse
LRTimelapse is an essential tool for advanced timelapse work, especially day-to-night sequences. It allows you to keyframe exposure changes, smoothly interpolate transitions, and remove flicker caused by small exposure variations. The result is a polished, professional sequence that would be extremely time-consuming to fix manually.
Why it matters:
Smooths day-to-night transitions
Removes exposure flicker
Saves hours of manual work
It is essential for Holy Grail timelapse workflows.
Drone Timelapse: Aerial Time Compression
Adding altitude to timelapse opens a completely different category of footage. Cloud shadows racing across a valley floor. Fog filling a lake basin as the sun rises above the ridge. A city grid with tiny car lights flowing like liquid. These are shots that simply don’t exist from ground level.
Modern camera drones – particularly the DJI Mini and Mavic series – have built-in hyperlapse and timelapse modes that automate much of the complexity. DJI’s Free mode, Circle mode, Course Lock, and Waypoints mode each produce distinct motion paths that combine drone movement with time compression.
Key points to rememebr
- Wind is your enemy. Drones in hover are constantly correcting against wind, which introduces micro-movements that look terrible in timelapse. Fly in wind conditions below 20 km/h for smooth sequences.
- ND filters still matter. ND 8 to ND 32 is the practical range for drone timelapse – the same motion blur principles apply. DJI-compatible ND filter sets are available for every Mavic and Mini model.
- Battery duration limits your sequence length. At 25–30 minutes per battery, plan your sequences accordingly.
- Manual camera mode. Exactly like ground timelapse — lock ISO, shutter, white balance, and shoot RAW or log profiles for maximum editing flexibility.
Check our Full drone camera settings guide: Manual Drone Camera Settings: ISO, Shutter, Aperture Explained
For the best drones to use for timelapse check: Best Drones for Photography 2026.
Step-by-Step shooting Workflow
Now that you understand the math behind intervals, the camera settings that prevent flickering, and the gear that makes it all possible, it’s time to walk through the actual shooting process from start to finish in this timelapse photography tutorial. This is where theory becomes practice, where you take your tripod, camera, and ND filters into the field and capture those hours of real time that will compress into seconds of compelling footage.
Step 1: Plan Your Scene and Timing
Decide what you want to show changing over time (clouds, traffic, sunset). Estimate how long the real-world event will last and how long you want the final clip to be (e.g., 10–20 seconds at 24 or 30 fps).
Step 2: Calculate Your Interval
Use the simple formula:
• Total frames = final video length (seconds) × frame rate (fps).
• Interval = real-world duration (seconds) ÷ total frames.
Round the interval slightly up to leave room for your shutter speed, especially if you use slow shutter with ND filters.Step 3: Lock In Your Composition
• Mount the camera on a stable tripod and frame your shot with a strong foreground and clear motion in the background.
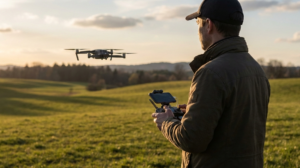
• For city or drone-style timelapse, look for repeating patterns: car lights, people flow, clouds moving past buildings.Step 4: Set Manual Exposure and Focus
• Switch to full Manual mode for shutter, aperture, ISO, and white balance.
• Choose aperture based on depth of field (often f/5.6–f/11), ISO as low as possible, and a shutter speed that gives natural motion blur.
• Use manual focus, zoom in in live view, focus precisely, then turn autofocus off so it cannot hunt during the sequence. Step 5: Add ND Filters for Motion Blur (If Daylight)
• If it's bright, screw on your ND filter so you can slow the shutter to roughly 1/30–1 second, depending on how strong you want the blur.
• Take a test shot and adjust shutter speed until moving elements (cars, people, water, clouds) look smooth rather than frozen.Step 6: Program the Interval and Frame Count
• Set your intervalometer or in-camera timer to the interval you calculated and enough frames to cover the full event plus a safety margin.
• Double-check that the timer is set to continuous shooting and that you have enough battery and card space.Step 7: Run the Sequence and Don't Touch the Camera
• Start the sequence and avoid touching the camera, tripod, or lens while it runs.
• Periodically glance at the LCD to make sure it's still shooting and exposure hasn't blown out or become too dark. Resist the urge to check your phone. The sequence doesn't need you, but it will punish you for touching the tripod.Step 8: Back Up and Organize Your Frames
• After shooting, copy all images into a dedicated folder named with date, location, and subject.
• Keep the sequence in order (don't rename individual files randomly), so your editing software can recognize it as a series.• Import the sequence into your editor or timelapse software, apply a base color grade to a few key frames, and sync across the set.
• Run deflickering if necessary and export as an image sequence or directly to video at your chosen frame rate and resolution.Step 10: Export for Your Final Use
• Export a master file in a high-quality codec (e.g., ProRes or high-bitrate H.264/H.265) for editing or stock upload.
• Create shorter, social-optimized versions (vertical or square) if you plan to use the timelapse as b-roll on Instagram, YouTube Shorts, or Reels.
Post-Production: Editing Your Timelapse
Shooting perfect timelapse frames is half the job. The edit is where the sequence becomes footage.
The Core Editing Workflow
Remove any frames with problems — accidental camera movement, unwanted objects in frame, exposure anomalies at the start or end.
Step 2: Process RAW files in Lightroom
Apply your exposure, white balance, and colour grade to one frame, then sync the settings across the entire sequence. This is where RAW format pays for itself – the editing latitude is completely different from working with JPEGs.
Even with locked manual settings, slight aperture blinking (the aperture blades micro-moving between frames) can cause low-level flicker. LRTimelapse's deflicker algorithm analyses luminance across the sequence and smooths it out automatically. This step separates professional from amateur timelapse.
Step 4: Assemble in video editing software
Import your processed sequence as an image sequence into Premiere Pro, DaVinci Resolve, or Final Cut Pro. Set the frame rate to 24 or 30 fps, trim the start and end, apply any additional grade, and export.
Software Recommendations
- LRTimelapse : The industry standard for timelapse processing. Integrates with Lightroom, handles deflicker, holy grail sequences, exposure ramping, and motion control data. If you shoot timelapse seriously, this is the tool. There is no real competitor at the same level.
- Adobe Premiere Pro / DaVinci Resolve : For final assembly, colour grading, and export. Both handle image sequences natively and produce broadcast-quality output. DaVinci Resolve is free for the majority of professional use cases.
- Adobe Lightroom – For RAW processing of the source frames. The integration with LRTimelapse is seamless and is the most efficient RAW-to-timelapse workflow available.
💡 Pro Tip: When exporting your final timelapse, render at the highest quality your delivery platform allows. For stock footage, export at 4K ProRes 422 or DNxHR minimum. For social media delivery, H.264 at high bitrate (25–50 Mbps) is the practical choice.
Common Timelapse Photography Problems & Solutions
Problem 1: Flickering (Strobe Effect)
Cause: Exposure changed between frames (usually from auto ISO, auto white balance, or variable light and manual shutter)
Solutions:
Shoot full Manual mode (M) with locked ISO, aperture, shutter speed
Use a stronger ND filter to maintain consistent exposure in changing light
Post-process with deflickering software (LRTimelapse, Timelapse+)
Avoid shooting during transitions (mid-sunrise, mid-sunset where light changes fastest)
Prevention: Always check your exposure lock before starting. Take a test shot, verify it looks correct, then lock manual mode.s
Problem 2: Out-of-Focus Frames
Cause: Focus drifted or autofocus re-focused between shots
Solutions:
Switch to manual focus (MF) and lock it before starting
Use hyperfocal distance calculation (approximately 1/3 into the scene as focus point)
For long focal lengths (70mm+), focus slightly behind your main subject (focus shift can look better than focus drift)
Test a 30-frame sequence before committing to a full shoot
Prevention: Manually focus, take a test frame, verify sharpness at 100% zoom, then disable focus lock.
Problem 3: Camera Battery Dies Mid-Shoot
Cause: Underestimated power consumption during long timelapse sequences. Continuous sensor use, image writing, and screen activity can drain batteries faster than expected.
Solutions:
Use external USB power or a high-capacity battery pack
Disable the LCD screen and unnecessary features (Wi-Fi, Bluetooth, IBIS)
For very long shoots, plan controlled battery swaps between intervals
Prevention:
Calculate power needs in advance.
For example, a 6-hour shoot at 10-second intervals produces:
6 × 3600 ÷ 10 = 2,160 frames
Most modern cameras can capture 800 – 2,000 + frames per battery, depending on model and settings. For long sessions, external power is the most reliable solution.
Problem 4: Memory Card Full
Cause: Underestimated storage (RAW files are large; long shoots accumulate quickly)
Solutions:
Shoot JPEG at high quality instead of RAW (if your post-processing is simple)
Use high-capacity, fast cards (V60 or V90 rated, minimum)
Shoot to tethered computer for effectively unlimited storage
Calculate needs in advance (see calculation section)
Prevention: A fast 128GB card holds ~8,000 RAW images (12MP camera). Calculate your total frames needed, then multiply by 1.2 for safety margin. Buy cards accordingly.
Problem 5: Motion Looks Jerky / Unnatural
Cause: Shutter speed too fast (1/500+); no motion blur between frames
Solutions:
Add an ND filter to slow your shutter to 1/50 – 1/100 range
Increase your interval slightly (more time between frames allows slower motion)
In post-production, use motion blur interpolation (Premiere Pro’s Frame Rate Conversion or LRTimelapse’s Motion Blur feature)
Result: Smoother motion that looks more cinematic and less sped-up.
How to Make Money from Timelapse Footage
The footage you shoot for practice today can become passive income for years. Timelapse is one of the most commercially in-demand categories on stock footage platforms – used constantly in broadcast television, advertising, documentary filmmaking, architectural presentations, and social media campaigns.
Selling on Stock Platforms
The two primary platforms for timelapse stock footage are **Pond5** and **Shutterstock**, and they serve different buyer types. Pond5 tends to attract editorial and documentary buyers who pay higher per-clip prices. Shutterstock serves a broader subscription market with higher volume and lower per-clip rates.
The keys to generating meaningful stock income are:
Shoot what buyers are searching for
Clouds, construction, urban traffic, sunrise and sunset, and industry-specific footage (energy, technology, nature) consistently sell. The specific subjects with the highest commercial demand are covered in What Timelapse Sells: Best Timelapse Subjects for Stock Videos.
Metadata is everything
A technically excellent clip with poor keywords earns nothing. A good clip with precise, thorough metadata sells consistently. The Stock Footage Metadata Generator tool on this site is built specifically to help you generate optimised metadata for timelapse footage — use it for every clip you upload.
Volume builds income.
Stock footage income is cumulative. The more quality clips in your portfolio, the more consistent the revenue. A portfolio of 200 well-keyworded clips on Pond5 outperforms 20 exceptional clips with weak metadata.
For the detailed platform comparison chech the Best Stock Platforms for Timelapse: Pond5 vs Shutterstock (2026)
For a realistic income breakdown with actual numbers read Timelapse Stock Footage Earnings: $3K/Month Case Study
Getting started from zero? Read How to Make Money Selling Timelapse Stock Footage.
Related deep-dives
- Tools
Timelapse Interval Calculator — Enter your event duration, clip length, and FPS to get your exact interval in seconds.
ND Filter Calculator — Find the right ND filter strength for your scene instantly.
Stock Footage Metadata Generator — Generate optimised titles, descriptions, and keywords for your stock clips.
- Technique Guides
Timelapse Interval Guide: Pick the Right Interval Fast — The companion deep-dive to the interval calculations above.
7 Timelapse Mistakes Beginners Make (And How to Fix Them) — The fastest way to improve your existing footage.
- Monetisation
What Timelapse Sells: Best Timelapse Subjects for Stock Videos — The commercial demand map for timelapse stock.
Timelapse Stock Footage Earnings: $3K/Month Case Study — Realistic numbers from a working stock portfolio.
Best Stock Platforms for Timelapse: Pond5 vs Shutterstock] — Where to sell your footage and why.
- Drone
Manual Drone Camera Settings Explained — Applies directly to drone timelapse shooting.
Best Drones for Photography 2026 — Which drones produce the best timelapse footage.
Dipon is a drone and timelapse cinematographer based in Ulm, Germany, with over 15 years of experience turning real spaces and projects into cinematic visuals. With a background in digital marketing, every shot is planned with a clear purpose — where it will appear, who will see it, and what it should help them decide.
Frequently Asked Questions
What's the best camera for timelapse photography?
Any camera with manual mode and an intervalometer (built-in or compatible external). Entry-level DSLRs (Canon T7, Nikon D3500) work perfectly. Higher megapixel counts don’t matter for timelapse, a 12MP camera produces identical quality to a 45MP camera at 4K export.
How many shots do I need for a smooth timelapse?
Minimum 24-30 fps playback requires 24-30 frames per second of video. A 10-second video needs 240 frames at 24 fps, or 300 frames at 30 fps. Most timelapse looks smooth at anything above 24 fps. Anything below 18 fps looks stuttery.
Can I shoot timelapse on my smartphone?
Yes. Modern smartphones have built-in timelapse modes. Limitations: no manual exposure control (you’ll get flicker in changing light), small sensors (limited depth of field), and limited interval control. Smartphones work for short sequences (clouds, sunsets) but struggle with long-term projects or changing light.
Do I need an ND filter for timelapse?
For daylight timelapse, yes — an ND filter is effectively non-negotiable if you want smooth, cinematic motion blur. Without one, bright conditions force very fast shutter speeds (1/1000s or faster), which produces stiff, mechanical-looking movement. ND 8 to ND 32 covers the majority of daytime shooting conditions. For night timelapse, ND filters are not needed. Use the free ND Filter Calculator to find the right strength for your specific scene.
What ND filter strength should I buy?
Start with a variable ND (2-32 range). As your experience grows, add fixed ND 16 and ND 32 filters for specific scenarios. Variable ND filters are convenient but slightly degrade image quality compared to fixed filters. For professional work, the image quality difference justifies owning both.
If I could only buy one to start: a quality fixed ND 16. It will cover most daylight situations and force you to learn how filters actually work before adding more to the bag.
How do I avoid camera shake and vibration in my timelapse?
Use a heavy, stable tripod with locked head and spike feet. Keep the center column low, avoid extending legs fully. Disable in-camera stabilization. Add weight (sandbag) to the tripod base if needed. Use a remote trigger instead of pressing the shutter button directly. For drones, ensure gimbal calibration is locked. If you spot vibration in test frames, relocate before committing to the full sequence.
Wind is the enemy you can’t always predict. If it picks up mid-sequence, let it finish – stopping and restarting creates a visible jump that is impossible to fix.
What is a holy grail timelapse?
A holy grail timelapse is a sequence that transitions from full daylight through to night in one continuous shot – capturing the full arc of a sunset, golden hour, twilight, and darkness. It’s called “holy grail” because it’s technically the most challenging timelapse to execute cleanly. The lighting shifts by 8–10 stops across the shoot. The standard technique is to shoot in Aperture Priority with Auto ISO, then use LRTimelapse’s Holy Grail Wizard to smooth and deflicker the sequence in post-production.
Can I make money from timelapse photography?
Yes — timelapse is one of the strongest passive income opportunities in photography. Footage uploaded to stock platforms like Pond5 and Shutterstock continues to sell long after the shoot. The highest-selling subjects are clouds and weather, construction and architecture, urban traffic and city life, and sunrise/sunset sequences. The key variables are shooting commercially in-demand subjects, writing thorough metadata keywords, and building a portfolio of consistent volume. Realistic income expectations and a practical 90-day plan are covered in the Timelapse Stock Footage Earnings case study.
You May Also Like
Milky Way Timelapse: Settings, Gear & Locations
The Complete Drone Videography Guide (2026)
Best ND Filters for Timelapse: Strength Guide & Picks
Stock Footage Metadata for Timelapse Contributors: How to Title, Tag & Describe Your Clips
Manual Drone Camera Settings: ISO, Shutter, Aperture Explained
Timelapse Interval Guide : Pick the Right Interval Fast
Best Stock Platforms for Timelapse: Pond5 vs Shutterstock (2026 Guide)
Drone Flying Tutorial : Beginner to Confident Pilot
What Timelapse Sells: Best Timelapse Subjects for Stock Footage
Timelapse Stock Footage Earnings: $3K/Month Case Study
Make money selling timelapse stock footage
7 Timelapse Mistakes Beginners Make
Need help capturing professional timelapse for your next project but not ready to invest in the gear yet? Check out our Timelapse Video Production service to see how Aero Timelapse Studio can help elevate your production.