Timelapse Interval Guide: Pick the Right Interval Fast
Dipon | February 2026
Table of Contents
Affiliate Disclosure
This guide contains affiliate links. Purchases made through these links support Aero Timelapse Studio at no additional cost to you. I only recommend products I personally use or carefully research. As an Amazon Associate I earn from qualifying purchases.
My first proper sunset timelapse looked great in my head and terrible on my hard drive. I’d picked a 5-second interval because I’d read somewhere that 5 seconds was “good for sunsets.” What I ended up with was a jumpy, uneven clip that lasted nearly four minutes – way too long, way too rough, and completely unusable for the stock footage library I was building at the time.
The problem wasn’t my camera, my lens, or even the light. It was that I had no system for choosing an interval. I was guessing.
That’s exactly why I built the AeroTimelapse Interval Calculator – and why this guide exists alongside it.
To plan a timelapse shoot properly, you only need three inputs: your capture duration, your desired clip length, and your timeline fps. The calculator translates those real-world numbers into the exact interval to shoot at, plus the total number of frames you’ll need. No unit juggling, no mid-shoot panic.
In this guide I’ll walk you through the simple manual formula so you can sanity-check any tool, five practical planning examples covering sunsets, clouds, traffic, construction, and drone hyperlapses, and the real-world constraints – battery, storage, exposure time, and flicker – that change the math on location.
If you want to skip straight to the numbers, the calculator is right below.
Fastest Method: Use the timelapse interval calculator
What interval means and why beginners get it wrong ?
Interval is the time in seconds between the start of one photo and the start of the next photo in a timelapse sequence.
It’s the main “speed dial” for timelapse motion: shorter intervals usually look smoother and faster, while longer intervals compress time more aggressively.
Beginners often pick an interval first (“I heard 2 seconds is good”) and only later realize they’ve created a 3-minute clip—or they run out of battery halfway through the event. The smarter workflow is to decide what story you’re capturing (event duration), what you want to deliver (clip length), and only then compute the interval.
Key Terms:
Interval: Seconds between photos (start-to-start).
Event/capture duration: How long you shoot in real time (minutes/hours).
Clip length: Length of the final timelapse in your video (seconds).
Frame rate (fps): Playback frames per second in your edit (e.g., 24/25/30).
Total frames/photos needed: How many stills your final clip requires.
Timelapse Interval Guide: The simple math
You can plan timelapse two ways:
A. Tool method
Input capture duration + desired clip length + fps → output interval + frames.
That’s exactly what the AeroTimelapse Interval Calculator is designed to do, fast, without you juggling unit conversions.
B. Manual method (simple, consistent)
Use these two steps:
Frames needed = clip length (seconds) × fps.
Interval = capture duration (seconds) ÷ frames needed.
Compact formula version (same math, one line):
Interval (s) = total capture length / (total target duration × frame rate).
Quick Example: 10-Second Timelapse at 30fps
Capture duration: 30 minutes = 1,800 seconds
Clip length: 10 seconds
fps: 30
Frames needed N = 10×30 = 300.
Interval I = 1,800÷300 = 6 seconds.
5 practical examples
Below are planning examples you can copy, then fine-tune based on motion, focal length, and conditions.
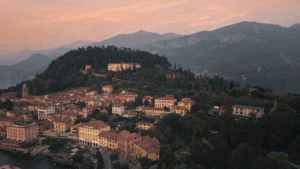
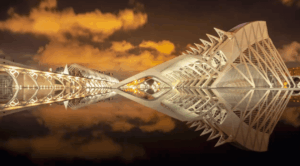
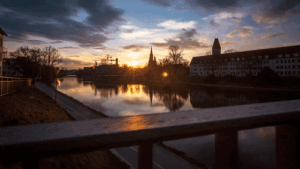
1. Sunset
Scene type: Sunset, shifting color + moving shadows
Capture duration: 1 hour = 3,600s
Desired clip length: 15s
fps: 25
Output: Frames needed = 15 × 25 = 375 frames; Interval = 3,600 ÷ 375 = 9.6s (start around 10s)
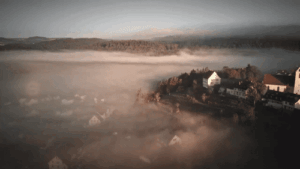
2. Clouds over mountains
Scene type: Layered clouds, medium-to-fast motion
Capture duration: 2 hours = 7,200s
Desired clip length: 20s
fps: 25
Output: Frames needed = 20 × 25 = 500 frames; Interval = 7,200 ÷ 500 = 14.4s (start around 14–15s)
3. City traffic blue hour
Scene type: Traffic flow, headlights, people movement
Capture duration: 45 min = 2,700s
Desired clip length: 12s
fps: 30
Output: Frames needed = 12 × 30 = 360 frames; Interval = 2,700 ÷ 360 = 7.5s (start around 7–8s)
4. Construction
Scene type: Slow change over a long period
Capture duration: 8 hours = 28,800s
Desired clip length: 20s
fps: 25
Output: Frames needed = 20 × 25 = 500 frames; Interval = 28,800 ÷ 500 = 57.6s (start around ~60s)
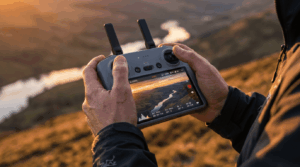
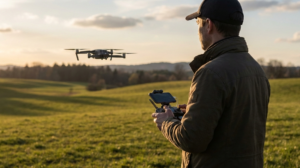
5. Drone hyperlapse
Scene type: Drone orbit/hyperlapse (flight-time constrained)
Capture duration: 10 min = 600s
Desired clip length: 8s
fps: 25
Output: Frames needed = 8 × 25 = 200 frames; Interval = 600 ÷ 200 = 3s
Starting-point interval cheat sheet
These are starting points, not rules, adjust based on motion speed, focal length (telephoto exaggerates movement), wind/shake, and how “busy” the scene feels.
| Scene | Motion speed | Starting interval range | Notes (what changes it) |
|---|---|---|---|
| Fast, textured clouds | Fast | 1–4s | Wider lenses can tolerate longer; telephoto often needs shorter. |
| Crowds / pedestrian streets | Medium-fast | 1–5s | If people “jump,” shorten; if it’s chaotic, lengthen slightly. |
| City traffic (cars, light trails) | Fast | 1–6s | Speed depends on road density + your viewpoint distance. |
| Sunset / blue hour color shift | Medium | 3–12s | Big focal lengths and dramatic clouds often benefit from shorter. |
| Moving shadows (clear sky) | Slow-medium | 10–30s | Shadows are subtle; longer capture duration often matters more. |
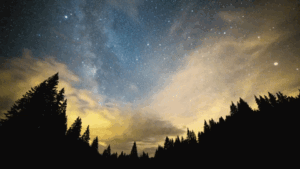
| Stars (astro timelapse) | Slow but constant | 10–30s | Interval is limited by exposure time + noise needs; plan for long capture. |
| Very slow construction / long events | Very slow | 30s–10min | Choose based on “change rate” of the phase you’re filming. |
Practical Constraints That Affect Your Timelapse Interval
Battery life (especially for drones): A DJI Mini 4 Pro gives you roughly 34 minutes of flight in calm conditions – less in wind or cold. If your calculated interval requires a 60-minute capture, plan for a battery swap mid-sequence or shorten the capture duration before you commit. Always carry at least one spare battery on location.
Storage and card write speed: Short intervals mean more photos, which means more data, fast. At a 2-second interval shooting RAW, you can burn through a 64GB card in under two hours. Use a fast UHS-II card like the SanDisk Extreme Pro and always check your remaining space before starting the sequence, not during.
Exposure time vs. interval (buffer time): Your shutter speed must always be shorter than your interval — the camera needs time to finish exposing, write the file to the card, and reset before the next shot triggers. A safe rule: leave at least 0.5–1 second of buffer. If your interval is 3 seconds, keep your shutter at 1/4s or faster. Cutting it too close causes missed frames or uneven cadence.
Flicker risk and how interval interacts with changing light: When light shifts during a long capture (sunset, clouds rolling in), auto exposure can hunt between frames and create visible brightness jumps in playback. Lock your exposure and white balance, or plan a manual exposure ramp. In post, LRTimelapse is the go-to tool for smoothing out any remaining flicker.
Wind, shake, and stabilization: A tripod that feels rock-solid at eye level can vibrate subtly when a gust hits — and at timelapse speeds, subtle vibration becomes obvious jitter. The longer your focal length, the worse it gets. For outdoor shoots I use the Rollei C5i — it’s not the heaviest tripod on the market, but it’s genuinely stable, compact enough to carry all day without your shoulder hating you, and the centre column takes a bag hook for extra ballast when the wind picks up. A solid choice if you don’t want to lug a full studio rig to every location.
Quick Answer: Should exposure be shorter than the interval?
Yes! Leave headroom so the camera finishes exposing and writing the file before the next frame, and so small timing slips don’t turn into uneven motion.
Checklist: before you start the timelapse
Planning
Define the “main change” you’re trying to show (light, motion, build, flow).
Estimate capture duration realistically (including setup, waiting, and buffers).
Check weather and wind for stability; plan a fallback framing.
Camera settings
Lock focus (manual focus or confirmed AF lock) and don’t touch the ring.
Choose a white balance strategy (locked WB for consistency; avoid WB hunting).
Decide exposure strategy: keep it stable when possible, and plan transitions when light changes fast.
Confirm interval input method — in-camera timelapse mode, drone hyperlapse mode, or a dedicated intervalometer. If your camera doesn’t have a built-in intervalometer, the Pixel TW-283 is a reliable and affordable option that works with most major camera brands.
Safety/legal
Follow local rules, property restrictions, and drone regulations; this is not legal advice, just a reminder to plan responsibly.
Execution
Shoot 20 test frames and preview playback for motion feel.
Check histogram/exposure stability and highlight clipping.
Re-check leveling and tripod stability before the “real” sequence.
Troubleshooting
Jumpy motion → Shorten interval, widen focal length, or move closer to the action.
Too slow / boring playback → Shorten interval, or capture longer so more change happens.
Flicker → Lock exposure/WB, avoid auto modes, and use LRTimelapse deflicker workflow in post.
Missed key moment (clip ends early) → Add handles, start earlier, or plan a longer capture duration.
Interval too short (battery/storage) → Lengthen interval, shoot JPEG instead of RAW, or reduce clip length target.
Motion blur mismatch → Adjust shutter strategy so frames don’t look “staccato” (too sharp) or mushy.
Drone fails to finish sequence → Shorten capture duration, simplify movement, or increase interval to reduce total shots.
People/traffic looks chaotic → Lengthen interval slightly or choose a cleaner, more readable angle.
Stars look like dots/lines unexpectedly → Change interval/exposure expectations; longer exposures and longer intervals change star appearance.
Post-processing stutter → Ensure consistent cadence (no dropped frames), export at your timeline fps, and avoid frame blending artifacts.
Frequently Asked Questions
What is the best interval for timelapse?
There isn’t one best interval for every scene. Start with a range based on how fast things move, then adjust after a short test sequence.
How do I calculate timelapse interval?
Decide capture duration, final clip length, and fps, then compute frames and interval. The fastest option is to use the AeroTimelapse Interval Calculator so you don’t mix units.
How many photos do I need for a 10-second timelapse?
Multiply 10 seconds by your fps. At 25 fps you need 250 photos; at 30 fps you need 300 photos.
Is 24fps or 30fps better for timelapse?
Neither is universally “better”. Match your project and timeline. 24 fps often feels more cinematic, while 30 fps is common for online delivery, and consistency matters more than the exact number.
Why does my timelapse look jumpy?
Your interval is likely too long for the amount of motion in the frame, or the shot is shaking. Shorten the interval, stabilize better, and test again.
How long should a timelapse clip be?
Most timelapse shots land well around 8–25 seconds in an edit, but “hero” shots can go longer if the motion stays interesting. If the scene doesn’t evolve, shorten the clip or pick a different moment.
What’s the easiest way to plan a timelapse quickly?
Use a timelapse interval calculator guide workflow: decide capture duration, target clip length, and fps, then let the tool output your interval and frames. Use the interval calculator here: Aerotimelapse Interval Calculator.
Use the tool
If you want the fastest, least-error way to plan, use the AeroTimelapse Interval Calculator and sanity-check with a 20-frame test before committing. Use the interval calculator here: Timelapse Interval Calculator.
Open the calculator and plug in your numbers, then adjust based on motion, focal length, and conditions.
For full camera setup details, check our Ultimate Timelapse Photography Tutorial: Settings & Gear. It covers aperture, shutter, and ND filters for smooth motion.

Dipon is a drone and timelapse cinematographer based in Ulm, Germany, with over 15 years of experience turning real spaces and projects into cinematic visuals. With a background in digital marketing, every shot is planned with a clear purpose — where it will appear, who will see it, and what it should help them decide.
You May Also Like
Milky Way Timelapse: Settings, Gear & Locations
The Complete Drone Videography Guide (2026)
Best ND Filters for Timelapse: Strength Guide & Picks

Stock Footage Metadata for Timelapse Contributors: How to Title, Tag & Describe Your Clips
Manual Drone Camera Settings: ISO, Shutter, Aperture Explained

Best Stock Platforms for Timelapse: Pond5 vs Shutterstock (2026 Guide)
Drone Flying Tutorial : Beginner to Confident Pilot
What Timelapse Sells: Best Timelapse Subjects for Stock Footage
Timelapse Stock Footage Earnings: $3K/Month Case Study
Make money selling timelapse stock footage
7 Timelapse Mistakes Beginners Make
Ultimate Timelapse Photography Tutorial: Settings, Techniques & Gear
Need help capturing professional timelapse for your next project but not ready to invest in the gear yet? Check out our Timelapse Video Production service to see how Aero Timelapse Studio can help elevate your production.