Manual Drone Camera Settings (2026): ISO, Shutter & Aperture Guide
Dipon | March 2026
Table of Contents
- Intro
- Why Manual Camera Settings Matter on Drones
- The 5 Core Drone Camera Settings Explained
- The Exposure Triangle for Drone Video
- Recommended Drone Camera Settings by Scene
- Step-by-Step: Dialing In Manual Exposure in the Field
- ISO and Noise: What to Look For and How to Fix It
- Drone Camera Settings for Timelapse and Hyperlapse
- 12 Common Drone Camera Settings Mistakes
- FAQ
- Next Steps
Affiliate Disclosure
This guide contains affiliate links. Purchases made through these links support Aero Timelapse Studio at no additional cost to you. I only recommend products I personally use or carefully research. As an Amazon Associate I earn from qualifying purchases.
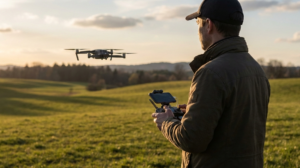
You’ve landed the drone, reviewed the footage – and something just looks off. The sky is blown out, the shadows are muddy, and every pan looks like a jittery slideshow instead of the smooth cinematic shot you had in your head. Sound familiar? You’re not alone. I’ve made every one of these mistakes myself – the jittery golden-hour shot, the flickering timelapse, the D-Log footage that looked like grey soup in the edit. Here’s what I learned.
Most beginner drone pilots get great at flying within a few sessions, but the camera side of things stays on auto – and auto quietly sabotages the footage every single time. It doesn’t know your creative intent. It doesn’t care about motion blur. And it will happily push drone camera settings ISO to 1600 on a bright sunny day just because a cloud passed over.
The good news: you don’t need a film school degree to fix it. Understanding just three settings – ISO, shutter speed, and aperture – puts you in complete control of how your footage looks, from the first frame to the last. This guide breaks down each setting in plain language, shows you exactly what to change when something looks wrong, and gives you ready-to-use starting recipes for the most common shooting scenarios. Whether you fly a fixed-aperture compact drone or a higher-end variable-aperture model, the principles are the same — and once they click, you’ll never want to go back to auto.
Quick Answer (TL;DR)
ISO on a drone camera controls how sensitive the sensor is to light – a higher ISO brightens the image but introduces digital grain (noise), while a lower ISO keeps footage clean and sharp. The single most important rule for beginners: keep ISO as low as your scene allows, and control exposure with shutter speed and ND filters first.
Why Manual Camera Settings Matter on Drones
When you leave your drone in auto exposure mode, the camera is constantly making decisions and it doesn’t know what you want the shot to look like. It may brighten a frame as you pan toward a dark treeline, then suddenly darken again when the sky comes back into view. That kind of flickering is nearly impossible to fix cleanly in post-production.
Manual mode hands the control back to you. Once you dial in your settings before takeoff, the exposure stays consistent throughout the entire flight, across orbits, reveals, and descents. This consistency is what separates amateur footage from footage that looks “cinematic,” even on an entry-level drone.
There is also the motion blur factor. Cinematic video looks smooth because there is a subtle blur between frames, the human eye expects it. Auto mode often selects shutter speeds that are too fast, producing stiff, jittery footage even when the drone is moving slowly. Manual settings let you nail motion blur exactly right.
Quick Answer – Should I use auto or manual exposure on a drone?
Use auto exposure for casual snapshots or learning the basics, but switch to manual for any video, timelapse, or situation where consistent, cinematic results matter. Auto is fine for still photos in predictable light; manual is the standard for professional video work.
The 5 Core Drone Camera Settings Explained
ISO (Sensor Sensitivity)
ISO controls how sensitive your camera sensor is to light. Raise it and your image gets brighter, but the sensor also amplifies noise (grain and colour blotching) along with the signal.
Drone sensors are typically smaller than those found in full-frame DSLRs or mirrorless cameras, which means noise appears at lower ISO values than you might expect from a DSLR. Keeping ISO low is the single most consistent way to preserve clean, colour-accurate footage.
ISO starting points by light condition:
Bright daylight: ISO 100 as a first choice
Golden hour / overcast sky: ISO 100–400 depending on available light
Low light / dusk / city at night: ISO 800 and above – accept more noise, manage in post
Shutter Speed
Shutter speed determines how long the sensor is exposed per frame and in video, it directly controls motion blur. The standard reference point is the 180° shutter rule: set your shutter speed to approximately double your frame rate.
At 24 fps → 1/50s (closest practical value)
At 25 fps → 1/50s
At 30 fps → 1/60s
At 60 fps → 1/120s
Too fast (e.g. 1/500s at 25fps) and movement looks jittery and stroboscopic. Too slow and the image becomes excessively blurry. The 180° rule sits at the natural midpoint that our eyes read as realistic motion.
On a bright day, following this rule typically means your image is overexposed, which is exactly where ND filters come in. Use our free ND Filter Calculator to find the exact filter strength you need — then grab the Neewer ND8-ND64 Filter Set to cover most outdoor shooting situations.
Aperture (if available)
Many compact and mini-class drones like the DJI Mini 5 Pro series have a fixed aperture, meaning you cannot change it. On these cameras, ISO and ND filters become your only tools for exposure control. Check your drone’s manual or current firmware documentation to confirm.
Drones with variable aperture (typically the Air and Pro series) let you adjust f-stop for depth-of-field and exposure control. A practical note: stopping down to very high f-numbers (e.g. f/8 and above) can introduce diffraction softness. As a starting point, stay between f/2.8 and f/5.6 for sharpest results then adjust for conditions.
For fixed-aperture drones: ND filters + ISO are your only two exposure levers — making ND filters an essential purchase, not an optional accessory. I use the Neewer ND8-ND64 Filter Set for the Mini series — it covers the range you’ll actually use in the field and won’t break the bank while you’re still building your kit.
White Balance
Auto white balance (AWB) is one of the most overlooked problems in drone video. As your drone moves across different parts of the sky or rotates past a building, AWB shifts the colour tone mid-clip – making colour-grading a nightmare and ruining a clean edit.
Kelvin starting points as a reference:
Sunny daylight: ~5500–6000K
Golden hour / sunrise / sunset: ~3500–4500K
Overcast / cloudy: ~6000–7000K
Open shade: ~7000–8000K
The practical tip: lock your white balance before take-off. Pick a Kelvin value that suits the scene, set it manually, and don’t touch it during the flight. You can always fine-tune colour temperature in post, but you cannot fix an AWB shift mid-clip.
Color Profile
Your color profile determines how the camera encodes colour and dynamic range into the file before it reaches your SD card.
Normal (Standard): Colour-corrected and contrast-ready. What you see is close to what you get. Best for beginners and quick delivery.
D-Log M: DJI’s flat/log profile with reduced contrast and saturation, preserving more highlight and shadow detail for professional colour grading. Requires a LUT or manual grade in post.
HLG (Hybrid Log-Gamma): A middle path, more dynamic range than Normal, less flat than D-Log M. Looks reasonable straight out of camera and grades well.
For beginners: Start with Normal or a low-saturation Normal variant. D-Log M and HLG need more careful exposure (especially in low light) and require colour grading skill to look good. Shoot D-Log M consistently if you use it – it’s difficult to match with Normal footage in the same timeline.
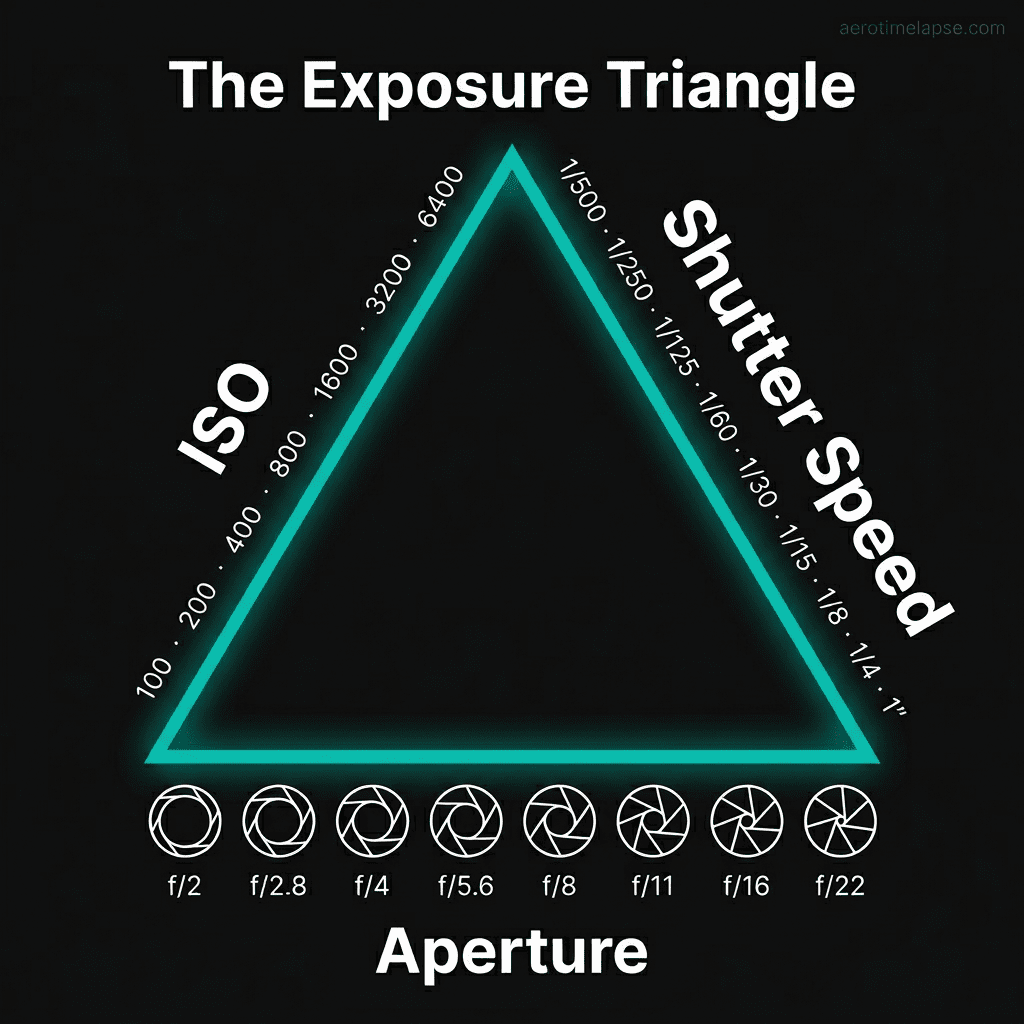
The Exposure Triangle for Drone Video
Think of ISO, shutter, and aperture as three interconnected sliders. Push one up, and at least one other needs to compensate – otherwise the exposure shifts.
Priority order for drone video:
Set frame rate (determines your shutter target)
Set shutter speed (apply 180° rule)
Set aperture to a clean f-stop (if variable)
Add ND filter to bring exposure into range
Adjust ISO last – only as high as necessary
| Setting | What it changes visually | What it costs you | ND filter alternative? |
|---|---|---|---|
| ISO ↑ | Brighter image | Grain, colour noise, banding in post | ✅ Yes — prefer ND over ISO boost |
| Shutter ↑ (faster) | Less motion blur, sharper movement | Jittery “video game” look | ✅ Add ND to lower shutter |
| Shutter ↓ (slower) | More motion blur, cinematic feel | Risk of overexposure in bright light | ✅ ND keeps shutter slow without blowout |
| Aperture ↑ (higher f-stop) | More depth of field, darker image | Diffraction softness at extremes | Partially — ND still helps |
| ND filter | Reduces light entering sensor | None optically — mild vignette on cheap filters | — |
| White balance (wrong) | Colour cast (orange/blue tint) | Hard to fix in post if AWB drifted | ✗ — must set manually |
Recommended Drone Camera Settings by Scene
Every row is a starting point – adjust for your specific conditions, light level, and drone model.
| Scene | Frame rate | ISO | Shutter | Aperture | ND filter | Color profile | Notes |
|---|---|---|---|---|---|---|---|
| Bright midday landscape | 24/25 fps | 100 | 1/50s | f/2.8–f/4 | ND16–ND64 | Normal / D-Log M | Strong ND essential |
| Golden hour cinematic orbit | 24/25 fps | 100–200 | 1/50s | f/2.8 | ND4–ND16 | D-Log M / HLG | Light fades fast — re-check exposure |
| Overcast / cloudy sky | 25/30 fps | 100–200 | 1/50–1/60s | f/2.8 | ND4–ND8 | Normal / HLG | Softer light, less ND needed |
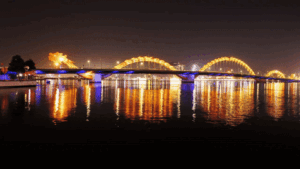
| Blue hour / city at dusk | 24/25 fps | 200–400 | 1/50s | f/2.8 | ND4 or none | Normal / HLG | Watch for clipping on city lights |
| Interior real-estate | 25/30 fps | 200–400 | 1/50–1/60s | f/2.8 | None | Normal | Boost ISO carefully; avoid underexposure |
| Night city motion | 24/25 fps | 400–800+ | 1/50s | f/2.8 | None | Normal | Accept noise; NR in post |
| Timelapse static (full manual) | N/A (photo) | 100 | 1/100–1/500s | f/2.8–f/4 | ND4–ND16 | Normal / RAW | Lock all settings before first shot |
| Drone hyperlapse (auto mode) | N/A | Auto | Auto | Auto | None | Normal | Accept limited control; deflicker in post |
Settings below apply to any drone. If you’re shopping for a new drone, I’ve reviewed the best options for beginners in 2026 → and the best budget drones under €500 →.
Note on night shooting:
Higher ISO is unavoidable in very low light. Expect some grain. Consider noise reduction in post and check your local drone regulations before flying at night – many areas require special authorization.
Step-by-Step: Dialing In Manual Exposure in the Field
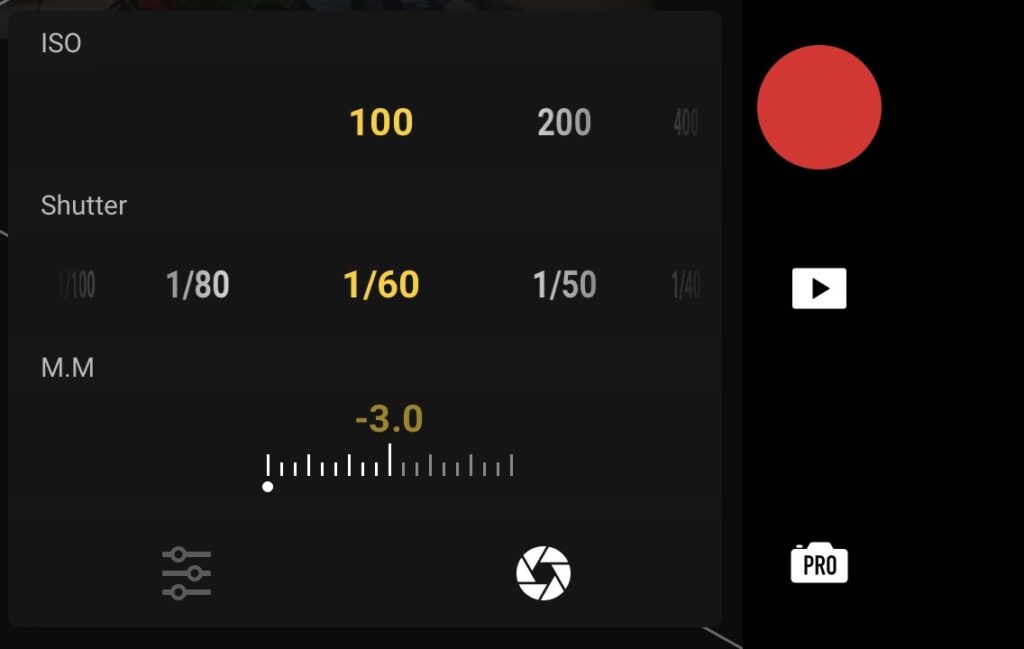
Set your recording format and frame rate – choose resolution (e.g. 4K) and frame rate (e.g. 25fps) before anything else. This locks your shutter target.
Apply the 180° shutter rule – at 25fps, set shutter to 1/50s. At 30fps, set to 1/60s. Don’t deviate without a reason.
Set ISO to base value – start at ISO 100 regardless of light. You’ll compensate with ND, not ISO.
Set aperture (if available) – start at your drone’s sharpest f-stop (typically f/2.8–f/4; check your model’s documentation).
Check the histogram or zebras – is the image overexposed (highlights clipped)? Does the histogram spike hard to the right?
Choose an ND filter if needed – overexposed in daylight at 1/50s? Add ND16 or ND32 as a starting point and re-check.
Re-check exposure – switch ND until the histogram sits comfortably without clipping highlights.
Lock white balance in Kelvin – pick your Kelvin value for the light conditions and manually lock it. Do not leave it on Auto.
Choose and lock your color profile – Normal for beginners, D-Log M or HLG if you plan to grade. Don’t mix profiles in the same edit.
Record a 10–20 second test clip – fly a short move or hold a hover and record.
Review on your screen – check for: jittery movement (shutter too fast?), flat blurry motion (shutter too slow?), grainy sky (ISO too high?), clipped highlights.
Adjust and re-shoot the test if needed – make one change at a time.
Start your actual shot – only when the test looks correct. On a sunrise shoot over Black Forest, I locked ISO 100, 1/50s, ND8 before takeoff. When light shifted at golden hour, one ND swap was all it took — the whole sequence graded in 20 minutes.
Quick Answer – How do I know if my drone exposure is correct?
Use your histogram – the graph should have most data in the middle to slightly right, without spiking into the far right (clipping). Enable zebras if your drone supports them: any striped area means overexposed highlights. Always check both sky and shadow detail in the frame.
ISO and Noise: What to Look For and How to Fix It
High ISO noise on drone cameras appears as a grainy, textured pattern – most visible in flat areas like clear sky or smooth walls. At very high ISO values, you may also see colour blotching (green/magenta patches in shadows) and banding after colour grading.
The fix almost always starts before you shoot, not in post. Noise reduction tools in DaVinci Resolve can clean footage significantly, but they cost sharpness and processing time. Prevention is always faster.
Practical ISO and noise tips:
Expose to protect highlights – a slightly bright exposure (without clipping) is easier to pull back in post than a dark one is to push up cleanly
Log profiles need more exposure – D-Log M underexposes in a flat way that looks fine on camera but amplifies noise in post; expose slightly brighter when shooting log.
Clean shadows beat bright highlights – if you must choose, slightly underexpose the ground rather than blowing the sky
Keep ISO consistent across a shoot – matching shots with different ISO values in the same edit creates inconsistent grades and visible quality jumps
Use noise reduction in post – DaVinci Resolve’s temporal NR and spatial NR, or dedicated tools like LRTimelapse NR, can recover a lot from mild-to-moderate noise
Accept the trade-off at night – some noise is unavoidable in low light; expose correctly and address it in post rather than refusing to shoot
💡 Tip: Great camera settings only shine when your flight inputs are equally smooth. If hovering, orbiting, or holding altitude still feels challenging, work through the Drone Flying Tutorial: Beginner to Confident Pilot Masterclass before your next shoot.
Drone Camera Settings for Timelapse and Hyperlapse
Timelapse is where manual control goes from “preferred” to mandatory. Each photo in a timelapse sequence is shot as a separate still image. If exposure varies between frames, even by a fraction of a stop, the result is flicker: a rapid strobing that makes the sequence unwatchable.
Auto exposure changes between every frame to find the “correct” brightness. Manual exposure locks the same brightness to every single frame. The choice is obvious.
Timelapse and hyperlapse settings checklist:
Static timelapse: Set all settings manually (ISO, shutter, white balance, color profile) before the sequence starts. Do not change anything mid-sequence.
Shutter for timelapse: Unlike video, you have more flexibility – 1/100s to 1/500s as a starting point in daylight; slower for silky cloud motion (check your interval vs shutter relationship)
Photo-interval timelapse: Same rules as static – fully manual, locked before first frame
Drone hyperlapse: DJI’s automated hyperlapse modes (Circle, Course Lock, Waypoint) default to auto exposure for trajectory accuracy. Some DJI models allow manual exposure overrides in hyperlapse — check your specific model’s firmware. Plan to deflicker in post regardless.
Always shoot timelapse in RAW or the highest quality JPEG – this gives you maximum headroom to correct minor exposure inconsistencies in post
If you want to learn how to choose the right interval for your timelapse read: Timelapse Interval Guide
Here is the link to our free Timelapse Interval Calculator
12 Common Drone Camera Settings Mistakes
Leaving ISO on auto for timelapse – Auto ISO shifts brightness frame-to-frame, causing flicker. Fix: set ISO manually before the sequence starts and lock it.
Too-fast shutter speed in daylight – A shutter of 1/500s or faster at 24fps creates a jittery, unnatural look. Fix: follow the 180° rule and add ND filter to allow 1/50s at bright exposures.
Over-stopping aperture on variable-aperture drones – Very high f-numbers (f/8 and above) introduce diffraction softness. Fix: stay in the f/2.8–f/5.6 range as a starting point and check your specific drone’s sharpness curve.
Leaving white balance on auto mid-flight – AWB shifts colour tone as the drone pans, creating ungradeably inconsistent clips. Fix: set a Kelvin value before take-off and lock it manually.
Using D-Log or flat profiles without enough light – Log profiles compress shadows heavily; in low light, this amplifies noise dramatically. Fix: reserve log profiles for well-lit conditions, or raise base ISO slightly to compensate.
Not checking the histogram before take-off – You can’t fix clipped highlights in post. Fix: check your histogram on a static hover before your first real move.
Forgetting to remove the ND filter at dusk or night – An ND filter in low light forces you to push ISO dangerously high. Fix: use the Drone Pre-Flight Checklist for Beginners and add “ND filter correct for current light?” as a permanent line item.
Underexposing and “fixing” it in post – Lifting dark footage in editing amplifies noise and creates banding. Fix: expose correctly in camera; a slightly bright exposure is safer than a dark one.
Shooting at wrong frame rate for the edit timeline – Mixing 30fps footage in a 25fps timeline (or vice versa) creates judder or speed issues. Fix: confirm your project timeline frame rate before you fly.
Using the wrong color profile and struggling in post – D-Log M footage pasted into a Normal-profile edit looks flat and washed out. Fix: decide on one color profile per project and stick to it across all batteries.
Not matching settings between battery swaps – A brightness or white balance shift between battery swaps is immediately visible in an edit. Fix: note your exact settings (ISO, shutter, Kelvin, ND strength) and apply them identically after every battery change.
Ignoring wind buffet when choosing shutter speed – In strong wind, the drone micro-vibrates. A very slow shutter at 1/25s or 1/30s can turn this into blur smear. Fix: in windy conditions, consider a marginally faster shutter (e.g. 1/100s at 25fps) and adjust your ND accordingly.
Frequently Asked Questions
What are the best drone camera settings for video?
As a starting point: frame rate at 25fps (or your target fps), shutter speed at 1/50s (180° rule), ISO at 100, aperture at f/2.8–f/4 (if available), white balance locked in Kelvin, and an ND filter matched to the light conditions. These are baseline drone camera settings for video — adjust for your scene, drone model, and creative intent.
What ISO should I use on a drone in daylight?
ISO 100 is the standard starting point for daylight drone footage. This produces the cleanest image with minimal noise. Only raise ISO if your image is still underexposed after widening aperture and reducing shutter speed (within the 180° rule limit).
What shutter speed is best for 24/25/30 fps drone footage?
Following the 180° shutter rule: 1/50s for 24–25fps, and 1/60s for 30fps. These values create natural motion blur that reads as cinematic to human eyes. Faster shutters look jittery; slower shutters look excessively blurry.
Do I need ND filters for my drone?
For video, yes – they are effectively essential, not optional. In bright daylight, following the 180° shutter rule at 1/50s will massively overexpose without an ND filter. A basic starter set of ND4, ND8, ND16, and ND32 covers most outdoor situations. I would recommend a set of Neewer ND Filter Set ND8-64.
What white balance should I use for drone video?
Pick a Kelvin value that matches your light and lock it manually – approximately 5500–6000K for bright sun, 3500–4500K for golden hour, 6000–7000K for overcast. Never use auto white balance for video; the mid-clip colour shifts it creates are very difficult to correct in editing.
What is D-Log and should beginners use it?
D-Log M is DJI’s logarithmic colour profile that captures a wider dynamic range by flattening contrast and desaturating colour. It preserves more highlight and shadow detail for colour grading, but the footage looks flat and grey straight from the camera. For beginners, start with Normal or HLG until you’re comfortable with colour grading workflows – D-Log M rewards skill but punishes incorrect exposure.
How do I reduce noise in drone footage?
First, prevent it: expose correctly in camera at the lowest ISO that gives you the right brightness. In post, DaVinci Resolve offers powerful temporal and spatial noise reduction. Noise reduction always costs some sharpness, so prevention in camera is always the better strategy.
What camera settings should I use for drone timelapse?
Use fully manual exposure: ISO as low as possible (typically ISO 100 in daylight), shutter speed suited to the scene and interval (e.g. 1/200s–1/500s for sharp frames in bright light), white balance locked in Kelvin, and shoot in RAW or maximum quality JPEG. Never use auto exposure for timelapse – it causes flicker between frames. See also: Timelapse Interval Guide
Why does my drone footage look jittery?
Jittery footage is almost always caused by a shutter speed that is too fast relative to your frame rate – for example, shooting 1/500s at 25fps. The lack of motion blur makes every micro-movement appear as a sharp stutter. Fix it by following the 180° shutter rule (1/50s at 25fps) and adding an ND filter to control exposure.
Should I shoot RAW or JPEG for drone photography?
RAW gives you far more latitude for exposure correction, white balance adjustment, and noise reduction in post – and for timelapse sequences, the ability to correct subtle exposure drifts before rendering. JPEG is fine for quick social media delivery where post-processing time is not available. If your drone and storage allow it, RAW (or RAW + JPEG) is the better habit to build.
Next Steps
Now that you have a solid understanding of drone camera settings, the most practical next step is to build and save a “base settings” preset on your drone – ISO 100, shutter at 180° for your frame rate, white balance locked at 5600K, Normal or HLG color profile – so you have a reliable starting point every time you power on. From there, you adjust for conditions rather than starting from scratch on every flight.
Camera settings are one piece of the puzzle. For the complete framework — shot types, gear selection, EU regulations, editing workflow, and stock monetisation — the Complete Drone Videography Guide covers every stage in one place.
⚠️ A brief note for EU pilots: Before flying, always verify your drone is registered and operated in accordance with current EU rules. The EASA Open Category guidelines cover A1, A2, and A3 subcategories, registration requirements, and pilot competency rules for all EU member states.

Dipon is a drone and timelapse cinematographer based in Ulm, Germany, with over 15 years of experience turning real spaces and projects into cinematic visuals. With a background in digital marketing, every shot is planned with a clear purpose — where it will appear, who will see it, and what it should help them decide.
You May Also Like
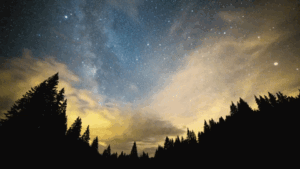
Milky Way Timelapse: Settings, Gear & Locations
The Complete Drone Videography Guide (2026)
Best Drones Under 300 Euro 2026: Entry-Level Options That Actually Deliver
Stock Footage Metadata for Timelapse Contributors: How to Title, Tag & Describe Your Clips
Timelapse Interval Guide : Pick the Right Interval Fast
Drone Pre-flight Checklist for Beginners: Safety System for Confident Flights

Best Stock Platforms for Timelapse: Pond5 vs Shutterstock (2026 Guide)
Drone Flying Tutorial : Beginner to Confident Pilot
What Timelapse Sells: Best Timelapse Subjects for Stock Footage
Best Drones for Beginners (2026): Safe, Easy Picks + Buying Guide
Timelapse Stock Footage Earnings: $3K/Month Case Study
Best Drones Under 500 Euro (2026) – Top 6 Budget Camera Drones
Need help capturing aerials for your next project but not ready to invest in the gear yet? Check out our Drone Videography to see how Aero Timelapse Studio can help elevate your production.