The Complete Guide to Drone Videography (2026)
Dipon | March 2026
Table of Contents
- Intro
- Key Takeaways
- What Is Drone Videography?
- EU Drone Regulations: What You Must Know Before You Fly
- Essential Drone Camera Settings for Cinematic Footage
- The 7 Drone Shot Types Every Videographer Needs
- Best Gear for Drone Videography in 2026
- How to Edit Drone Footage Like a Pro
- How to Sell Drone Footage as Stock Video
- Go Deeper: Related Guides on Aero Timelapse
- Frequently Asked Questions
- Start Flying — Your Best Footage Is Ahead
Affiliate Disclosure
This guide contains affiliate links. Purchases made through these links support Aero Timelapse Studio at no additional cost to you. I only recommend products I personally use or carefully research. As an Amazon Associate I earn from qualifying purchases.
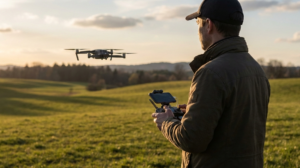
You’ve watched that cinematic pull-back over a mountain ridge, or the buttery orbit around a cathedral at golden hour, and thought: I want to create that. Maybe you already own a drone and your footage still looks frustratingly flat, jittery, or just… amateur. Either way, you’re in the right place.
This drone videography guide covers everything — from the exact camera settings that separate cinematic footage from shaky holiday clips, to EU regulations you must understand before you ever launch, to the shot types that make viewers stop scrolling. I’ve built this from years of real commercial work across Southern Germany, the Dolomites, and Lake Como. Not theory. Actual field-tested technique.
By the end of this guide, you’ll know exactly how to set up your drone, execute professional shot types, stay legal under EU law, gear up without wasting money, and if passive income is your goal, know how to turn every flight into a revenue stream.
Key Takeaways
Sub-249g drones (DJI Mini series) operate in EASA’s A1 sub-category – the fewest restrictions in the EU, no licence exam required for most flights.
The 180-degree shutter rule is the single biggest differentiator between amateur and cinematic footage: set your shutter to double your frame rate.
ND filters are non-negotiable outdoors – they enforce the 180-degree rule in bright sunlight where you can’t reduce ISO further.
Seven shot types form the foundation of professional drone cinematography: master these and every location opens up.
The best camera settings for cinematic drone footage: 4K/24fps, 1/50s shutter, ISO 100, D-Log M/D-Cinelike colour profile, f/2.8–f/8 if variable aperture available.
Stock drone footage sells best in 4K, 10-bit colour, D-Log, 10–30 second clips – Pond5 offers the best royalty rates at 40–60%.
Before you spend €800 on the wrong drone, read the gear section – the right choice depends entirely on your use case and EU flight environment.
What Is Drone Videography?
Drone videography is the practice of capturing video footage from an unmanned aerial vehicle (UAV), commonly called a drone, using an onboard gimbal-stabilised camera. The resulting aerial perspective – impossible to achieve from the ground – gives filmmakers, content creators, real estate professionals, and documentary makers a visual dimension that transforms otherwise ordinary scenes into cinematic storytelling.
Drone videography is different from drone photography because it requires an understanding of motion – how the drone moves, how that movement interacts with the camera’s shutter and frame rate, and how to plan fluid transitions between shots. A well-executed drone video clip tells a story through movement; a great drone photo freezes a single perfect moment. The two crafts share the same equipment but demand entirely different skills.
A modern drone videography setup combines three core elements: the drone platform (flight system, GPS, obstacle avoidance), the camera system (sensor, gimbal, codec, colour profile), and the operator’s technique (flight path planning, camera movement timing, in-field settings). Get all three right, and the results are stunning. Neglect any one of them, and even a €1,500 drone will deliver footage that looks like a shaky dashcam recording.
EU Drone Regulations: What You Must Know Before You Fly
Flying without understanding EU drone law is not just risky – it can mean fines, confiscated equipment, and in commercial contexts, no insurance coverage. The good news: if you fly a sub-249g drone like the DJI Mini series, the rules are far simpler than most people think.
The EASA Open Category: A1, A2, A3 Explained
Since 2021, the European Union Aviation Safety Agency (EASA) has standardised drone operations across all EU member states under the Open Category framework, covering most recreational and commercial drone flights. This system divides operations into three subcategories based on drone weight, class marking, and proximity to people:
| Subcategory | Drone Class | Who Needs It | Key Rule |
|---|---|---|---|
| A1 | C0 (under 250g) / C1 (under 900g) | Almost every hobbyist | Can fly over people; not over crowds |
| A2 | C2 (under 4 kg) | Intermediate/commercial | 30m horizontal from uninvolved people (reduced to 5m with low-speed mode) |
| A3 | C2/C3/C4 (up to 25 kg) | Remote/industrial use | Minimum 150m from people and residential areas |
What this means for you in practice:
If you fly a DJI Mini 5 Pro or Mini 4 Pro (both under 249g, CE class C0): you operate in A1. No formal licence exam required – you read the operator manual and register with your national authority (in Germany, that’s the LBA – Luftfahrt-Bundesamt).
If you fly a DJI Air 3S (CE class C1): you still operate in A1/A2, but you need to pass the EASA A2 CofC (Certificate of Competency) exam to fly close to people.
All operators must register in their home EU country and carry their operator ID.
Germany-Specific Rules (LBA)
In Germany, drone operators must register through the Luftfahrt-Bundesamt (LBA) via the UAS-Registration Portal; once registered, your unique UAS Operator ID (e-ID) must be clearly displayed on the exterior of your drone.
Nature reserves, airport exclusion zones (5 km radius without ATC permission), and areas marked in apps like DJI Fly or AirMap have additional restrictions. Always check the Luftfahrt-Bundesamt portal before flying anywhere new.
💡 Pro Tip: Before any shoot, commercial or persona, run through a complete pre-flight safety check. My drone pre-flight checklist for beginners covers every step from airspace authorization to battery voltage.
⚠️ Warning: Flying commercially (i.e., receiving payment for footage) without proper registration and liability insurance (Haftpflichtversicherung) is illegal in Germany. Your standard household insurance does NOT cover commercial drone operations. Get dedicated drone insurance – providers like Allianz and Hanse Merkur offer specific UAV policies from around €100–€180/year.
💡 Go Deeper: EU drone law changes regularly and varies by location type. A dedicated guide covering airspace classifications, restricted zones, and the full LBA registration process step-by-step is coming soon to Aero Timelapse.
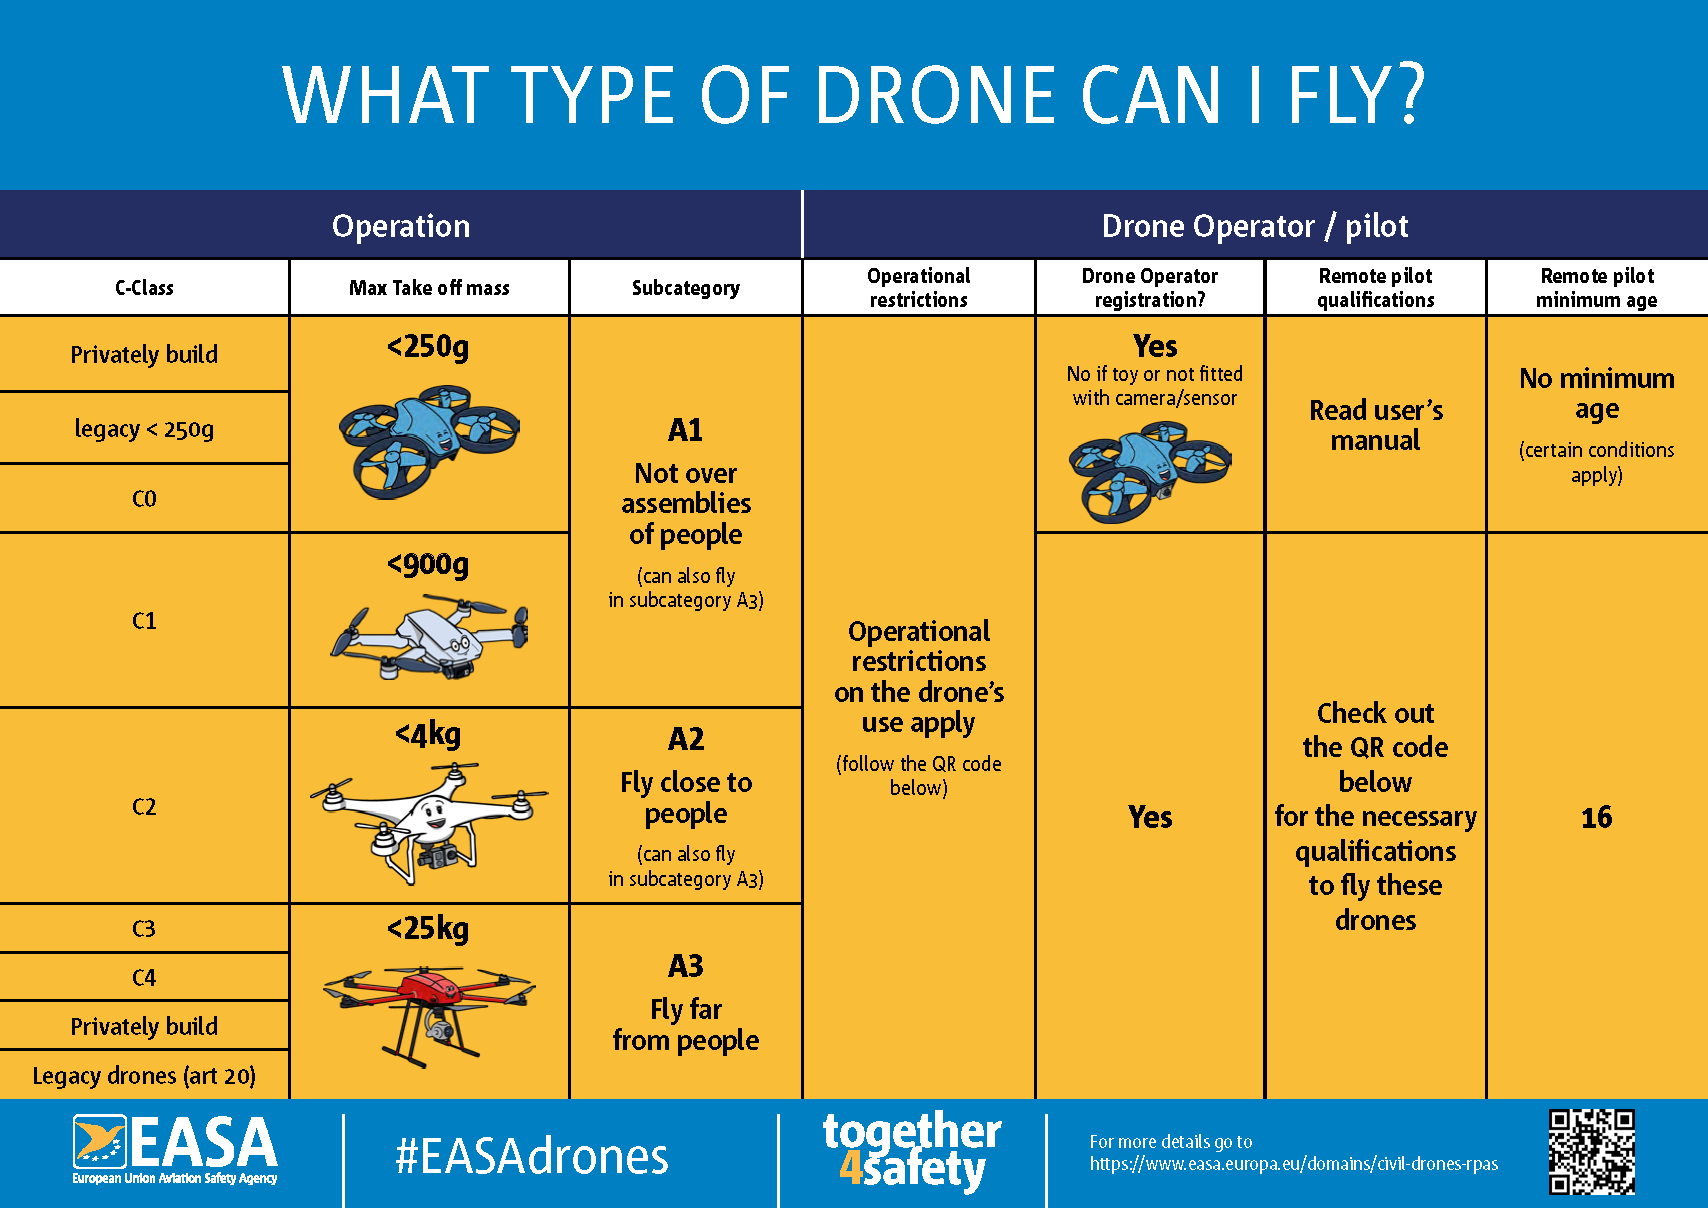
EASA Open Category diagram. Source: easa.europa.eu
Essential Drone Camera Settings for Cinematic Footage
The difference between amateur and cinematic drone footage is, more often than not, a single setting: shutter speed. Everything else flows from getting this right first.
The 180-Degree Shutter Rule
The 180-degree shutter rule is the foundational principle of cinematic motion blur. It states: set your shutter speed to approximately double your frame rate. This replicates the natural motion blur the human eye perceives in real life, making movement look smooth and organic rather than jittery.
Concrete values:
Shooting at 24fps → set shutter to 1/50s
Shooting at 30fps → set shutter to 1/60s
Shooting at 60fps (slow motion) → set shutter to 1/120s
The problem outdoors: in bright sunlight, 1/50s at ISO 100 will massively overexpose your image. You can’t close down the aperture on most compact drones (DJI Mini 5 Pro has a fixed f/1.8 lens). The solution is ND filters – see below.
ND Filters: Non-Negotiable for Outdoor Shoots
An ND (Neutral Density) filter is essentially sunglasses for your lens. It reduces incoming light without affecting colour, allowing you to maintain the 180-degree shutter rule in bright conditions.
Which ND do you need?
| Condition | Recommended ND | Effect |
|---|---|---|
| Overcast / golden hour | ND8 | 3 stops reduction |
| Bright sunshine, mid-morning | ND16 | 4 stops reduction |
| Harsh midday sun | ND32–ND64 | 5–6 stops reduction |
| Snow, water, extreme sun | ND64–ND128 | 6–7 stops reduction |
I carry a full set on every shoot – on a Dolomites shoot last summer, I switched between an ND16 in the valley and an ND64 on the high plateau within 90 minutes as clouds cleared.
For DJI Mini 5 Pro users, I recommend the Freewell ND Filter Set for DJI Mini 5 Pro – it covers ND8/16/32/64 in a single affordable kit and the magnetic mount system means no fumbling at altitude. Unsure which ND to use on a given day? Use the free ND Filter Calculator – plug in your conditions and it gives you the exact filter in seconds.
Full Manual Settings Cheatsheet
Lock these in before every flight:
Frame rate: 24fps for cinematic, 60fps for slow motion
Shutter speed: Follow the 180-degree rule (see above)
ISO: As low as possible – start at ISO 100, push to max ISO 400–800 in low light
Aperture: f/2.8–f/8 if available; fixed aperture drones use ND filters for exposure control
White balance: Manual, 5600K for daylight. Never leave it on auto – it shifts mid-clip.
Colour profile: D-Log M (DJI Air 3S, Mini 5 Pro) or D-Cinelike – flat profile for maximum post-production flexibility
Resolution: 4K minimum – never shoot stock in 1080p
For a complete deep-dive on every setting, see manual drone camera settings – it covers aperture priority, histogram reading, and exposure compensation in detail.
💡 Pro Tip: Lock your white balance before you launch. On a 45-minute flight session near Lake Como, I once accidentally left white balance on auto — the colour temperature shifted 800K between takes, making colour matching in post a nightmare. Ten seconds of care on the ground saves hours in DaVinci Resolve.
⚠️ Warning: Flying commercially (i.e., receiving payment for footage) without proper registration and liability insurance (Haftpflichtversicherung) is illegal in Germany. Your standard household insurance does NOT cover commercial drone operations. Get dedicated drone insurance – providers like Allianz and Hanse Merkur offer specific UAV policies from around €100–€180/year.
The 7 Drone Shot Types Every Videographer Needs
Your drone is only as cinematic as the shots you programme into it. Flying aimlessly and hitting record is how you generate hard drive clutter. These seven shots give every location a language.
1. The Reveal (Crane Up)
Start low, behind or below your subject, and rise slowly while the camera tilts down. The landscape opens up behind the subject as altitude increases, what was hidden becomes visible, and the viewer experiences the same sense of discovery you felt when you first saw the location.
What makes it cinematic is the timing of the reveal. Hold the low position just long enough that the viewer settles into the frame, then rise. Too fast and the moment is lost. At Hohenzollern Castle on a misty morning, starting below the cloud layer and rising slowly until the castle emerged above the white, towers first, then the full silhouette turned a grey overcast day into the most atmospheric shot of the entire project.
Keep your ascent speed consistent, uneven vertical movement reads immediately in playback. Use your drone’s speed limiter if needed, and check the horizon stays level throughout the rise.
Best subjects for this shot: castles, churches, mountain peaks, coastal cliffs, city skylines, lone trees, architectural landmarks.
2. The Orbit (Point of Interest)
Circle a fixed subject while keeping the camera centred on it throughout the movement. The subject stays locked in the frame while the background rotates, revealing context, depth, and the surrounding environment from every angle in a single continuous shot.
What makes it cinematic is the sense of scale it creates around the subject. A tight orbit makes a subject feel grand and isolated; a wide orbit places it inside its full environment. On Achensee in Austria, orbiting a single sailing boat at low altitude with the turquoise lake surface and Tyrolean ridgeline rotating slowly behind it produced a clip that felt effortlessly cinematic without a single complex manoeuvre.
Most DJI drones have an automated Point of Interest mode. For manual execution: yaw in one direction while applying opposing lateral stick to maintain radius. Keep orbital speed at 3–5 m/s for a controlled, professional feel.
Best subjects for this shot: isolated buildings, churches, monuments, boats on water, mountain peaks, vehicles on open roads.
3. The Top-Down Bird's Eye
Position the gimbal at exactly 90°, drone drifting slowly across a subject with the camera pointing straight down. Everything below becomes a flat, abstract composition – geometry, pattern, colour, and texture replace depth and perspective entirely.
What makes it cinematic is watching movement unfold from directly above. The viewer sees motion in its purest form – no horizon, no depth, just subject against surface. In Lagos, Algarve, shooting from height directly above the harbour, the boats carrying kayaks cutting slowly through the turquoise water left clean white trails across the surface – the contrast between the vivid colour of the sea and the movement lines beneath each hull made the shot.
Speed matters more than you expect at –90°. Even 5 m/s feels fast when there is no horizon to anchor the eye. Keep your own drone movement slow and deliberate — 2 to 3 m/s — and let your subject’s movement do the work.
Best subjects for this shot: roads and intersections, rivers and coastlines, rooftops, agricultural patterns, construction sites, harbours, geometric architecture.
4. The Tracking Shot (Chase)
Follow a moving subject – a car, cyclist, boat, or athlete – from behind, beside, or directly above, keeping it consistently framed throughout the movement. The drone matches the subject’s speed and direction while the camera holds the composition.
What makes it cinematic is the shared sense of motion between subject and viewer. The audience doesn’t just watch the subject move – they move with it. On Lake Como, tracking a passenger ferry cutting across the water from a low lateral angle, bow wave spreading white against the deep blue, Bellagio visible on the far shore – gave twelve seconds of footage that anchored an entire travel edit with almost no effort.
Anticipate the subject’s path before you start rolling – reactive stick inputs always show in the footage. Position yourself slightly ahead of the movement, let the subject come to you, and match speed gradually rather than chasing from behind.
Best subjects for this shot: boats and ferries, cars on scenic roads, cyclists, runners, trains, agricultural machinery, horses.
5. The Fly-Through
Navigate the drone through a natural or architectural gap – between trees, under a bridge, through a gate, along a canyon wall, or between two buildings. The environment passes the camera on both sides simultaneously, creating an immersive tunnel-vision effect that no other shot type replicates.
What makes it cinematic is the sensation of passing through space rather than over it. When executed cleanly, a fly-through feels like the camera has been freed from gravity entirely. In Lagos, Algarve, threading the drone through a narrow gap between two towering sandstone boulders directly beneath an old stone bridge – rough amber rock filling both edges of the frame – produced three seconds of footage that stopped every viewer mid-scroll.
Practise in open, obstacle-free space before attempting any real fly-through. Disable obstacle avoidance only in well-assessed, clearly visible passages – never near power lines, in wind, or anywhere the margin for error is genuinely thin.
Best subjects for this shot: rock formations, cliff faces, bridges, archways, forest corridors, rows of vines or trees, industrial structures.
6. The Helix
Circle a fixed subject while simultaneously ascending or descending, keeping the camera centred on the subject throughout. The combined rotation and vertical travel creates a spiralling path – the subject stays locked while the background rotates and expands around it.
What makes it cinematic is that it reveals both the subject and its surroundings in a single unbroken movement. An orbit shows context. A crane-up shows scale. The helix does both at once. In Bellagio on Lake Como, starting at rooftop level with the colourful terraced town filling the frame, then ascending slowly in a wide helix until the full panorama of the lake opened behind it – both arms of the lake stretching north toward the Alps, compressed an entire location reveal into one continuous fifteen-second shot.
Keep total movement speed low — 2 to 3 m/s combined and monitor your altitude throughout. It is easy to lose track of how high you’ve climbed mid-helix when your attention is on maintaining the orbit radius.
Best subjects for this shot: lakeside towns, tall architecture, mountain summits, isolated trees, lighthouses, towers, monuments.
7. The Low Altitude Fly-Over (Nap-of-the-Earth)
Fly forward at low altitude — 1 to 5 metres above the surface — with the camera pointing straight ahead or angled slightly downward. The subject beneath the drone does the visual work: wheat fields, lavender rows, snow plains, water, road markings, or rooftops all become hypnotic when skimmed at low altitude.
What makes it cinematic is proximity, not speed. Even at 20 km/h, flying 2 metres above a field of tall grass creates a sense of urgency and immersion that a 100-metre altitude shot at the same speed simply cannot replicate. On a shoot just outside Ulm last summer, a single low pass over a sunflower field — rows stretching perfectly to the horizon — became the opening shot of the final edit. Nothing else from that session came close.
Two things to manage carefully: ground clearance and wind. At low altitude, a sudden gust or uneven terrain can close the margin between your drone and the ground extremely fast. Fly this shot in calm conditions, know your terrain in advance, and never disable obstacle avoidance without a clear sightline to the ground beneath you.
Best surfaces for this shot: crop fields, sunflower and rapeseed fields, vineyards, open water, coastal sand, snow fields, long straight roads, railway lines.
⚠️ Warning: Practise each shot type in a safe, open area before attempting them near buildings, trees, or people. The fly-through and helix especially have a high consequence of error at low altitude.
💡 A full execution breakdown for each shot type — with setup checklists, speed settings, and common mistakes — is coming soon.
Best Gear for Drone Videography in 2026
Before you spend €800 on the wrong drone, understand one thing: the best drone is the one that matches your current skill level, your EU flight environment, and what you actually plan to shoot — not the one with the most impressive spec sheet. Here is an honest, research-backed breakdown of what I would actually recommend in 2026.
Which Drone Do You Need?
The DJI lineup in 2026 covers four distinct tiers. Each one serves a genuinely different pilot — and buying above your actual needs usually means paying for features you won’t use while inheriting regulatory complexity you didn’t want.
Tier 1 — Beginner & Hobbyist: DJI Mini 4 Pro
The DJI Mini 4 Pro is the most proven all-round beginner drone on the market, and it remains my primary recommendation for anyone learning drone videography in 2026.
It weighs under 249g — CE class C0 — which means it sits in the EASA A1 sub-category across the entire EU. No formal licence exam required. Register with Germany’s LBA, display your operator ID, and fly. For a beginner, that regulatory simplicity alone is worth something. You’re learning to fly, learning camera settings, and building confidence — you don’t also need to be managing A2 CofC paperwork at the same time.
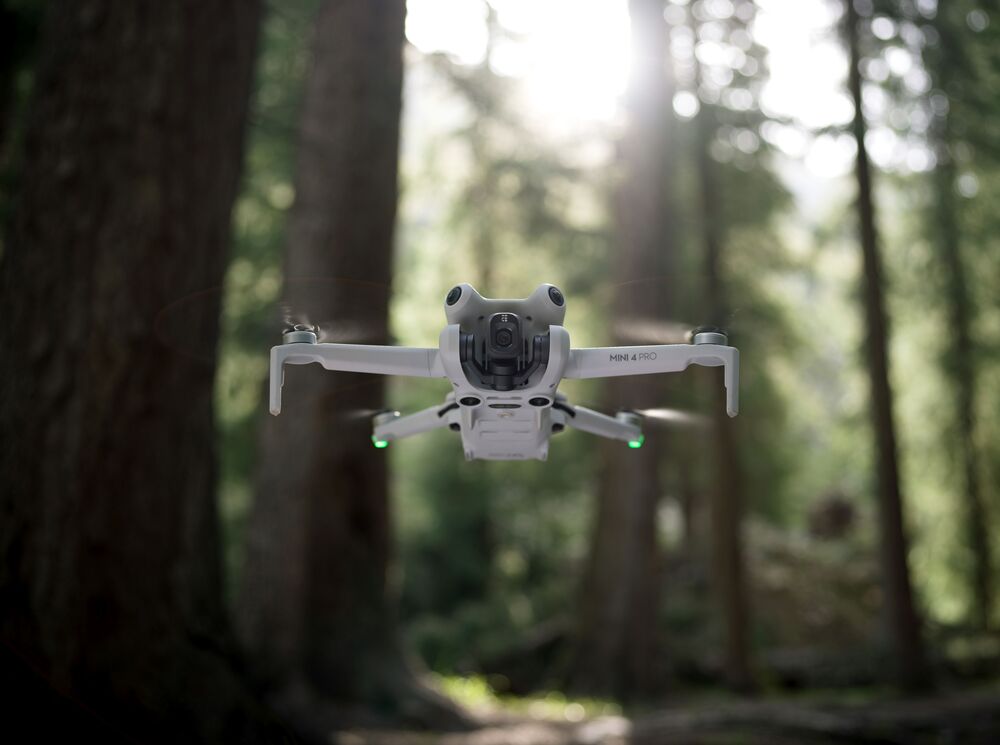
On image quality: the Mini 4 Pro shoots 4K/100fps in 10-bit D-Log M, features 1/1.3-inch sensor with omnidirectional obstacle sensing, ActiveTrack 360° subject tracking, and vertical shooting for social content. Independent real-world comparisons confirm its footage is virtually indistinguishable from the Mini 5 Pro in standard daylight conditions. It will not limit you creatively for 12 months of regular flying.
For everyday shooting, travel, and learning the fundamentals, I recommend the DJI Mini 4 Pro — it is the safest, most forgiving drone to learn on, and its image quality in normal shooting conditions is genuinely excellent.
Best For: Beginners, hobbyists, travel creators, anyone wanting maximum EU regulatory simplicity.
Tier 2 — Advanced Hobbyist & Stock Footage Seller: DJI Mini 5 Pro
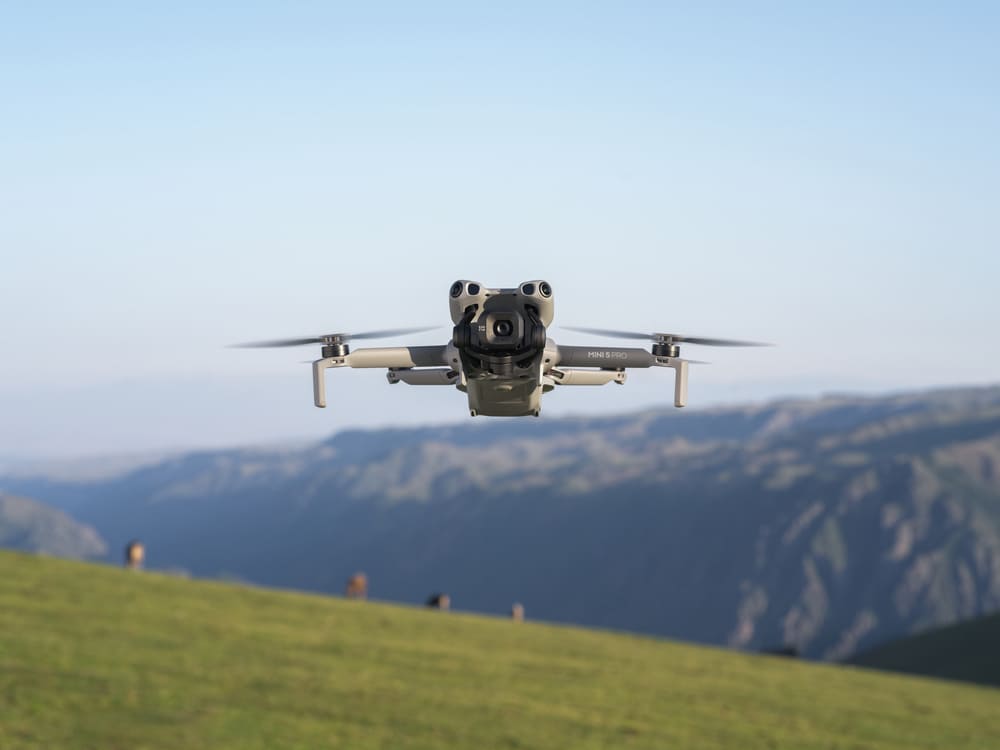
The DJI Mini 5 Pro is a genuine editorial recommendation — but only for a specific type of creator.
The step up from the Mini 4 Pro to the Mini 5 Pro makes a measurable difference in two specific scenarios: low-light and variable lighting conditions. The Mini 5 Pro carries a 1-inch CMOS sensor, captures 5.4K resolution, shoots 4K/120fps slow motion in 10-bit D-Log M, and offers up to 52 minutes of flight time on the Plus battery. For stock footage creators specifically, the larger sensor produces clips with visibly better dynamic range and low-light detail — qualities that directly affect whether agency image reviewers approve or reject a clip.
💡 Honest caveat: In good daylight, the image quality gap between the Mini 4 Pro and Mini 5 Pro is genuinely small. If you shoot mostly in midday or morning sunlight, the Mini 4 Pro is sufficient. The Mini 5 Pro earns its price premium specifically for golden hour, dusk, overcast conditions, and high-dynamic-range scenes — the situations where a 1-inch sensor’s wider latitude becomes clearly visible.
It still weighs under 249g — same A1/C0 regulatory freedom as the Mini 4 Pro. No additional exam required across the EU.
For stock footage production and shoots in challenging light, I recommend the DJI Mini 5 Pro — the 1-inch sensor and 4K/120fps capability produce clips that hold up under professional agency review.
For a full field test of the Mini 5 Pro — including real-world low-light samples and battery performance — see the DJI Mini 5 Pro Review.
Best For: Stock footage sellers, advanced hobbyists, creators regularly shooting at golden hour, dusk, or in variable weather.
Tier 3 — Commercial & Professional: DJI Air 3S
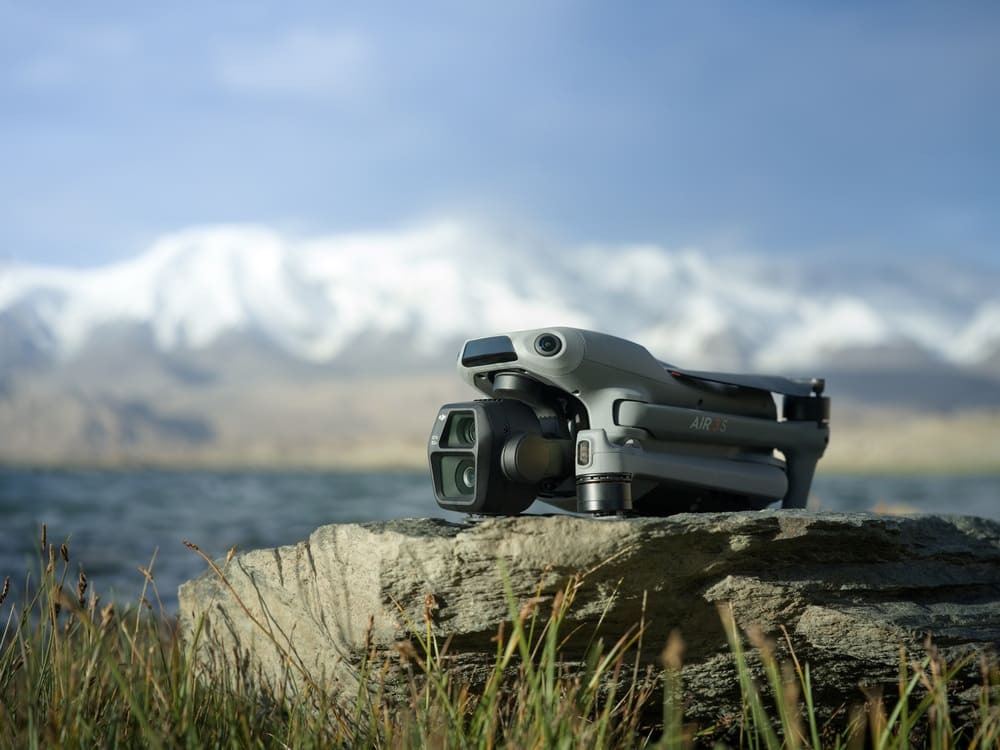
The DJI Air 3S is the professional-grade recommendation for 2026 — and it directly replaces the DJI Air 3 that I previously featured on this site. This is a meaningful upgrade, not a cosmetic refresh.
The key change: the Air 3S upgrades the primary camera to a full 1-inch CMOS sensor (the Air 3 used a 1/1.3-inch), adds 42GB of internal storage (vs 8GB on the Air 3), improves nightscape obstacle avoidance for low-light commercial operations, and retains the dual-camera system with a second 1/1.3-inch medium telephoto lens for compressed perspective shots. Flight performance and handling are essentially identical to the Air 3.
In practical terms: the Air 3S produces footage that holds up to professional colour grading for demanding client deliverables — real estate, hotel and tourism branding, construction documentation, architectural showcases. On commercial shoots for clients in Stuttgart and Ulm, I use the dual-camera system regularly: wide angle for context-setting shots, telephoto to compress the relationship between foreground subjects and background architecture.
One important note for EU pilots: the Air 3S is CE class C1 (724g), which means you need the EASA A2 Certificate of Competency to fly it near uninvolved people. That’s an online theory exam — not a practical flight test — but it’s a real step worth planning for before purchase.
For commercial drone videography, I recommend the DJI Air 3S — the 1-inch sensor, dual-camera system, and 14 stops of dynamic range produce footage that justifies the investment across real estate, tourism, and branded content work.
If real estate is your primary use case, the dedicated Best Drones for Real Estate Photography guide covers the Air 3S and its alternatives specifically for property shoots.
Best For: Commercial shoots, real estate, tourism, branded content, any professional client-facing work.
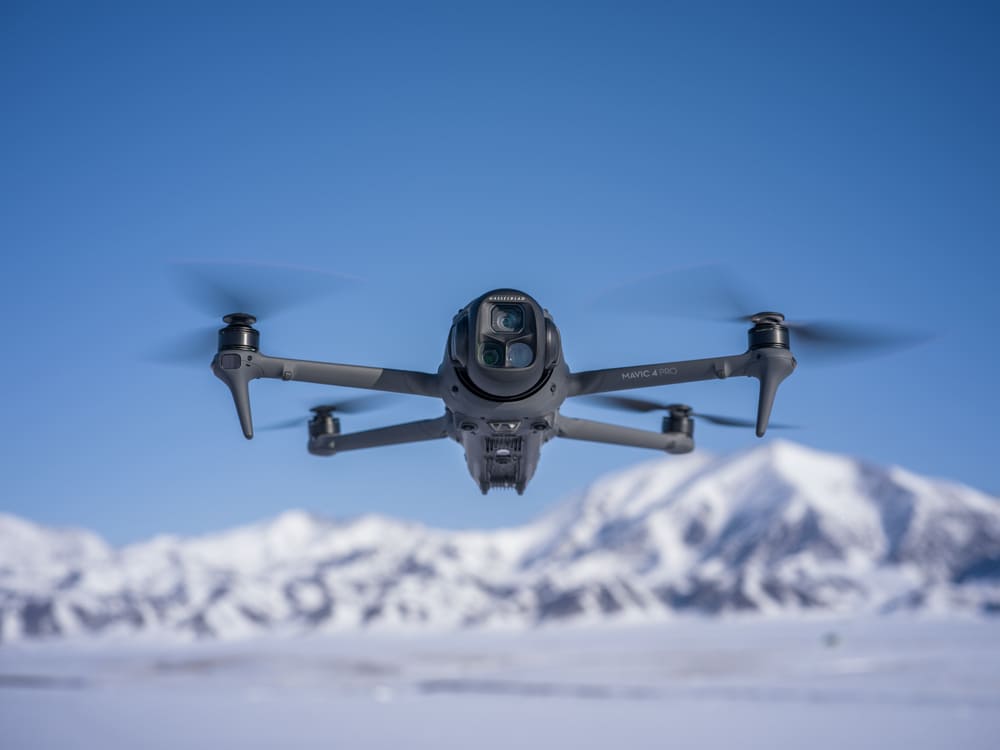
Tier 4 — High-End Professional: DJI Mavic 4 Pro
The DJI Mavic 4 Pro (released late 2025) has set a new benchmark for portable professional drones that I haven’t yet covered fully on aerotimelapse.com — but should. It shoots 6K/60fps, captures 100MP stills, features LiDAR-assisted obstacle detection for genuine low-light flying safety, and delivers approximately 51 minutes of flight time.
It is not a beginner drone, and it sits above the Air 3S in both price and complexity. But for high-budget commercial clients — premium architecture, luxury real estate, large-scale construction documentation — where the Air 3S footage isn’t quite enough and the Inspire 3 is overkill, the Mavic 4 Pro fills a real gap. A dedicated review is on the roadmap for this site.
Best For: High-end commercial productions, premium real estate, professional cinematographers who’ve outgrown the Air 3S.
Drone Comparison at a Glance
| Drone | Sensor Size | Max Video | Weight / EU Class | Sweet Spot | Price |
|---|---|---|---|---|---|
| DJI Mini 4 Pro | 1/1.3-inch | 4K/100fps 10-bit | <249g / C0 — A1 | Beginners, hobbyists | Check Latest Price |
| DJI Mini 5 Pro | 1-inch | 5.4K / 4K/120fps 10-bit | <249g / C0 — A1 | Stock sellers, low-light | Check Latest Price |
| DJI Air 3S | 1-inch + 1/1.3-inch tele | 4K/120fps 10-bit | 724g / C1 — A1/A2 | Commercial, professional | Check Latest Price |
| DJI Mavic 4 Pro | Large CMOS | 6K/60fps 10-bit | ~900g / C1 — A1/A2 | High-end professional | Check Latest Price |
Essential Accessories — Don't Fly Without These
The drone is only half the kit. These four accessories are the difference between a smooth, productive shoot and a session cut short.
Spare Batteries
A single battery gives you 30–45 minutes in real-world conditions — often less in wind or cold weather. Any serious shoot requires a minimum of two batteries, preferably three. Running to a low-battery warning mid-sunset means the shot is gone. For the DJI Mini series, carry spare batteries and rotate them on a labelled charging schedule so you always know which are full.
Spare Propellers
The most overlooked item in any drone bag. One hard landing, one clipped branch, one prop strike on a gate during a fly-through practice — and you’re grounded for the day. Spare propellers for the DJI Mini series cost under €15 and weigh almost nothing. They live permanently in my kit bag. They’ve rescued shoots more than once.
Memory Card — Don't Cut Corners Here
4K/120fps in 10-bit D-Log generates large files writing at sustained high speed. A slow or budget card causes dropped frames, mid-clip recording failures, or corrupted files you discover only in post. Use a card rated V30 minimum, UHS-I U3 — the SanDisk Extreme Pro in 128GB or 256GB handles everything current DJI drones produce without hesitation. A corrupted clip from a cheap card costs more in reshoot time than the price difference ever justified.
ND Filter Set
If you’re shooting on the DJI Mini 5 Pro, a dedicated ND filter set is not optional — it’s how you enforce the 180-degree shutter rule outdoors. The Freewell ND Filter Set for DJI Mini 5 Pro covers ND8 through ND64 in one magnetic-mount kit designed specifically for the Mini 5 Pro lens. Fast to swap in the field, well-built, optically clean.
How to Edit Drone Footage Like a Pro
Most drone footage looks average not because of how it was shot, but because of what happens — or doesn’t happen — in post. Raw D-Log footage is intentionally flat and grey. That’s not a problem — it’s a feature. It’s a wide-dynamic-range canvas waiting for a grade.
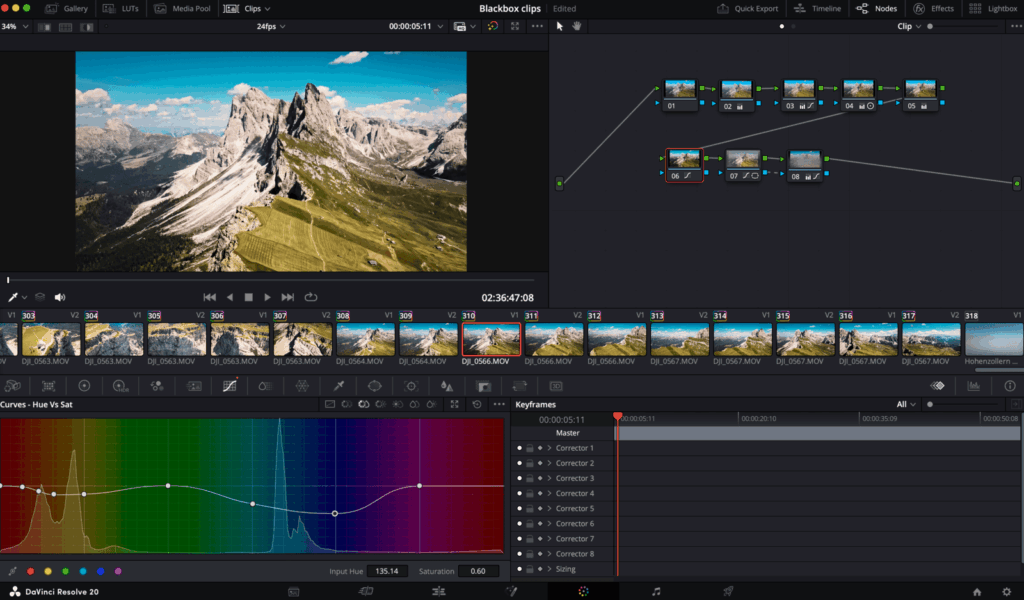
Colour Grading D-Log M Footage
Start every D-Log M edit by applying a D-Log M to Rec.709 LUT — DJI provides official LUTs for free on their website. In DaVinci Resolve (my primary editing tool), import the LUT into a serial node, then build your creative grade on top of it. Never try to colour grade directly from D-Log without neutralising first — the results will be inconsistent and non-repeatable.
A simple, reliable grade workflow:
Apply D-Log M to Rec.709 LUT (serial node)
Correct exposure and white balance (lift/gamma/gain wheels)
Pull shadows slightly towards blue-teal; push highlights slightly warm — the cinematic teal and orange separation
Reduce overall saturation by –10 to –15 for a more filmic feel
Add a gentle s-curve for contrast depth
Speed Ramping and Pacing
The most compelling drone edits mix normal-speed and slow-motion footage. Shoot establishing and reveal shots at 24fps; shoot fast-movement clips (fly-throughs, tracking shots, vehicle movement) at 60fps, then slow to 40% in the timeline for ultra-smooth slow motion.
Cut on movement, not on stillness. Transition out of a drone shot at the peak of a pan or tilt — the motion carries the viewer through the cut invisibly.
Audio Makes or Breaks the Reel
Silence kills drone showreels. Use royalty-free music from platforms like Artlist or Epidemic Sound — choose tracks whose dynamic range matches the visual energy of the edit. Slow orchestral swells for wide landscape reveals; rhythmic, building tracks for construction or urban footage.
💡 Pro Tip: On construction timelapse projects I run for clients in Ulm, I always deliver two versions: a music-sync cut for marketing, and a clean voice-over-ready version for presentations and tenders. That extra 30 minutes of output consistently generates referrals and repeat commissions from the same client.
A dedicated drone footage editing guide — covering node structure in DaVinci Resolve, LUT stacking, and a full edit walkthrough from raw D-Log to export — is in progress and will be linked here on publication.
How to Sell Drone Footage as Stock Video
Film it once. Earn from it for years. Stock drone footage is one of the most scalable passive income streams open to any drone pilot — and most pilots are leaving consistent money on the table because they don’t understand what actually sells, which platforms pay fairly, and how to get clips found in the first place.
For a complete deep-dive into the mechanics, the 90-day action plan, and realistic income benchmarks, read Make Money Selling Timelapse Stock Footage — everything below is the drone-specific application of the same system.
What Footage Actually Sells
Buyers — advertising agencies, brands, documentary producers, and media companies — are searching for footage that is technically flawless, commercially versatile, and easy to find through metadata. The most useful thing I can tell you here is based on what I’ve seen move from my own portfolio and from watching patterns across creator communities:
The footage that sells fastest is the most useful — not the most artistic. Buyers are solving recurring project briefs, not collecting beautiful shots. In practice, from my own aerial portfolio and from what consistently surfaces in stock creator communities, the categories with the strongest and most durable demand are:
Urban and city aerial flyovers — especially European cities with distinctive character
Construction sites and infrastructure development progress
Coastal and water scenes — rivers, harbours, open sea
Agricultural and rural landscapes — seasonal variations especially
Transportation corridors — highways, railways, bridges
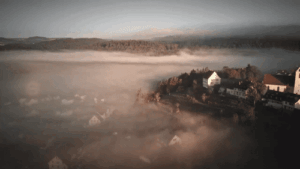
Weather and atmospheric movement — cloud fronts, fog, rain over city
These aren’t guaranteed bestsellers — they’re the categories worth shooting towards because buyer demand for them is consistent and year-round. Your exact results will depend on technical quality, location, and metadata.
Platform Strategy: Two Workflows for Two Realities
My approach splits by content type — because the volume dynamics are fundamentally different.
For timelapse footage: direct uploads to each platform.
Timelapse clips are fewer in number, higher in individual value, and benefit from platform-specific pricing control. Direct uploading gives full control over title, pricing, and keywords on each platform. It’s the method I cover in detail across both monetisation guides linked above.
For drone footage: Blackbox.global for distribution.
I have thousands of drone clips in my archive. Uploading that volume individually to every platform — writing metadata, setting pricing, managing approvals — would consume more time than the income would justify. Blackbox.global solves this cleanly: upload once, they distribute to Pond5, Adobe Stock, Shutterstock, and other major platforms automatically. Their commission is 15% of your NET sales — meaning 15% of what the platform pays you after they’ve taken their own cut, not 15% of the sale price.
For a high-volume drone portfolio, that 15% is a fair exchange for the hours it saves. Time that I reinvest in shooting, client projects, and content creation rather than upload admin.
⚠️ Before uploading to Blackbox.global — read this first
In early 2026, credible reports emerged of Blackbox licensing contributor footage to generative AI companies without explicit opt-in consent, with some creators reportedly receiving significantly below-market payouts for clips licensed this way. Before committing your portfolio, read their current contributor terms carefully — specifically any AI licensing clause — and check the LinkedIn post from Jason Bullock that surfaced the issue. The situation may have evolved by the time you read this. Verify before uploading your best clips.
For a deeper comparison of how Pond5 and Shutterstock stack up on royalties, upload process, and approval rates, see Pond5 vs Shutterstock: Best Stock Platforms for Timelapse — the platform mechanics apply equally to drone footage.
Platform Comparison: Where to Upload
| Platform | Your Rate | Pricing Control | Best For |
|---|---|---|---|
| Adobe Stock | 35% flat | No | First direct upload — AI keywording, Premiere Pro integration |
| Pond5 | 30% non-exclusive / 40% exclusive | Yes | Premium-priced cinematic content, direct uploads |
| Shutterstock | 15%–40% tiered | No | Volume creators with 200+ proven clips |
| Getty / iStock | 20%–40% | No | Premium selective tier — apply after proven track record |
| Blackbox.global | Platform rate minus 15% NET | No | High-volume drone footage distribution — upload once, multi-platform |
One principle that applies regardless of platform: As a beginner, avoid exclusivity deals entirely. Stay non-exclusive until you have at least 6 months of sales data showing exactly which clips consistently perform — only then does locking a proven winner into an exclusivity arrangement make financial sense. This applies to both drone footage and timelapse content.
Metadata Is Your Hidden Multiplier
A technically perfect 4K clip in D-Log M with a vague title and no keywords will never surface in a buyer’s search. Every clip needs a precise location-based title, a 2–3 sentence descriptive summary, and 30–50 relevant keywords that anticipate how buyers actually search — not how you’d describe what you felt while filming it.
This is the step most sellers skip — and it’s why most portfolios earn almost nothing despite technically excellent footage. The Stock Footage Metadata Generator removes this bottleneck entirely — paste in a clip description and it generates a complete, platform-optimised metadata set in seconds. Use it on every upload without exception.
Go Deeper: Related Guides on Aero Timelapse
- Technique & Camera Settings
Manual Drone Camera Settings — The complete field reference for ISO, shutter speed, aperture, white balance, and colour profiles on DJI drones. Includes scene-by-scene setting tables and a 13-step field workflow. Essential reading before any shoot.
Drone Flying Tutorial: Beginner to Confident Pilot — Takes you from first flight to advanced cinematic manoeuvres with a full 14-day structured practice plan, including hyperlapse and orbit techniques.
- Gear & Getting Started
Best Drones for Beginners 2026 — A no-nonsense breakdown of every beginner-friendly drone on the market, with EU class requirements, obstacle avoidance comparisons, and honest trade-off analysis for each model.
Drone Pre-Flight Checklist for Beginners — The exact two-phase checklist I run before every commercial flight — at-home prep and on-location scan — covering airspace, battery, firmware, weather, and legal compliance.
- Free Tools
ND Filter Calculator — Enter your frame rate, target shutter speed, and current exposure — get the exact ND filter strength for any lighting condition in seconds.
Stock Footage Metadata Generator — Generate an optimised title, description, and 50 keywords for any stock footage clip instantly.
Timelapse Interval Calculator — Calculate the perfect shooting interval for any timelapse duration, subject movement speed, and target frame rate.
- Services
Drone Videography — Professional aerial video production across Southern Germany and wider Europe.
Timelapse Production — Long-form construction, real estate, and event timelapse production from installation to final delivery.
Frequently Asked Questions
What is drone videography, and how is it different from regular videography?
Drone videography is the capture of video footage using an unmanned aerial vehicle (UAV) equipped with a gimbal-stabilised camera. Unlike ground-based videography, it provides aerial perspectives — bird’s-eye views, reveal shots, and dynamic orbital movements — that are physically impossible to achieve at ground level. The key practical difference is that “camera movement” in drone videography is produced by the flight of the aircraft itself, requiring the operator to simultaneously control flight path, camera angle, and exposure settings — a three-dimensional coordination skill that takes deliberate practice to master.
What drone camera settings should I use for cinematic footage?
For cinematic drone footage, use 4K resolution at 24fps, shutter speed at 1/50s (following the 180-degree rule), ISO at 100–400, aperture at f/2.8–f/5.6 if variable aperture is available, colour profile set to D-Log M, and white balance manually locked at 5600K for daylight. Add an ND filter (ND16–ND32 in sunny conditions) to maintain the correct shutter speed without overexposing. Never shoot stock footage in 1080p — 4K is the commercial minimum. For a complete deep-dive on every setting and scene-by-scene tables, see the manual drone camera settings guide.
Do I need a licence to fly a drone in Germany or the EU?
For sub-249g drones (like the DJI Mini 4 Pro or Mini 5 Pro), you register as an operator with Germany’s LBA (Luftfahrt-Bundesamt), display your operator ID on the drone, and you’re legal for most A1 category flights — no formal licence exam required. For heavier C1-class drones like the DJI Air 3S, you additionally need to pass the EASA A2 Certificate of Competency (A2 CofC) online theory exam. Commercial operators require liability insurance (Drohnenversicherung) regardless of drone class or weight. Always check the LBA portal and your airspace app before flying any new location.
What is the best drone for beginner videographers in 2026?
For beginners, I recommend the DJI Mini 4 Pro — it’s the most proven, safest all-round beginner drone currently available. Under 249g (minimal EU regulatory requirements), omnidirectional obstacle sensing, ActiveTrack 360° for autonomous subject tracking, vertical shooting for social content, and excellent 4K/100fps video quality. It’s the drone that will still serve you well 12 months after you buy it. If you want the maximum image quality the sub-250g category offers and plan to sell stock footage, step up to the DJI Mini 5 Pro — its 1-inch sensor and 4K/120fps 10-bit D-Log M output produce commercially competitive footage while keeping you in the simplest EU regulatory category.
How much does professional drone videography cost in Germany?
Professional drone videography in Germany typically ranges from €400–€800 for a half-day corporate or real estate shoot to €1,500–€4,000+ for multi-location cinematic productions. Pricing factors include crew size, number of licensed pilots, required flight permits (for controlled airspace), post-production scope, and delivery format. Construction timelapse projects are generally priced as long-term installations with separate day-rate and post-production fees. For a project-specific quote, get in touch here.
How do I stop my drone footage from looking jittery or shaky?
Jittery footage almost always comes from one of three causes:
(1) incorrect shutter speed — if you’re not following the 180-degree rule (shutter = 2× your frame rate), motion will look unnatural and stroboscopic;
(2) no ND filter — in bright daylight, your camera compensates by using a too-fast shutter, eliminating all motion blur;
(3) overly aggressive stick inputs — slow, deliberate movements always read as more professional than fast, reactive corrections. Fix the shutter speed first, add an ND filter to match exposure, then focus on smooth, intentional stick movements. The improvement in playback is immediate and striking.
What drone footage sells best on stock platforms?
The best-selling aerial stock categories in 2025–2026 are European city flyovers, infrastructure and construction footage, coastal and water scenes, agricultural landscapes, and transportation corridors. Clips should be 10–30 seconds, 4K minimum, shot in D-Log M for editing flexibility, and accompanied by detailed keyword metadata (30–50 keywords per clip). Pond5 (40% royalty, you set pricing) and Wirestock (multi-platform distribution) are the strongest starting combination for independent creators. Use the Stock Footage Metadata Generator 🔧 to generate complete, optimised metadata for every clip before uploading.
How long does it take to learn drone videography?
Safe, basic flight control can be learned in 3–5 sessions of 20–30 minutes each in an open practice area. Producing consistently cinematic footage typically takes 3–6 months of regular, deliberate practice — specifically developing smooth stick control, mastering manual camera settings, and training your eye for light and composition simultaneously. Editing skills (colour grading, pacing, sound design) develop in parallel and often take the longest to refine. The fastest learning path is structured progression — the drone flying tutorial masterclass includes a full 14-day practice plan that compresses this curve significantly.
Start Flying — Your Best Footage Is Ahead
If there’s one thing to act on right now, it’s this: go fly, and fix your shutter speed first. Every other skill in this guide — shot composition, D-Log colour grading, stock metadata, orbital technique — builds on that one correct foundation. Don’t wait for the perfect drone, perfect conditions, or the perfect location. Some of my most cinematic Dolomites footage came from an overcast morning that looked completely unpromising at 7am. The settings were right. That’s what made it work.
The tools, techniques, and gear in this guide give you everything you need to move from uncertain beginner to confident drone videographer producing footage you’re genuinely proud of. If you’re choosing your first drone, the best drones for beginners 2026 guide will help you decide without wasting money. If you want to understand your camera controls before your next flight, the free ND Filter Calculator is open right now.
Your best aerial footage is one flight away.

Dipon is a drone and timelapse cinematographer based in Ulm, Germany, with over 15 years of experience turning real spaces and projects into cinematic visuals. With a background in digital marketing, every shot is planned with a clear purpose — where it will appear, who will see it, and what it should help them decide.
You May Also Like
Best Drones Under 300 Euro 2026: Entry-Level Options That Actually Deliver
Stock Footage Metadata for Timelapse Contributors: How to Title, Tag & Describe Your Clips
Manual Drone Camera Settings: ISO, Shutter, Aperture Explained
Timelapse Interval Guide : Pick the Right Interval Fast
Drone Pre-flight Checklist for Beginners: Safety System for Confident Flights
Best Stock Platforms for Timelapse: Pond5 vs Shutterstock (2026 Guide)
Drone Flying Tutorial : Beginner to Confident Pilot
What Timelapse Sells: Best Timelapse Subjects for Stock Footage
Best Drones for Beginners (2026): Safe, Easy Picks + Buying Guide
Timelapse Stock Footage Earnings: $3K/Month Case Study
Best Drones Under 500 Euro (2026) – Top 6 Budget Camera Drones
Make money selling timelapse stock footage
Need help capturing aerials for your next project but not ready to invest in the gear yet? Check out our Drone Videography to see how Aero Timelapse Studio can help elevate your production.